Grim Tales – The Wishes is a hidden object game where you collect items to unlock the clues that allow you to solve a mystery. Your nephew is in danger because a deadly bargain has been made. It’s up to you to figure it out and restore order. This Grim Tales – The Wishes walkthrough is meant to help you enhance your play, to kick start a chapter, or help you clear a scene when stuck.
Contents
General Tips & Tricks
Settings and Controls
You are able to customize your sound settings, like music, effects, environment, and voice volume and video settings like gamma, special effects, full screen, wide screen and custom cursor.
There are buttons to enhance play: INFO provides puzzle instructions; MAP allows you to jump locations instantly; and HINT rechargeable guide that points you in the right direction.
If you move your cursor to the bottom of the screen, you will be able to access your inventory and see the items you have collected.
Levels
There are three levels of play: casual, advanced, and hardcore mode.
Hidden Objects and Puzzles
Throughout this Grim Tales – The Wishes walkthrough , I will use HOP to signify a hidden object puzzle. You are provided with a list and you click on the item to eliminate it from your list. At the conclusion of the puzzle you obtain an item. Please note you may have to use the items in the puzzle before you clear it.
Puzzles can be skipped, so don’t fret if you cannot solve them.
Grim Tales – The Wishes Walkthrough
Chapter 1: Wishes
In the first part of the game you explore rooms in the house. They are: the entrance, Luisa’s room, fireplace room, Brandon’s room, Brandon’s closet, the secret passage, shelter, tree house, swamp, swamp house, demon house, and demon’s living room.
At the front door, examine the window. Take the Coat of Arms and the Magnet. Place theCoat of Arms on the front door lock. When you enter the house take the Light Bulb andGray Paint.

Grim Tales – The Wishes – The house
Use the Magnet to get a Key through the crack on the floor.
Luisa’s room is up the stairs on the right. Inspect the basket to access the first HOP. You obtain Red Paint.
Use the Key on the left door. Take the Fire Box Key. Return to the house entrance. Use the Fire Box Key on the fire box and take Ax. Return to the second floor. Use the Ax on the left door.
Inspect the window and take the Scarf. Return to hall and go right. Inspect the chair and take the Flint. Next, inspect the table and take the Green Paint. Use the Flint on theCandle and take the Candle. Use Candle under the chair. Move cloth and take Bowl of Milk and Bullet. Inspect fireplace.
Use Scarf on the scoop handle and take the Scoop. Inspect the fireplace. Use the Scoop to get Scoop with Sand. Give the cat the Bowl of Milk and take Fluffy. Use the Scoop with Sand on the fire in the fireplace. Take the Coal. Go to Brandon’s room.
Use the Coal on the puppet and get a Stained-Glass Piece and place it on the trunk to trigger the first puzzle. You can skip or solve. Take the Door Handle.
Place the Door Handle on the closet door. Move the clothes to access the second HOP. The paperclip is inside the coin purse. You obtain a Knife.
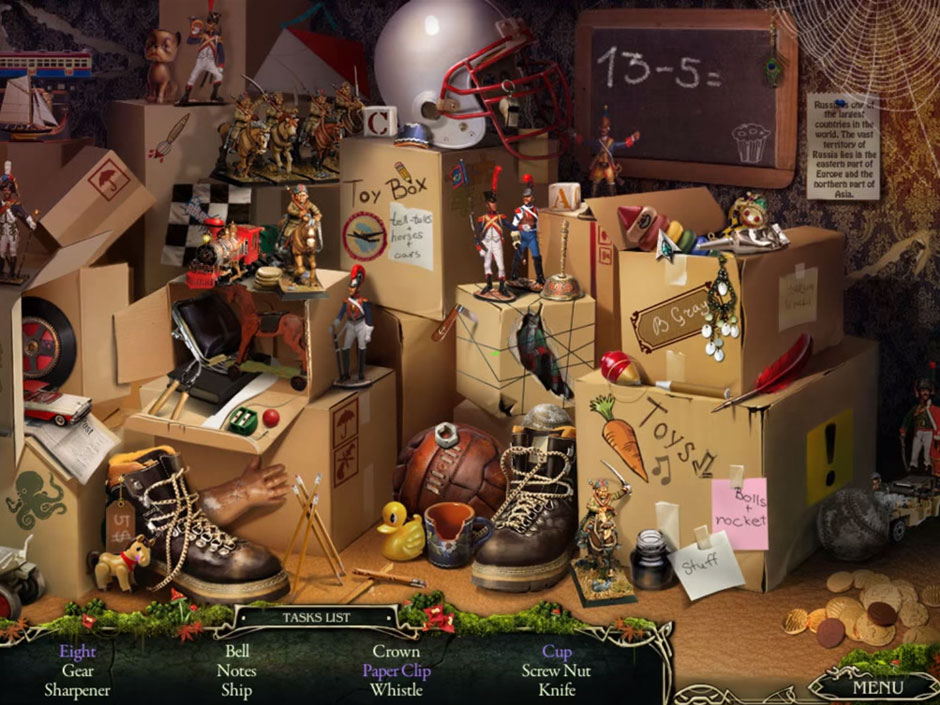
Grim Tales – The Wishes – Collect All The Items
Use the Knife on the puppet. Both the puppet and map now appear on lower right hand of screen. Return to Luisa’s room. Straighten the picture and use the Knife on the fallen picture. Take the Bee. Return to Brandon’s closet. Place the Bee on the floor to start a puzzle. The solution is R, UL, L, UL, L, DL, DR, R, UL, UR, R, DL, L, DL, R, DL, R, DL, L, DR, R, DR, and R. (R=Right, U=Upper, L=Left, D=Down).
Use Fluffy on the rats. Use the Flint on the oil trough. Enter the secret passage.
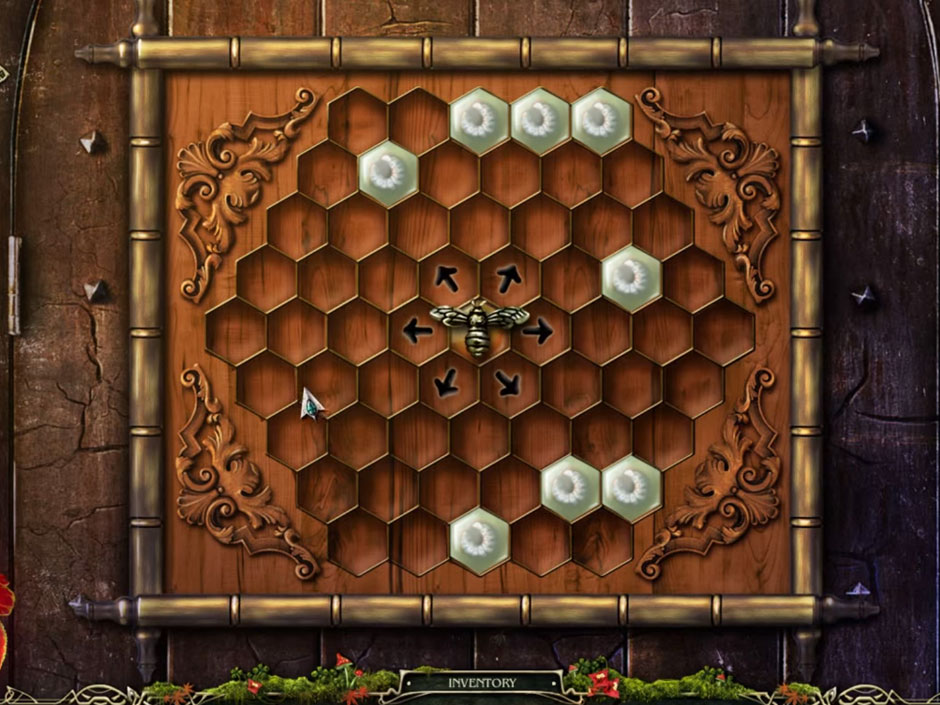
Grim Tales – The Wishes – Bee Puzzle
Take the Pipe Wrench. Return to house entrance.
Turn the Valve on the pipe. Place the Hose on the glass tube and take the Sword Medallion. Return to Luisa’s room.
Place the Sword Medallion on the box and take the Ball. Place the Ball on the box under the bed. Select numbers 593.
Take the Handgun combine with the Bullet and get the Loaded Handgun. Return to the secret passage and take the Battery. Go to the shelter on the left.
Take the Hexagonal Wrench. Inspecting the windmill starts the third HOP. You obtain a Locomotive.
Use the Knife on the bamboo to get the Bamboo. Climb up into the tree house.
Take the Tongs, Funnel and Paintbrush. Inspect the rocking horse to start the fourth HOP. You obtain a Gas Can. Go to the swamp.
Use the Tongs on the log and take the Chain and Chainsaw. Use the Chainsaw on the tree. Go to the swamp house. At the window, use the Flint on the leaf pile. Go to the demon house. Take the Crystal Ball and inspect the hutch to start the fifth HOP. You obtain a Crown. Return to the fireplace room.
Place the Locomotive on the train and Battery on the railroad control. Inspect the hole in the wall, take the Sun Medallion. Return to the shelter. Place the Red Paint, Green Paint, Gray Paint, Paintbrush, and Crown on the children’s book to begin the third puzzle. Paint the picture. Move items to find hidden characters. Take the Child’s Drawing. Go to the demon’s living room.
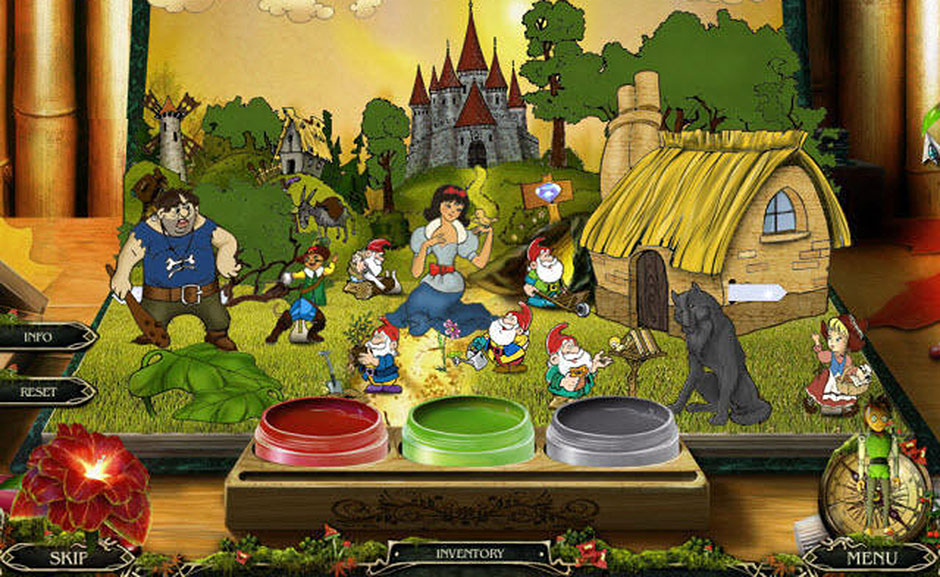
Grim Tales – The Wishes – Painting Puzzle Solution
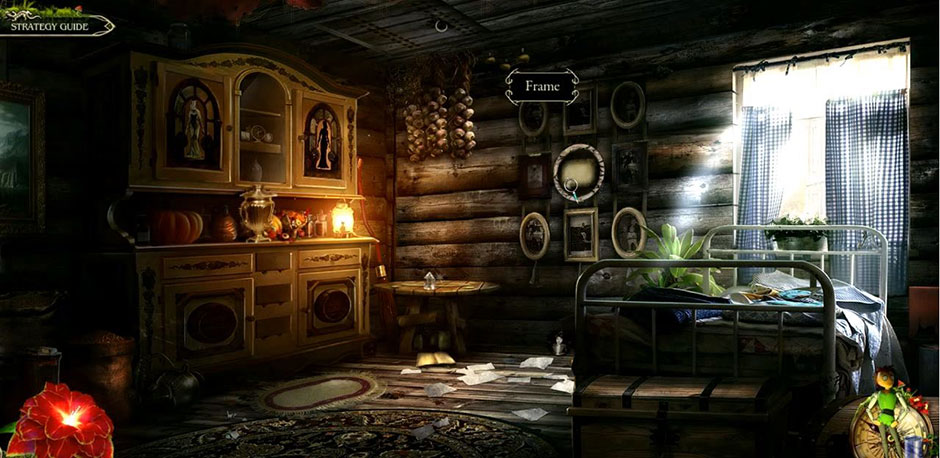
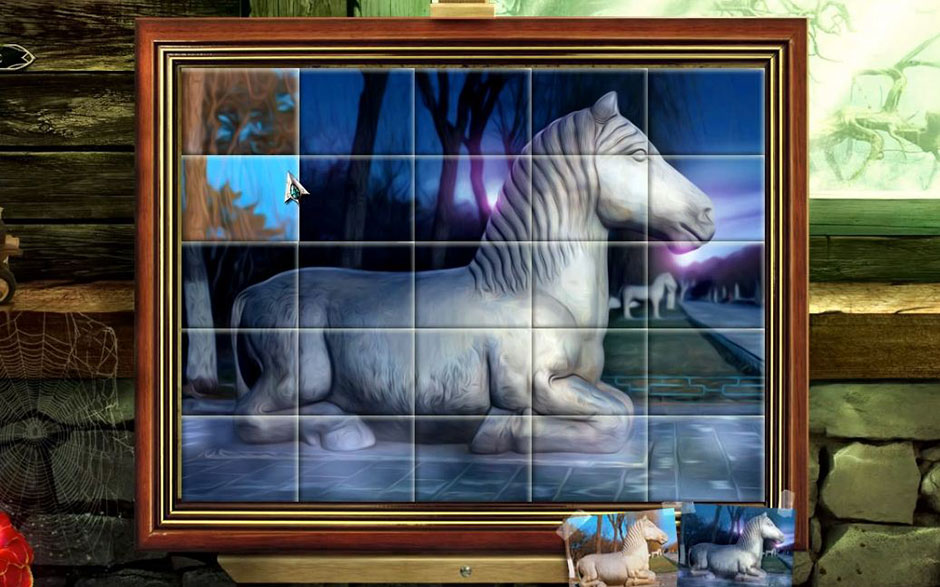
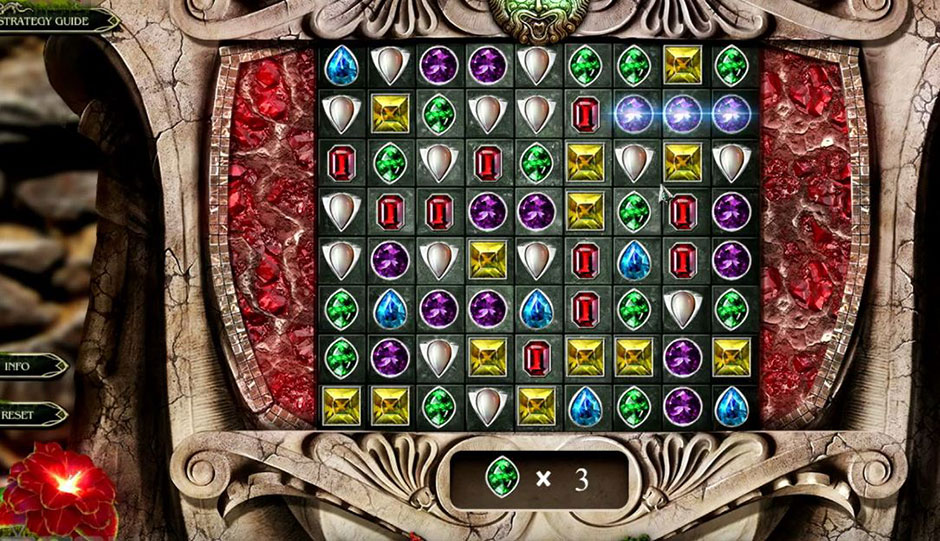
Inspect the frames and place the Sun Medallion in the slot to start the third puzzle. Rotate the rings until they are in the correct order. You obtain Puzzle Blocks. Return to Brandon’s room.
Move the carpet and place the Puzzle Blocks on the area under the carpet to start the fourth puzzle. Place identical cubes together. Take the Quill. Return to the demon’s living room.
Inspect the Child’s Drawing in the frame and use the Quill on the Child’s Drawing.
Grim Tales – The Wishes – Child’s Drawing
Chapter 2: Antidote
In this section, game play takes you to the boat dock, boathouse, fishing pier, forest, hall of the house, attic, gap in the road, the ambulance, and the ambulance interior.
Return to the house entrance. Take the Thread and Rag. Use Fluffy on the cat jar. Inspect the Glass, Shard, and Coin.
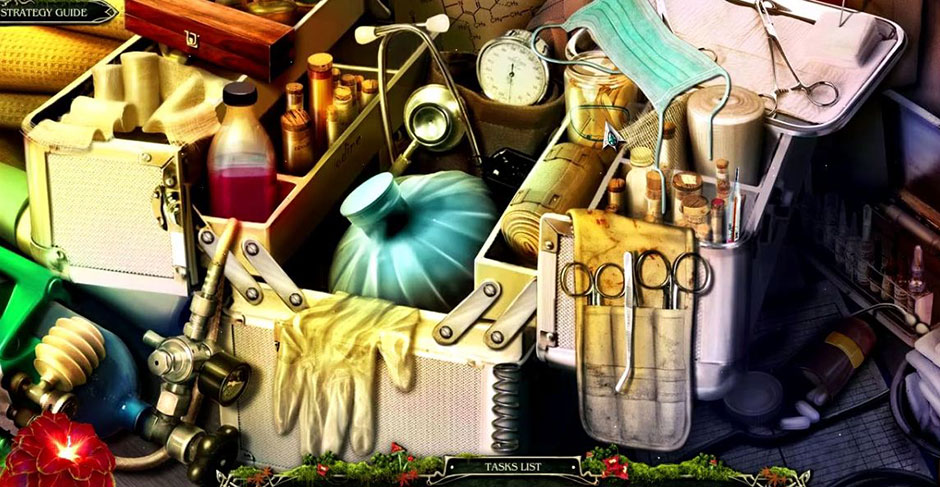
Inspect the table to take the 2nd Coin. Use the Glass Shard on the handbag. Open the handbag to begin first HOP. You obtain a House Key. Go into the house.
Grim Tales – The Wishes – First Hidden Object Place Handbag
Use the House Key on the lock on the door. Go towards the boat dock. At the boat, take the 3rd Coin and the Steering Wheel. At the motor, take the Crucible. Use the Steering Wheel on the boathouse door to enter the boathouse.
At the boathouse, take the Empty Bucket, File, Grain, and Crab Amulet. Go to the fishing pier.
Inspect the chest. Place the Crab Amulet on the shackle lock to open the chest and take the Lead Plummets. Return to the house. Place the Crucible and Lead Plummets on the stove and take the Lead.
Place the 3 Coins on the casket to start the first puzzle. Arrange coins in order and take the Ax. Return to the boat dock. To obtain a Bucket with Water, use the Empty Bucket on the boat.
Opening the cabinet starts the second HOP. You obtain an Arrow, once you get a butterfly, use the key on the safe, open the coin purse, and get a domino. Go to the Forest.
Use the Bucket with Water on the fire and Lead on the clay. Take the Shark and Forked Stick. Go to the hall of the house.
Place the Shark on the hatch lock and go to the attic.
To get the Stockpot, use Fluffy and take the Stockpot. Take the Handle and place it on the refrigerator to commence the second puzzle. The Solution: 3, 2, and 4. To get the clue, wipe the refrigerator with the Rag. Take the Juicer and Frozen Meat.
Cook the Frozen Meat on the furnace and get Cooked Meat. Return to the fishing pier.
Make Lemon Juice by adding lemon slice to Juicer. Return to the forest.
Place the Stockpot, Forked Stick, Thread, and Grain on the clearing. Knock over the Stockpot and take the Dragon Amulet and place it on the tree lock.
Use the Ax on the demon’s root. Start the third HOP by inspecting the tree hollow. You obtain a Screwdriver. Return to the attic.
Place the Lemon Juice on the medicine chest, take the Yellow Vial, and return to the boat dock. Use the Screwdriver on the motor and take the Cord. Placing the cord on the engine parts starts a puzzle. Pull the cord when complete.
Give the Cooked Meat to the crocodile. Take the Green Vial and Wooden Coin. Return to the attic. Place the Wooden Coin to trigger the third puzzle. When finished, take the Valve. Go to the gap in the road.
Look in the ditch. Place the Valve on the pipe and take the Wheel. Return to the boathouse. Place the Wheel on the wheelbarrow and take the Wheelbarrow on the boat to take the Boat. Return to the gap in the road.
Place the Boat in the ditch and get a Wheelbarrow. Return to the boat dock. Use the Wheelbarrow on the boat and take the Boat. Return to the gap in the road and place the Boat in the ditch.
Use Fluffy on the branch and get a Medallion. Return to the forest. Use the Medallion on the tortoise to begin a puzzle. Take the Bow and combine with the Arrow to receive a Charged Bow. Return to the house entrance.
Use the Charged Bow on the target and take the Acorns at the downspout. Return to the forest.
Use the Acorns on the anthill and take the Leaf Amulet. Go to the ambulance. Place the Leaf Amulet on the case and take the Syringe Needle.
Grim Tales – The Wishes – Ambulance
Inside the ambulance, use the Syringe Needle on the glove compartment and take the Scissors. Return to the fishing pier. Inspect the chest and use the Scissors to get the Fishnet.
In the attic, place the Fishnet on the tennis racket and take the Scoop Net.
Return to the ambulance use the Scoop Net on the stream and get a Caduceus Key which you will place on the medicine chest in the ambulance to access the fourth HOP. You obtain a Pink Vial when you move the mask to access the scalpel.
Return to the house entrance and open the medicine chest. Place the Yellow Vial, Green Vial, and Pink Vial in the injector to make the Antidote that you will use on Luisa’s leg.
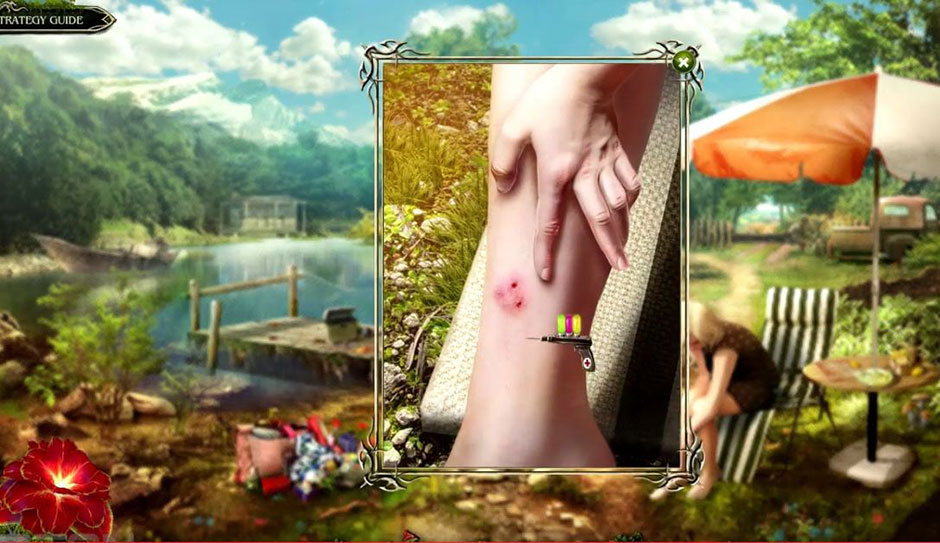
Grim Tales – The Wishes – The Antidote
Chapter 3: The Second Wish
In this section you are taken to the backyard and playground.
Take the Lavender and Brandon and return to Brandon’s room. Hang the Lavender on the Chandelier and place Brandon in the bed. Take the Horse to the kitchen and place it on the door lock to access the backyard.
Look at the pipe to take the Zipper Pull. Inspect the table to launch the first HOP. Get a screw nut, peeled nut, and binoculars to obtain a Totem.
At the hobbyhorse in the playground, place the Zipper Pull on the zipper and take the Glass. Back in Brandon’s room, place the Totem in the left corner and take the Dove in the right corner.
At the waterfall in the swamp, remove the broken glass and place it on the sensor twice to obtain a Sensor. Use the cup to get a flower. Take the Glass Ball.
In the backyard, place the Magnet in the birdbath, the Sensor, on the pipe, turn the valve and get the 2nd Fish. Place the 2nd Fish on the hatch in shelter and do down it. Open and take the Cylinder in the case. The first puzzle begins when you place the Cylinder on Pinocchio.
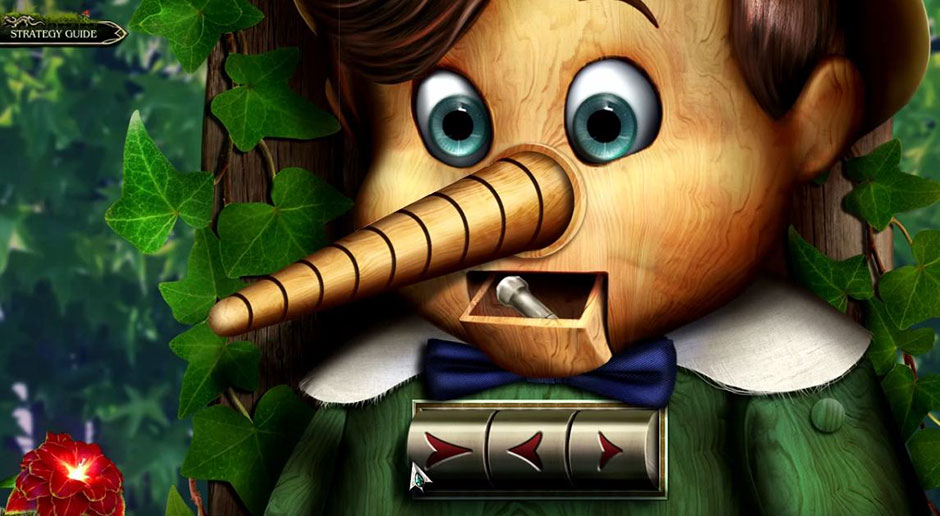
Grim Tales – The Wishes – Pinocchio
Once solved, you get the Handle. Next, place the Handle on the latch.
In the workshop, take the Pliers and use them on the wire in the shelter basement to get Sponges and Wire. At the workshop, twist Wire with Pliers to take the Rope to add to the curtains in the house entrance. Inspecting the couch at the tree house starts second HOP. You obtain a Totem that you place in the right corner in Brandon’s room. Take the Medallion on the floor and use Sponge to clean up Oil. Take Toggle from electric box in the kitchen to waterfall to get a spring once you combine it with the Fuse.
You receive the 2nd Medallion when you solve the third puzzle triggered by placing ball in the football field. Place 2nd Medallion on doll; use the Oil on the latch to flip it and take the Diamond. You will use the Diamond to cut through the glass door.
Obtain a Totem after you complete the third HOP, which begins when you inspect the washing machine.
In Brandon’s room place the Totem on the floor and take the Metal Rose. You will find the following items in the highlighter room: kitchen (Citric Acid); swamp house (figure); and demon’s house (alcohol).
Go to the workshop and place Metal Rose on the mixer. Place the Powder, Flower, Citric Acid, and Alcohol in the container to start the fourth puzzle. Take the Cogwheel and Solvent and go to the shelter.
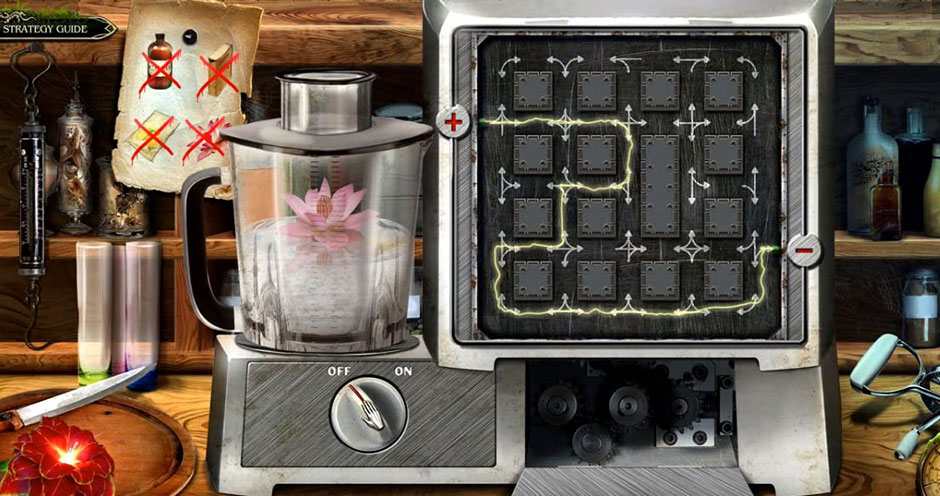
Grim Tales – The Wishes – Sorvent Puzzle
Examine the hollow in the forest thicket to access the fourth HOP. Get a striking match and pencil to obtain a Turtle Button. Place the Turtle Button in the center of picture in the tree house to begin a puzzle. Use Solvent and Quill to complete the picture.
Grim Tales – The Wishes – Fourth Puzzle
Chapter 4: Siberia
You will explore the landing, forest well, lumberjack’s camp, the Shaman’s house, the Shaman’s attic, and the icy room.
Take the Crosspiece, Snowshoes, Saw, and Bulb in the landing. Similarly at the forest well take Part of Totem, Branches, and Ice Ax. Inspect the Ice Ax to begin first HOP. You obtain a Gas Can.
Next, take the 2nd Part of Totem, Torchy, Ladder, Winch, Bandage, Fish, Battery, and Camera. At the forest well use the Camera to trigger the first puzzle. Go down the well take the Electrical Tape and enter the Lumberjack’s Camp where you will take the 3rd Part of Totem and Fish Oil.
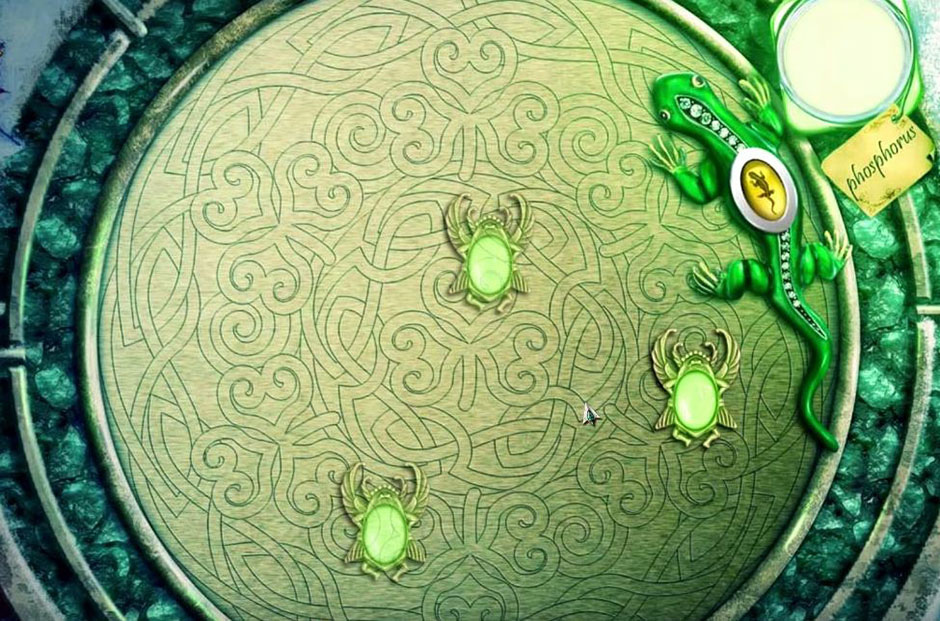
Grim Tales – The Wishes – Lizard
Examining the debris in the lumberjack’s camp starts the second HOP. You gain a Bear. Take the Leaf, Hummingbird, and Powder. At the Shaman’s hose take the Powder. Place the Leaf on the chest with the herbs to begin the second puzzle.
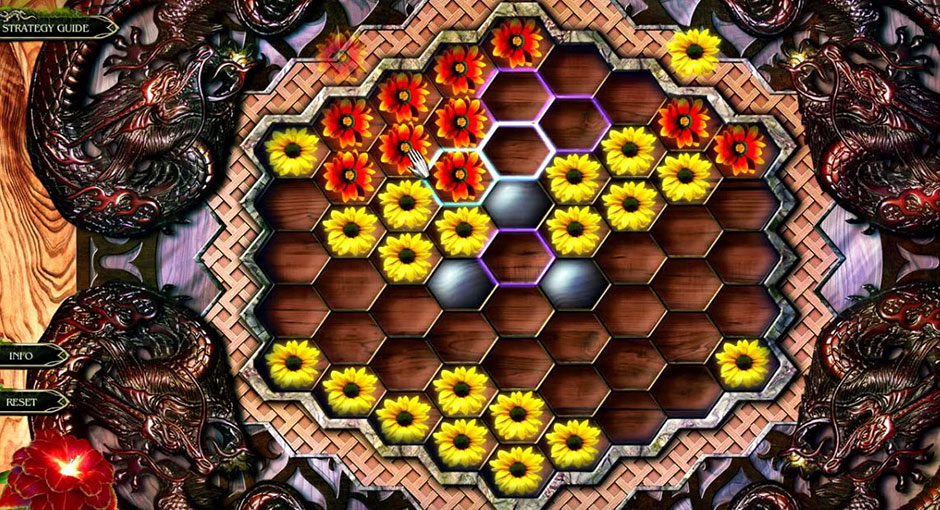
Grim Tales – The Wishes – Second Puzzle
Take the Mandrake. Upstairs, take the Eagle and Hay. Examining the icy niche starts the third HOP. You obtain a Thistle. In the icy room, place the Hay, Flint, Mandrake, Thistle ,and Powder on the fire. Take the Bas-Relief.
In the Shaman’s attic placing the Bas-Relief on the altar, triggers the third puzzle. Take the Tuning Fork. In the icy room take the Rope, Star, and Medallion. Opening chest in landing triggers the fourth HOP. You obtain a Stretcher. Take the Glass, Tube, and Gray.
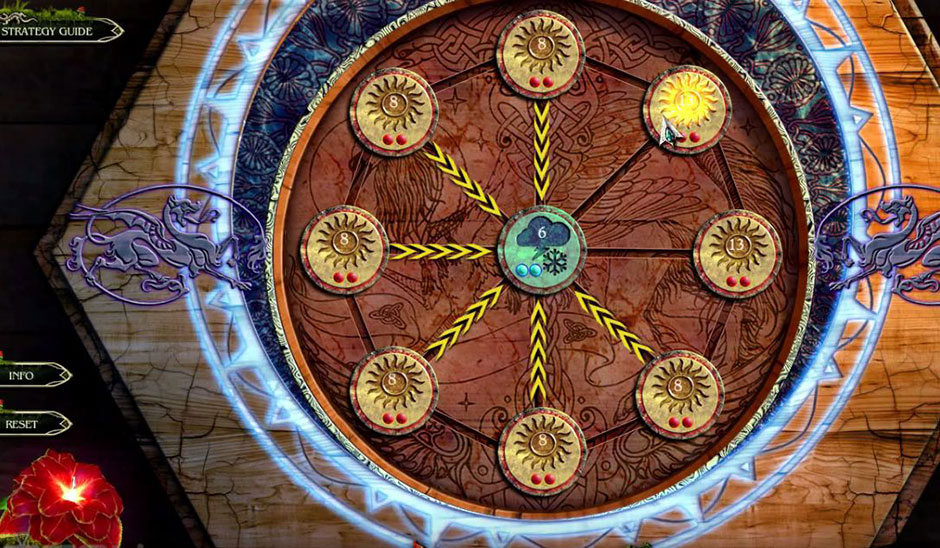
Grim Tales – The Wishes – Puzzle Shaman’s Attic
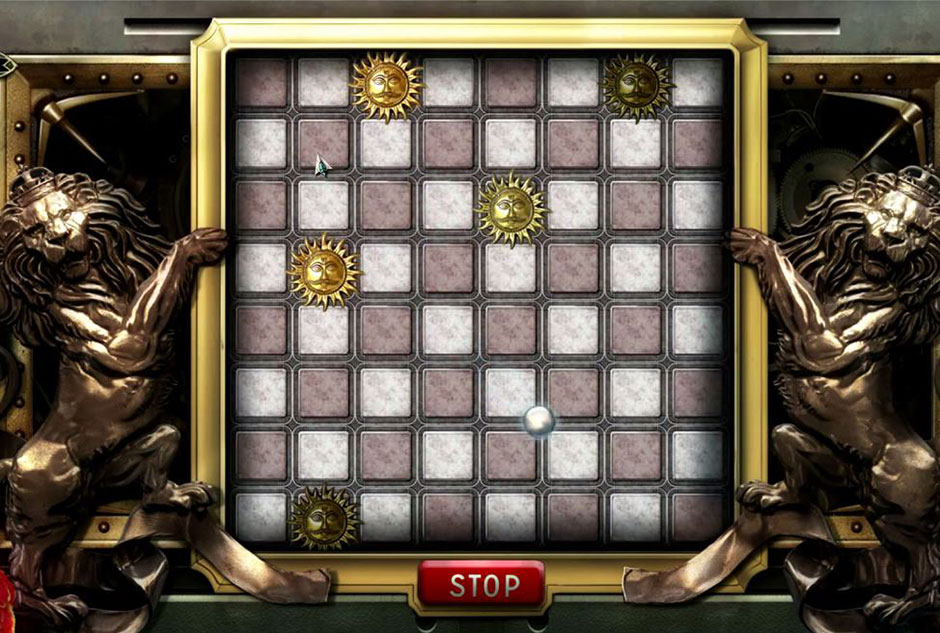
Inspect and place the Glass Tube on the balloon motor to start the third puzzle. The solution is: 3-36, 45-13, 36-16, 25-23, 47-49, 7-12, 13-46, and 49-11.
Chapter 5: Reunited
The last chapter takes you to the following scenes: the forest edge, the asylum, the demon’s living room, the house in the crystal ball, and basement.
You obtain the Eagle Medallion at the forest edge. Next go to the waterfall and take the Chalk. Inspect the pile on the left and the first HOP begins. You obtain a Moon Symbol. The tunnel leads to the asylum. Take the Steps, Crystal, and Moonstone. The 2nd Crystal is found on the second floor of the demon’s house.
Use the Diamond to take the Sun. Inspecting tub launches the second HOP. You obtain a Door Handle. In the attic, take the Ruby, Plug, Reading Lamp, Captain, and Pump Handle. Place Pump Handle in backyard on pump and take Pump to the waterfall.
The first puzzle begins when you place the Moonstone on the left atlas. Take the 4th and 5th Crystal. The second puzzle begins when you place the Emerald on the right atlas. You obtain the 1st Piece of Chart and you take the 2nd Piece of Chart.
Grim Tales – The Wishes Totem
Back at the house, take the Handle and Belt. Inspecting the pile on the left triggers the third HOP. You obtain the Moon. Take the 3rd Piece of Chart. Place the 3 Pieces of Chart in the house in the crystal ball and the third puzzle begins. Take the Scheme and Device.
The fourth HOP begins when you inspect boxes in Brandon’s room. You obtain an Anchor. At the playground, take the Pirate, Ensign, Rusty Nippers, Soap, Sharp Nippers, and Wind Medallion.
Inspecting furnace door triggers the first HOP. You obtain a Forged Rose. In demon’s living room take the demon’s Ring by using soap on the demon’s hand. Use the ring on the demon’s hand. Use the Ring on the trunk in the attic to take the Crystal Ball. Use the Cystal Ball to Capture Demon. In room with totems, place Captured Demon on the pedestal. The final puzzle is found in the asylum. Use the Ring to trigger the puzzle.
Congratulations! You’ve completed our Grim Tales – The Wishes Walkthrough! For more great tips and tricks, visit our blog!
- Delicious – Emily’s Hopes and Fears Walkthrough
- Big City Adventure – Shanghai Walkthrough
- Building the Great Wall of China 2 Walkthrough
The Grim Tales – The Wishes Walkthrough is meant as a guide and does not contain cheats, hacks, or serials.