If literature has taught us anything, it’s that you shouldn’t dig anything up that’s been buried under the floorboards, no matter how much noise it makes. Unfortunately, one of the inmates at a prison in Bitterford, Maine didn’t get the memo, and dug up a whole mess of trouble when he uncovered a mysterious artifact from the floor of his cell. This was back in 1973, but the effects of that ungodly object still haunt the town of Bitterford to this day. In Mystery Case Files – Shadow Lake, you are entrusted with the investigation of the mysterious events that unfolded at Bitterford so long ago. With the help of a psychic companion (voiced by the peerless Lea Thompson), get to the bottom of this nastiness and make darn sure it never happens again. This gameplay walk through contains information about the levels in the game and a walkthrough with some tips and tricks to help solve the case and cheat death.
Contents
Mystery Case Files – Shadow Lake Walkthrough
Part 1: Drive Motel
Go to the back of the van and talk to Jack Talon: he has some important information to impart to you. After that, walk down one screen and check the dumpster to obtain the Phone Receiver and Phone Base, then go forward to the next screen and enter Room No. 2. In there, open the left door and look through the hole, then take the Quarter in the top right drawer of the TV stand. On the sheet of paper in the drawer where you found the Quarter is a written phone number: make a note of it for later. Mess with the antenna on the right of the TV to see a short dispatch, and then you will obtain the Bent Antenna for your inventory. Turn off the TV when you’re done: no need to waste power.
Heading back outside, use the Bent Antenna in the window to the left of the door to the motel to get access to the guestbook. Opening the book will add an important phone number to your notes for later, so be sure to do that. Heading back to Room No. 2, check out the notebook in the satchel lying on the bed to find out the safe combination. On the wall is a coin slot: insert the Quarter and turn the level to the max, marked as ‘You Animal.’ This will move the bed to the side, allowing you to plug in the Phone Base and Phone Receiver on the nightstand by the bed. Give Kelly’s phone a call, and you’ll hear it ringing in the bag under the TV stand. You can check it to find another clue as to the safe combination.
Head into the next room, which has been converted into a photo darkroom. Resting on the shelf in the top left corner is a piece of Photo Paper you can grab. Take a close look at the instructions posted on the left wall, then place the Photo Paper in the tray on the table to the far left. Push the button on the left, then wait for the appropriate amount of time based on the instruction sheet and push the button again. Remove the Photo Paper from the first tray and place it in and out of the subsequent trays until it reaches the last one, becoming a piece of Exposed Photo Paper. It is on this photo you will find the last part of the safe combination.
Go back into the previous room and input the safe combination into the safe in the wall next to the TV. When you open it, grab the Motel Key from inside and leave the room, heading over to Room No. 1. Use the Motel Key to enter the room and grab the Infrared Camera and Night-Vision Goggles. Then, head into the next room, obscured by the pile of boxes on the right side, and you’ll have a short conversation with Cassandra. After bending your ear, Cassandra will give you some Drawings. Finally, open the Map found in the bottom-right corner of the screen and head to the next area: the Shadow Lake Penitentiary…
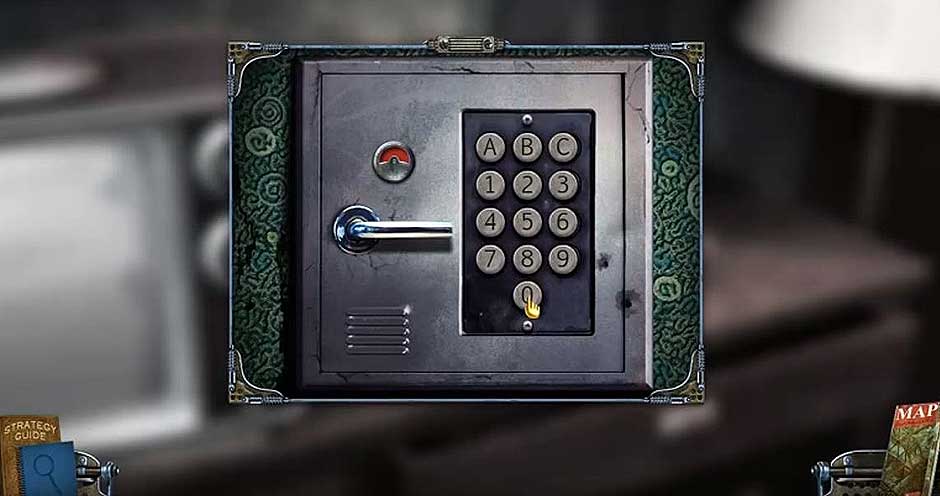
Mystery Case Files – Shadow Lake – Safe
Part 2: Shadow Lake Penitentiary
You should now find yourself outside the entrance of the mysterious Shadow Lake Penitentiary. Before entering, place the Drawing you received from Cassandra over the window in the top right to receive the Charged Drawing. Then you can enter the penitentiary. Once inside, press the recorder resting on the barred window sill to the left. Then, knock over and pick up the Stone Ball on the pillar to your right, adding it to your inventory. On the railing next to where you obtained the Stone Ball is a Prison Key: take it and use it to open the lock on the door in front of you.
The next few rooms contain a Hidden Object Puzzle, with all the needed objects to be found in the surrounding area. Some of them are in this first room, but the majority of the hidden objects can be found in the administration room to your left, including a Small Silver Key that can be used to open a locked cabinet in the previous room. When all the hidden objects have been found and the puzzle solved, head back into the administration room.
The gate leading further into the penitentiary is closed, and you’ll need to solve a puzzle in order to advance further. The solution to this one is simple: just place the larger pieces across from the proportionately smaller pieces, resulting in the largest left piece having the smallest right piece, the next largest left piece having the next smallest right piece, and so on until the smallest left piece has the largest right piece. Solving this puzzle will allow you to open the gate and continue to the next area after pulling on the ring in the center.
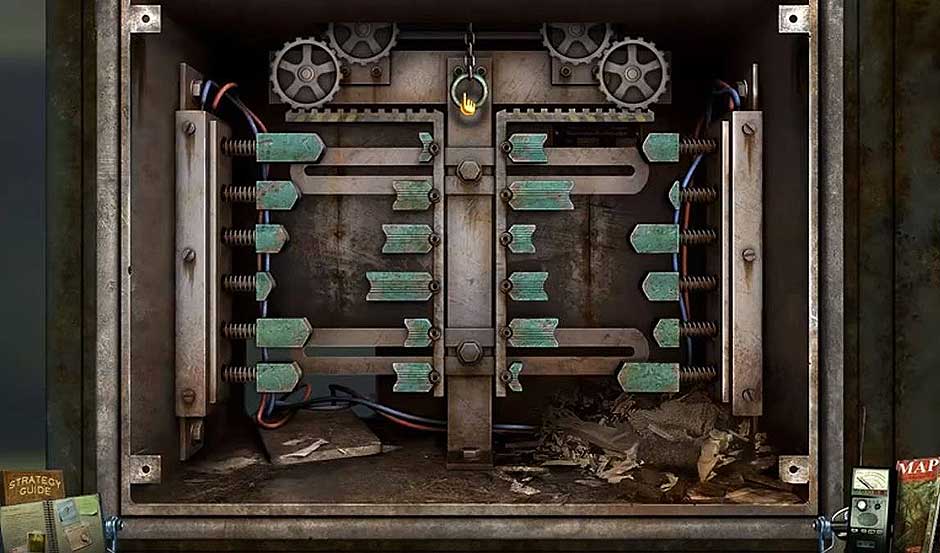
Mystery Case Files – Shadow Lake – Gate
In the next room, open the nearby ‘M’ labeled file cabinet and pull up the file for Jaime Monihan. Then, place the Stone Ball in the open cabinet stacked on top of another to knock it over, granting you access to the ceiling hole by climbing up the cabinets. Through the hole on the left wall is the beginning of another Hidden Object Puzzle, which when solved can be used to charge another Drawing. Heading back down the hole, charge one Drawing on Jaime’s file, one on the floor of the administration room, one by the stairs in the main room, and one on the pile of rubble where you first obtained the Stone Ball.
Use the Map to go back to Cassandra’s office, and give her the Charged Drawings. She will give you a puzzle to solve. When you’re finished, return to the penitentiary and go through the hole in the ceiling found in the storage room. Go over to the desk and open the nearby drawer to unlock the location of the next area on your map, the Warden’s House…
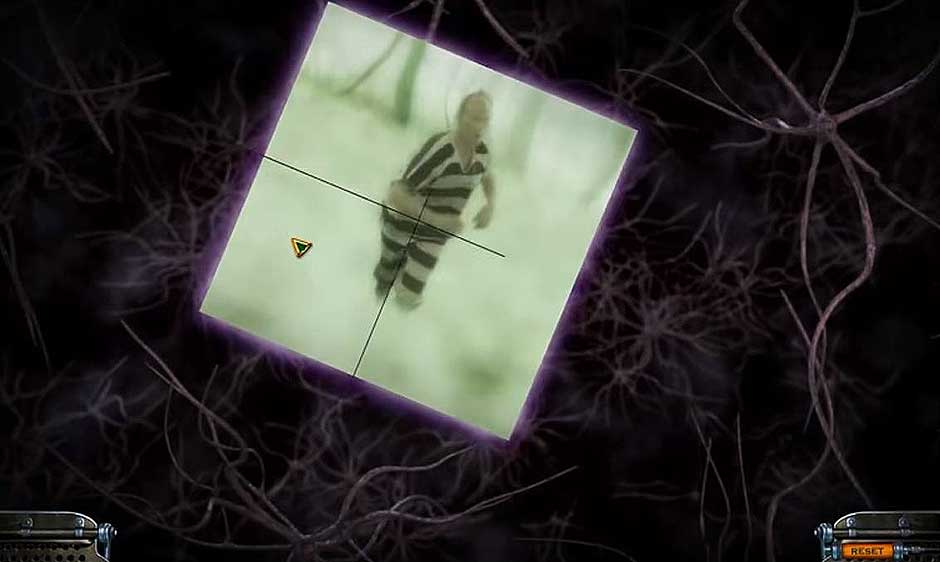
Mystery Case Files – Shadow Lake – Puzzle Chapter 1
Part 3: The Warden’s House
Head over to the Warden’s House using the Map. In the pile of logs to the right of the house, grab the Rusty Axe, then enter the house through the front door to begin another Hidden Object Puzzle. This puzzle begins in the foyer but continues into the kitchen through the doorway directly in front of you, with most of the remaining items being found in the junk drawer. Also in the junk drawer is a Fuse, your reward for solving the Hidden Object Puzzle.
Look through the keyhole of the door to your left and try not to get spooked too hard. After that, open the door and use the Night-Vision Goggles to see. There are some small Bolt Cutters to be found on the nearby shelf, and the Fuse goes in the fusebox in the top-left. Leave this room and the kitchen, and head up the nearby stairs.
Go through the door on the left and grab the Wires in the tent. Head back outside and use the Bolt Cutters to open the power box on the outside wall and begin a puzzle. For this puzzle, the Wires you collected must be used to restore power to the Warden’s House. There are plugs with different numbers and colors: pairs of like color/number combinations must be connected with similarly colored wires. The numbers indicate how many spaces the wire has to use when connecting, so two 5 plugs must be connected by a wire that is 5 spaces long. Refer to the following screenshot if you get stuck to see the puzzle’s solution:
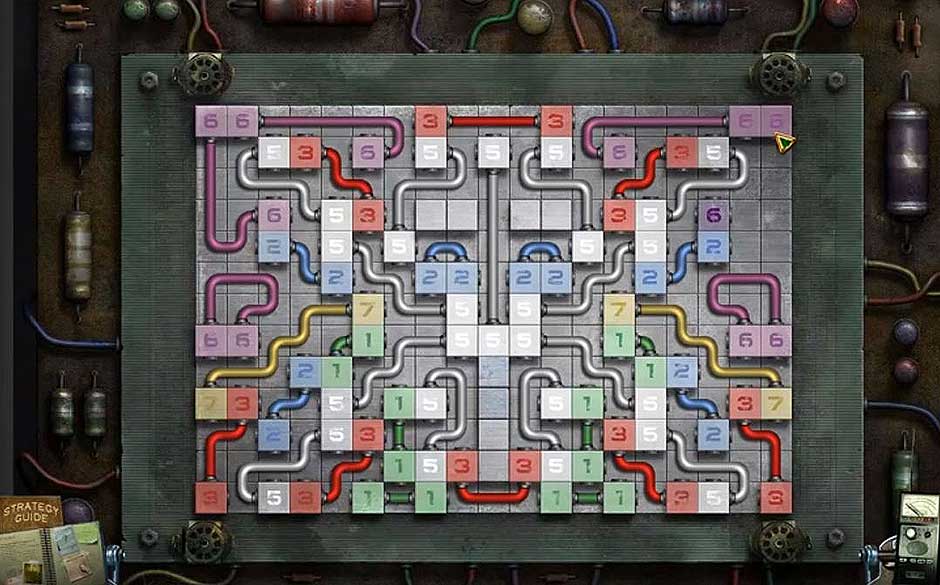
Mystery Case Files – Shadow Lake – Wires Puzzle
After finishing the puzzle, return to Cassandra and take the next set of Drawings that need to be charged.
With power now restored to the house, heading back upstairs to the tent room will trigger a Hidden Object Puzzle. Be sure to check the loose floorboard to find all the items. After completing this puzzle, go down to the now lit basement and use the Rusty Axe on the large machine on the bench to the left to get the Sharpened Axe, which can be used to chop down the branch blocking the path upstairs.
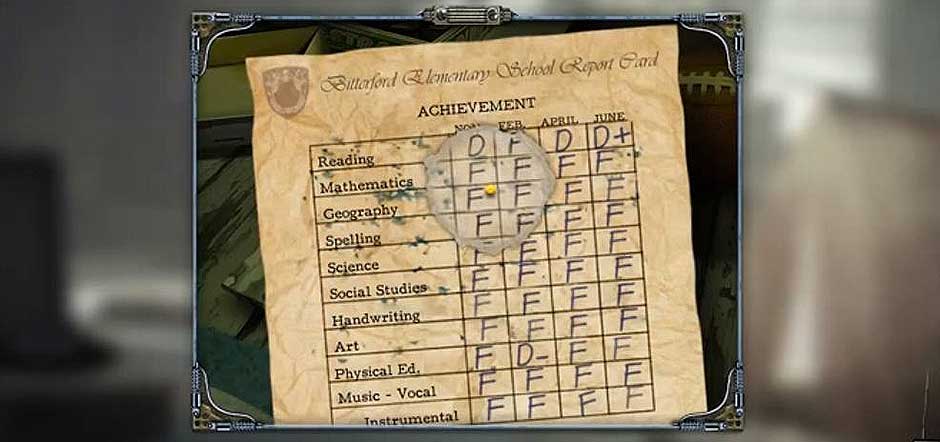
Enter the bedroom previously blocked by the fallen tree and look under the bed for another spooky. Then, check the back of the picture frame on the shelf to the right and open the back to find a letter. Part of the letter can be used to charge one of the Drawings. The other locations where the drawings are charged are on the report card in the tent room, the downstairs foyer, the kitchen, the basement, and the top-right corner of the house from the outside.
Mystery Case Files – Shadow Lake – Letter
Return to Cassandra with the Charged Drawings to receive another matching puzzle. Solving this puzzle will reveal another clue, as well as the next location for your investigation: the School. When you’re ready, use the Map to head over.
Mystery Case Files – Shadow Lake – Drawings Puzzle
Part 4: The School
Leaning against the shed to the left of the schoolhouse is a Crowbar you can add to your inventory. Take it, then go through the front door of the schoolhouse to start another Hidden Object Puzzle. Once you solve the puzzle, use the Night-Vision Goggles on the dark room ahead. Touching the nearby ghost will kill your goggles, but don’t worry: the Crowbar you grabbed earlier can be used to pry off the boards on the window, illuminating your environment.
Using the Chalk found on the nearby chalkboard, finish the game of Hangman someone else started. The solution is the phrase “You are too late.” Grabbing the Teacher’s Desk Key in the locker, open the desk to find a message about Billy, as well as a confiscated Knife and Lighter. Open Billy’s locker to find a Baseball Card, then head back to Cassandra and get the Drawings.
Going back to the school, open the trunk on the ground to the right of the schoolhouse to find a letter, as well as an Extension Cord and some Video Tape. Next to that is a tripod, where you should place the Infrared Camera. Now, head over to the playground and flip the seat to discover the name Sam: opening his locker will yield a very dangerous M80. This is used to blow up the lock on the shed, and can be lit with the Lighter.
Enter the shed and grab all the items to solve the Hidden Object Puzzle, then go back to the playground. Go to the sandbox and fill the Castle Bucket and Round Bucket. Use the Castle Bucket three times to make three sand castles, then use the Round Bucket to make the center one taller. Adorn the three castle with the three Shells, then place the Army Man and the Flag on top. This will allow you to charge one of the Drawings when you take a step back.
The other Drawings can be charged by examining the shed, the classroom, the locker room and the toy box. Then, head back to the Warden’s House and place the Baseball Card with the others in the sleeve found on the bed in the tent room to charge the final Drawing. Take the drawings back to Cassandra and solve the puzzle she gives you.

Mystery Case Files – Shadow Lake – Jigsaw Puzzle
Head over to Room No. 2 in the motel and use the Video Tape on the TV. Now, head back to the School and knock down the boards leaning against the wall in the locker room. This will reveal a pulley mechanism which will extend a ladder after breaking it with the Knife. Take the ladder to the roof and open the bag to see a drawing that tells you where to go next on your Map: the Teacher’s House…
Part 5: The Teacher’s House
Head over to the Teacher’s House from the Map and enter the front door to begin another Hidden Object Puzzle. Once solved, check the nearby bookcase and open the book on the Amaseconti Tribe to reveal another spot on the Map.
Go into the garage and open the cabinet to get the Lug Wrench and Isopropyl Alcohol. Two cinder blocks can be placed under the missing wheel of the car to recover the Car Jack and add it to your inventory. Finally, open the Map and head Downtown to move on to the next area.
Part 6: The Downtown Library
Before heading to the library, grab the Spare Tire from the nearby car. Then, after moving forward one screen, head to the Library on your right and use the Crowbar to smash out the right window, allowing you to unlock and open the door. There will be another Hidden Object Puzzle you must solve, giving you the Car Key.
On the nearby desk are some documents you can examine, with some information having to do with the number 600. Open the card catalog to the 600 section and read the hidden note, then continue through the front door. In the next room, move the ladder so you can access the book titled ‘My Life Under the Steel Hood.’ This will reveal important information for later.
Place the Crowbar under one of the bookshelves and use it twice to reveal a door you can pass through. Leaf through the pages of the nearby book and find another clue. Once you’re finished here, head back to Cassandra to get some more Drawings to charge.
One of the Drawings can be charged in the master bedroom of the Warden’s House, in the trunk by his bed. The rest of the Drawings can be charged Downtown: one on the hanging Doctor sign, one on the front door of the Library, one on the brick wall near the next doorway inside, one on the back window to the far left, and one on the ground by the book with the clue.
Go back to Cassandra with the Charged Drawings and she will have another puzzle for you to solve. This one seems to point toward the Coroner’s Office, so pull up the Map and head back Downtown to get there, and to the next part of the game.
Mystery Case Files – Shadow Lake – Puzzle Chapter 6
Parts 7: The Coroner’s Office
Heading forward from Downtown, the Coroner’s Office is on the left. Grab the Sandbag leaning on the side, then use the Car Jack, Lug Wrench and Spare Tire to replace the wheel on the nearby car. The Isopropyl Alcohol goes in the gas tank and the Bent Antenna is used to open the lock from inside the window. Now, place the Car Key in the ignition and the Sandbag on the pedal to make the car crash into the Drugstore, letting you go inside.
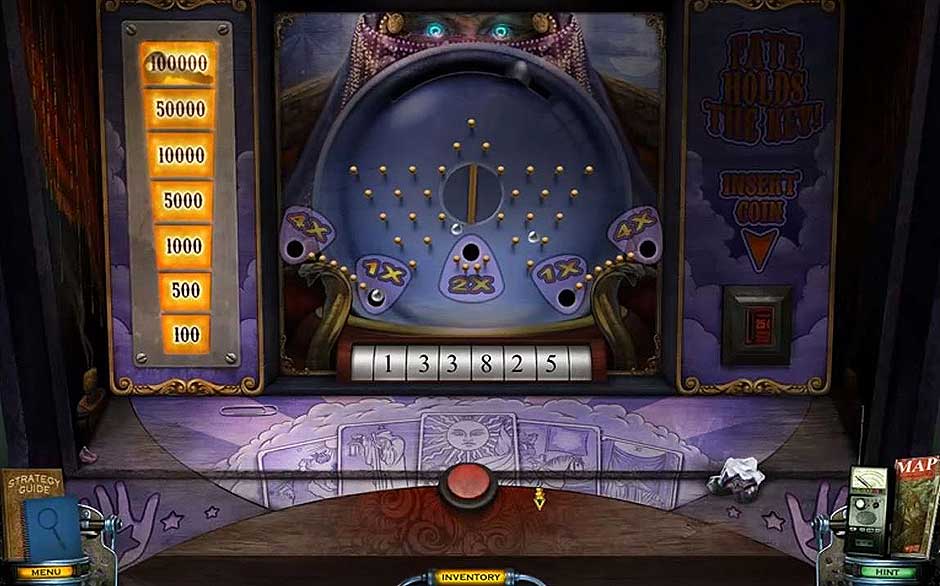
Inside the drugstore is some Plaster of Paris and a Screwdriver: grab both. Then, grab a Quarter from the shelf on your right and use it on the Pachinko machine in the corner to start another puzzle.
Pachinko is a very popular gambling game in Japan. The object of this puzzle is to drop Pachinko balls into the slots and get 100,000 points. Pressing the red button makes the Pachinko balls drop, and depending on the trajectory the balls will bounce off the numerous pegs and fall into one of the five holes. There isn’t much you can do to manipulate the route the balls take, so feel free to rapidly press the button until you run out of Pachinko balls. If you fail to get enough points, you can grab another Quarter on the nearby shelf and try again.
Once you’ve won, remove the screws with the Screwdriver and take the Pharmacy Key.
Mystery Case Files – Shadow Lake – Pachinko Machine
Use the Pharmacy Key on the roof latch and climb through. Place the Ladder between the two buildings to make a bridge. Cross it, then tie the Extension Cord to the nearby pipe and use it to rappel down the side. The Knife is used on the window’s locking mechanism, allowing you to enter the room.
In the nearby closet and the room to the left are the items needed to solve the subsequent Hidden Object Puzzle, as well as some Tape and a Piano Roll. In the room to the right of the left doorway, place the Piano Roll in the glass compartment of the nearby piano. Pull the lever and pay attention to what keys are hit: you will have to match them to solve the puzzle and go through the door.
On the bulletin board, take the Bobby Pin and examine the photo in the envelope. At this time, you can head back to Cassandra and receive more Drawings to charge, but head right back to this room after and go through the back door, starting another Hidden Object Puzzle. After solving, place the Plaster of Paris in the sink and fill it with water, then place four Books on the nearby shelf.
The Test Tubes and Weights you have collected previously go on the test tube rack and scale respectively, and should match up with the Drawings you collected from Cassandra. Once they’re matched, use them and the nearby bookshelf to charge three Drawings. Heading back, two Drawings go on the photo on the bulletin board and on the wall by the Pachinko Machine.
Exit the Drugstore and walk down a few more times to reach the Sheriff’s Office, where the Bobby Pin and Screwdriver are used to pick the lock. Lift the tumblers from slowest to fastest and the door should open no problem. Go through it.
Take a look at the Sebec lake area of the map. Now look towards the books and look at the one titled 1601-1700. Use the Drawing here. Head through the door and into the evidence room. This will activate a Hidden Object Scene for you. Once you complete it, use the Stethoscope with the dial. This will trigger a pile where you rotate the dial. The solution goes as follows: Clockwise to “S”, Counterclockwise to “E”, Clockwise to “B”, Counterclockwise to “E”, Clockwise to “C”.
Collect the Hockey Mask and listen to the message. Note “1142”. Now you can go back to Cassandra in her motel room. You will give her the Charged Drawings. Now all that is left to do is to solve the medium’s puzzle. Bring the matching pieces together. Correct answers will lock together.
Open the map and proceed to Trestle road.
Mystery Case Files – Shadow Lake – Drawings Chapter 7
Part 8: Trestle Road
Study the truck and go into the glove compartment. Here, locate all the items on the list. Now take a look under the truck. There is a wallet. Open it and grab the note before going back to the Sheriff’s Office where you’ll get a message from Cassandra. Go to her hotel room and collect the Drawings.
Make your way back to the Sheriff’s Office and go back to the books. Open the ones titled “1101-1200”. Remember the death date: 815 before using the Drawing here. Now take a closer look and place the Drawing again. Make your way to the evidence room. Put the code 815 into the locked box. Collect the Warden’s Keys from inside and use the first Drawing then the second Drawing inside the box. Head back to Trestle Road and use the 2 Drawings on the truck, then on the bush. Go back to Cassandra in her motel room and you will give her the Charged Drawings once again.
Now there is another puzzle to solve. Pull the correct pieces together. They will snap together when the correct pieces touch. When you’re done, go to the Church.
Mystery Case Files – Shadow Lake – Puzzle Chapter 8
Part 9: The Church
Outside the Church, use the Ladder on the building before going inside the church. The hatch ring will break when you pull on it so use the Knife on the hatch and head through. You’ll be given a list of items to find. Collect them all by looking closer at the pews on the right, left, and at the center. In the back you can take a closer look to get the Church Key. Now open a curtain and take a closer look at the stained glass window, where you can use the Church Key to start a puzzle. Connect the points of light without crossing over the same path twice.
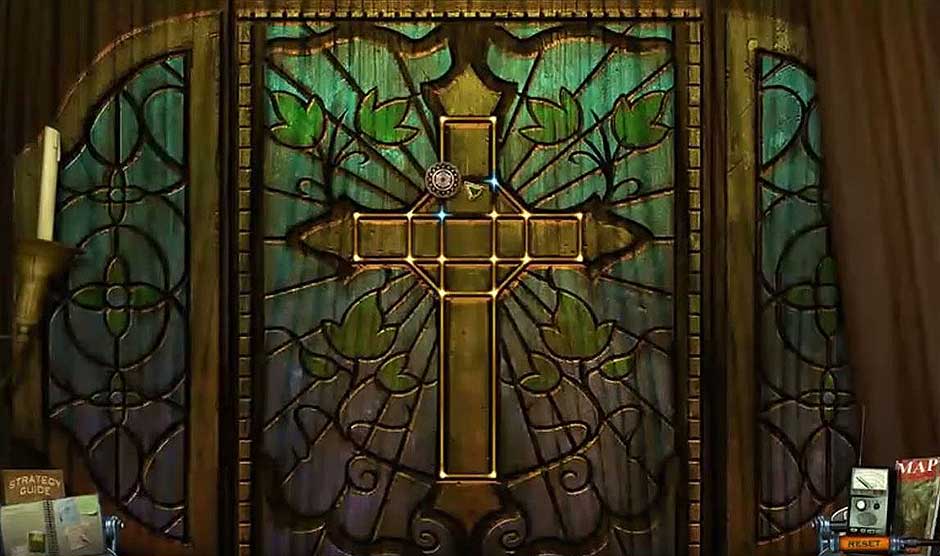
Mystery Case Files – Shadow Lake – Church
Head back to Cassandra’s room. She’ll give you more Drawings. Now go to the Church again and move forward. Collect the Torn Page and Doctor’s Bag. There is a pile of rocks to take a closer look at and use the Doctor’s Bag on the relic. Collect the Relic-In-Bag.
Now it’s time to place the Drawings. You’ll want to do this to the lower right of the skeleton, back in the pew area between the left picture and the door, the floor on the left when looking down the hatch, outside the church on the broken fence on the left, on the rock wall towards the right outside the truck, and in the tower when standing outside the broken building. Make sure you collect the Ladder from the church. Now go back to Cassandra in her room and you’ll give her the Charged Drawings. Now pull all the pieces of the puzzle together.
Mystery Case Files – Shadow Lake – Puzzle Chapter 9
Part 10: The Relic
Go back to Trestle Road. Take a closer look at the rocks and remove them, starting with the top one on the right, moving across to the next two, then taking the one from below that in the center. Go inside and look closer at the wall, then look closer again. Now head back to the prison administration office.
Use the Ladder on the grate and look closer. Remove all four screws using the Screwdriver. After taking the grate down, use your Night-Vision Goggles on the shaft. Now you can collect the Video Tape that’s in the lower left. Unlock the lock with the Warden’s Keys and go through the door. Here you can take a better look at the calendar hanging on the wall. If you remove it you can collect a Spoon. If you head further in twice you’ll run into Cassandra. Go down four times over and recollect the Ladder. Now make your way back to the Teacher’s House.
On the bookcase you’ll find a book called “Amaseconti Tribe”. Use the Torn Page on the book then flip the page. Now go back to the reading room in the Downtown Library. Use the Torn Page in the red book. Now go up onto the pharmacy roof and use the Ladder to go across and get to the autopsy room. When you look in the sink there is a Fake Relic inside the mold. Use the plaster of Paris in the mold, close it, and turn on the water. Step back five times and recollect the Ladder.
Go back to the prison administration office and use the Ladder on the shaft once again while using the Night-Vision Goggles. Go through the door then the hole in the wall. Go forward again. Use the Spoon on the candle behind Cassandra. Now take a closer look at the Relic before switching it with the Fake Relic. Go ahead one screen and use the Relic to start a puzzle by placing it in the niche.
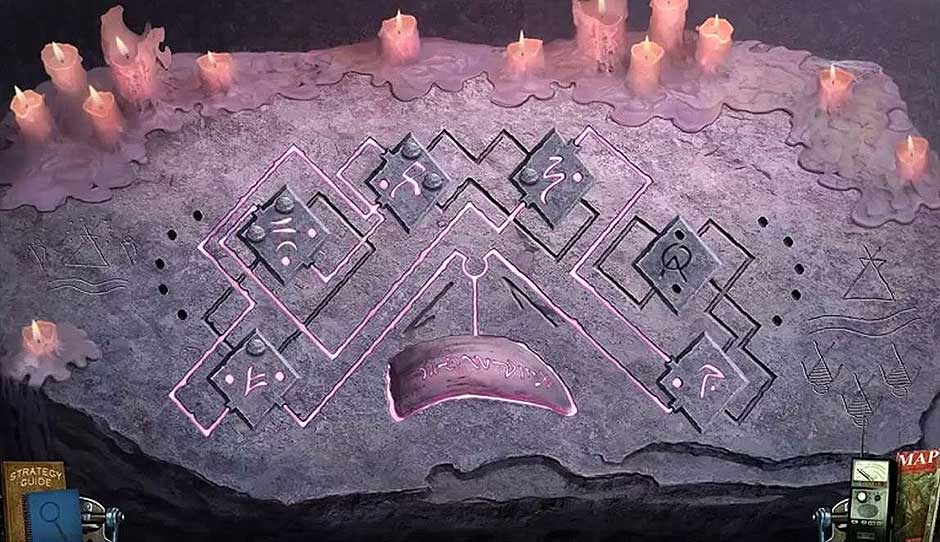
Mystery Case Files – Shadow Lake – Relic
Switch around the titles to spell out “We release you spirits”. This puzzle is random. Look in your Case Book for the proper places to place the pegs. Now collect the Relic again before looking at the map and going to Shadow Lake. Take a closer look at the pier and throw the Relic into the water. Go back to the motel. Take a look at the TV and use the video camera with the Video Tape. Watch it before returning to Cassandra’s room.
Congratulations! You’ve completed Mystery Case Files – Shadow Lake!
For more great tips and tricks, visit our blog!
The Mystery Case Files – Shadow Lake Walkthrough is meant as a guide and does not contain cheats, hacks or serials.