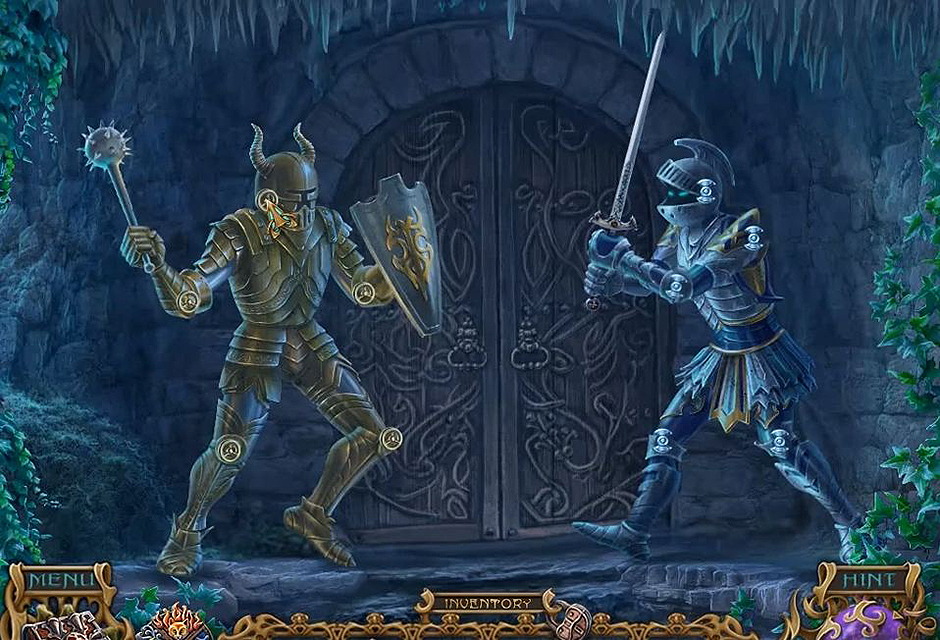
Spirits of Mystery: The Dark Minotaur is a hidden object electronic game with a quest. Four magical animals have been abducted. Rescue the magical animals before the Minotaur is summoned by witch Mortis and her crony Isa.
This gameplay guide is a complete walkthrough of the game. The guide contains gameplay instructions along with tips and tricks and hints to help players solve the mini-games or hidden object puzzles to rescue the four missing animals.
Toggle back and forth among the sections of the gameplay guide to clear scenes and keep gameplay moving when unable to solve the puzzles. Review the Main Menu option and General Gameplay Tips and Tricks before diving into the four game sections: (1) the zoo; (2) the village; (3) the hotel; (4) the forest prince; (5) Hanna’s house; and (6) the castle.
Contents
Main Menu
The Main Menu is the starting point for the Gameplay Guide. In the Main Menu the player is able to customize the game and save her progress by adding or deleting players. The settings enhance the gameplay experience by permitting the player to modify or change screen, music, cursor and sound settings accessed through the Options button. Other games by the developer can also be accessed through this screen including a Special Collector’s Edition of the game.
General Tips & Tricks
The objective of the game is to rescue four animals by solving games and puzzles. Some guidelines apply to all chapters. The most notable are highlighted below.
Puzzles or mini-games may be skipped once the skip button recharges.
There are two points during gameplay where the player receives the Invisibility Potion, this potion permits the player to clear scenes incognito or invisible. Without the Invisibility Potion the gameplay locks. Play can only continue with possession of the Invisibility Potion in the player’s inventory.
Items collected are placed in the Inventory section. Keep tabs on the collected items for use to uncover or access other items.
A Diary, is included to collect notes and to serve as a reference guide during gameplay.
Hidden Object Scenes are found wherever sparkles appear in a scene.
Each of the six sections contain a rechargeable Hint button that provides guidance on clearing the scene or solving the puzzle.
Spirits of Mystery – The Dark Minotaur Walkthrough
SECTION 1: THE ZOO
After speaking with the nanny, examine the base of the angel statue to collect the Crest. Examine the picture and place the Crest, in the nook. Collect the Blue Drop. Examine the fruit bowl and collect the Banana. Examine the picture frame and collect the Aquamarine Drop.
Collect the Red Drop from the cat on the bed. Examine the chest and place the Aquamarine Drop, Red Drop, and the Blue Drop, into the slots. Collect the Diary, and open and close it. Collect the Nail Scissors and the Shell. Exit through the open door.
Feed the creature by giving it the Banana, on the table. Collect Chester’s Brush. Select Nail Scissors and use it on the knot around the scroll to take note. Examine the fountain and collect the Trumpet from the angel and replace it with the Shell.
Collect the Book Page and place it on the book on the table and take the note. Collect the Key. Examine the gate and use the Key to unlock the gate by turning Key twice. Go through the archway on the right after going through the gate.
Collect the Scoop Net. Examine the ground, select the Handkerchief and collect the Medallion. Select the Medallion twice to collect the Handkerchief with Initials.
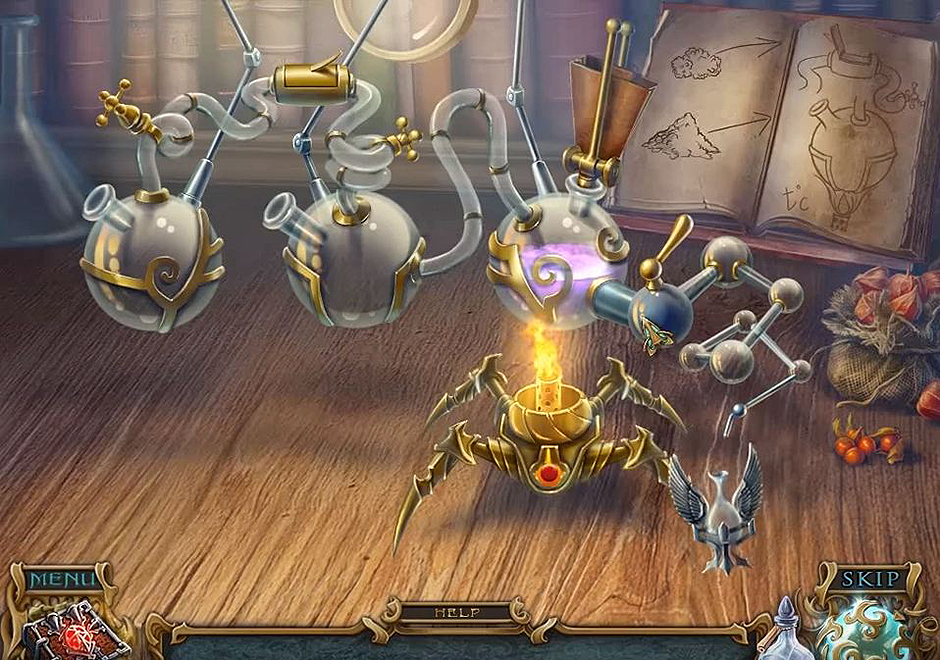
Mini-Puzzle 1: The first of five mini-puzzle games begins when the player examines the small castle. TIP: Collect the Air Symbol by removing three roots, touching the moon, touching the sun four times, and touching the cloud. To exit, go left.
Collect the Pruners and 1/3 Fish and cross the bridge. Examine the rocks and collect the Pickax. Use the Pickax on the glimmering rock.
Mini-Puzzle 2: Using the Trumpet on the dwarves starts the second mini-puzzle. HINT: Collect the Earth Symbol by giving tools to the dwarves.
Spirits of Mystery – The Dark Minotaur -Tools
At the temple, collect the Fishing Pole and Bowl and walk down to the waterfall to collect the Bowl by using the Bowl to collect the water.
Examine the bird and use the Pickax on the loose stone and collect the Worm. Use the Pruners on the roses and collect 2/3 Fish and Crystal. Go through right archway.
Examine the large castle and place the Crystal in the stand. Turn on the lights by selecting lights in order. Collect the Fire Symbol. Walk left.
Spirits of Mystery – The Dark Minotaur -Lights
Attach the Worm to the hook and place the Fishing Pole on the pond. Collect the Net by using Scoop Net. Go towards the temple. Examine the waterfall and give Net to the statue and collect the Bell Hammer. Return to the temple. Use the Bowl in the soil of the potted plant.
Mini-Puzzle 3: Using the Bell Hammer activates the third mini-puzzle. When finished with the puzzle, by placing the balls in sequence collect the 3/3 Fish from the plant.
Spirits of Mystery – The Dark Minotaur -Bell Hammer
To exit, walk down twice.
Mini-Puzzle 4: The fourth puzzle begins when 3 Fish are placed on the steps. HINT: To solve the puzzle rotate the fish until they face the stairs. Place a fish in the top right section and another fish in the bottom right section. When complete, collect the Water Symbol and walk down.
Examine the bowl and place the Air Symbol, Earth Symbol, Fire Symbol, and Water Symbol in the grooves to activate the fifth mini-puzzle.
Mini-Puzzle 5: The object of the puzzle is to rotate the rings until they are displayed in the correct order. When finished solving the puzzle, collect the Amulet. Give the Handkerchief with Initials and Medallion to the nanny.
To exit the section, go through the gate.
SECTION 2: THE VILLAGE
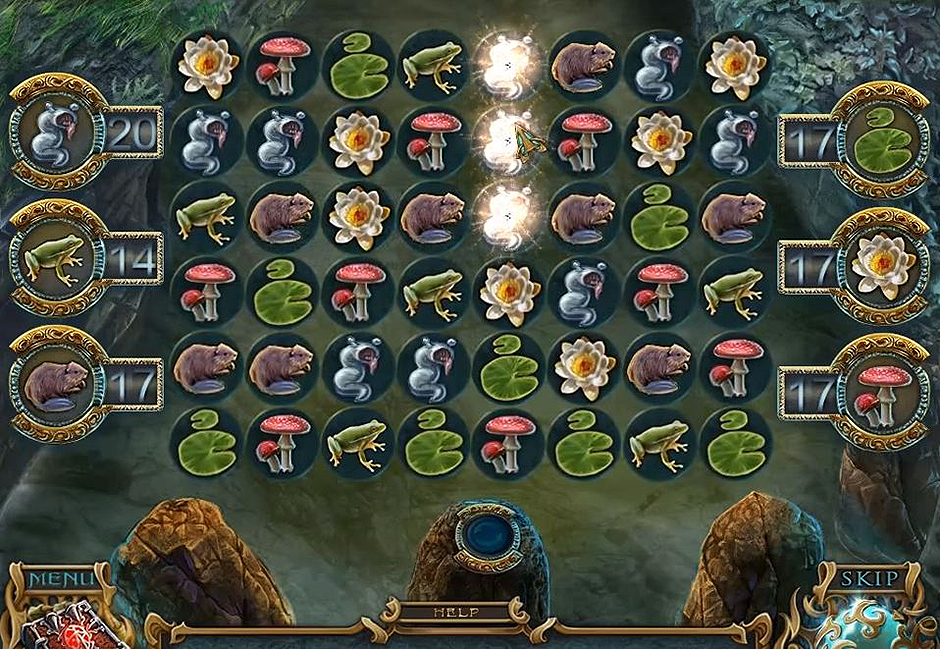
Please note that Hidden Object Puzzles or HOPs are accessed wherever sparkles are present. When a scene is entered scroll cursor over scene to notice the sparkles. Click on the sparkles to access the HOP.
HOP 1: Collect the items listed below to clear the scene. Unlock the gate by obtaining the Key found inside the barrel. Use the Hammer to obtain the spyglass to help look inside the barrel for the Key. Collect the Dragon Head.
Examine the gate. Collect the Shaft, Scarf, Bamboo, and Well Crank. Go to the shop.
Collect the Bag of Luminous Fungi Spores at the shelf. Placing the Dragon Head on the box begins the next HOP.
Hop 2: Clear the scene by touching the sphere to use or place objects in the scene. Collect the Seal when finished clearing the scene.
Open the scroll by placing the Seal on the scroll at the shelf. The player receives an the first of two Invisibility Potions.
TIP: As long as there is potion in the bottle, the Invisibility Potion keeps the player invisible.
HINT: Player can only pass through the gate and continue to play if she has collected the Invisibility Potion in her Inventory.
Collect the Firewood at the well and Pliers at the window sill.
To collect the Chain, remove the Nail with the Pliers.
At the well obtain the bucket by placing the Shaft on the well; the Well Crank on the Shaft; and the Chain on the crank. Use the Well Crank to pull up the bucket. Collect the Glass Cutter.
Clean the window glass with the Scarf and use the Glass Cutter on the glass. Collect the Tape and Yellow Button.
HOP 3: Next, play the third HOP by opening and closing the gate as hidden items are found and cleared from the scene. Collect 1/3 Candle Wax.
At the pyramid, cut the glass with the Glass Cutter and collect the Magic Fertilizer. Go outside by the well.
Use the Magic Fertilizer on the bucket and collect the Bucket With Fertilizer to use at the wall on the ivy.
Mini-Puzzle 1: Examining the chest begins a puzzle. CHEATS: Rotate rings until an image is formed. Sometimes when a ring is rotated it affects the direction of the ring beside it. Keep turning ring until picture created.
Spirits of Mystery – The Dark Minotaur -Rings
Brush the cat with Chester’s Brush and place him in the menagerie. Collect the Key to Room Number 8. The Amulet opens the menagerie. Exchange Bamboo with Chester to collect the Green Button.
Mini-Puzzle 2: Place the Yellow Button and Green Button into the grooves to begin the second puzzle in the chapter. When finished solving puzzle. Use hints to obtain instructions to solve puzzle and overcome a block. Go to the hotel.

Spirits of Mystery – The Dark Minotaur -Mini Puzzle 2
Chester the cat is saved. Three more animals to find and rescue.
SECTION 3: THE HOTEL
Collect the 2/3 Candle Wax, the Pot of Milk, and the Page. Exit through the door.
Select the picture twice and collect the following: Chair Leg, Piece of Yarn, and Snake Eye. Secure the Chair Leg with Tape and collect the 3/3 Candle.
Examine the snake. Place the Firewood and Snake Eye inside the snake’s mouth and socket. Place 3 Candle Waxes in the ladle. Place the Piece of Yarn in the box and touch the box twice. Exchange the Candle in the fire to collect the Lit Candle to place in the lamp. To reveal the code on the Book Page, hold the Book Page over the flame. Exit through the door.
Go through the left door by placing the Key To Room 8 in the lock. Collect the Lock Part under the pillow.
Collect a Shield by opening and closing the door to find hidden items. HINT: the Invisibility Potion is all used up and the player is visible again. Isa provides a Puzzle Part. To exit, access the hatch by removing the rug.
Place the Bag of Luminous Fungi Spores and Volcanic Ashes inside the basket. Collect the Sword.
In this section there is only one HOP to clear and one mini-puzzle to solve.
HOP: To illuminate the scene, light the lantern with the lighter. Use the Sword to break the vase to take the lyre and collect the Cooper Knife.
Mini-Puzzle: Place the Shield and Sword on the knight by the back door. HINT: position the knights in order by moving the joints. Exit through the door.
Spirits of Mystery – The Dark Minotaur -Knights
SECTION 4: THE FOREST PRINCE
The Forest Prince gives player the Mirror. Collect the Berries and Bamboo. To collect the Cinnamon use the Cooper Knife on the tree. Move right.
Mini-Puzzle 1: Using the Mirror on the nymph to begin the sections first mini-puzzle. HINT: Collect the monsters by viewing scene with Mirror.
Collect the Recipe, the Wine Glass, and the Onion. To collect the Pestle give the Bamboo to Chester once Amulet is opened.
Mini-Puzzle 2: Click on the waterfall to activate the second mini-puzzle. HINT: Match like items to make them disappear from the scene before time runs out. Receive more time to complete the puzzle by resetting the game; progress however is lost.
Spirits of Mystery – The Dark Minotaur -Match Game
Exchange the Wine Glass for the Wine Glass With Water. Cut the Onion with the Cooper Knife. Collect the Tear and Cauldron after giving Wine Glass With Water to the snake.
Placing the Cauldron in the water fills it up and provides player with a Full Cauldron to use to make an Elixir by following Recipe provided. Give the Elixir to the Prince to obtain the Part of the Elf Wand. Exit left.
Mini-Puzzle 3: Placing Puzzle Part on the sign activates this game. Collect the Diamond after switching pieces in the same row. Isa has the Magic Powder, take it and use it on the door. Collect the Bracelet and Sickle With Handle. Exit right through the door.
Collect the Cheese and Seaweed. At the plant, collect the Bamboo and Spider. Give Chester the Bamboo after opening the Amulet and collect the ½ Monster Head. Place the bracelet on the dragon to start a hidden object game. When finished collect the Top Of The Elf Wand. Exit through the door.
SECTION 5: HANNA’S HOUSE
Collect the Sickle and Fir Tree. Place the Cheese in front of the mouse hole and Fir Tree in the groove to collect the Horn to place on the deer head. The teeth below the counter opens when the Horn is selected. Collect the Jug and exit right.
Mini-Puzzle 1: Placing the spider on the web begins game. The objective of the game is to place spiders on the web until all spiders are on web. Collect the Hammer. Exit left.
Collect the Edged Sickle by placing and grabbing various items to use on the plant by the fence. This action activates the first HOP. When complete collect the Elf Wand Sphere. Go right.
Assemble the Elf Wand by combining the Part of the Elf Wand, Top Of The Elf Wand and Elf Wand Sphere together and placing wand in the dragon’s paw. Collect a Feather by using Elf Wand on guard. Travel towards the castle. Isa provides the Magic Powder and Key. Place the Diamond on the head of the gargoyle and collect the Hammer.
Collect the ½ Medal by using the Magic Powder on the door and giving Arton the Feather. Climb the ladder to exit the scene. Collect the Horn after playing the Hidden Object Game to place on the dragon chest. Open the chest with the Key. From Isa, get Isa’s Yarn Ball and the Magic Powder. Clear the second HOP and collect the 2/2 Medal.
Mini-Puzzle 2: Place 2 Medals on portal door to start game. When placed in the correct spot, the puzzle piece lights up. The third HOP starts when the Magic Powder is placed on the portal. Collect the 2/2 Monster Head.
Spirits of Mystery – The Dark Minotaur -Medals
Mini-Puzzle 3: At the castle door, placing the 2 Monster Heads on the door begins the game. Place the heads in the correct order. Clear the fourth HOP and collect ½ Stone Feather.
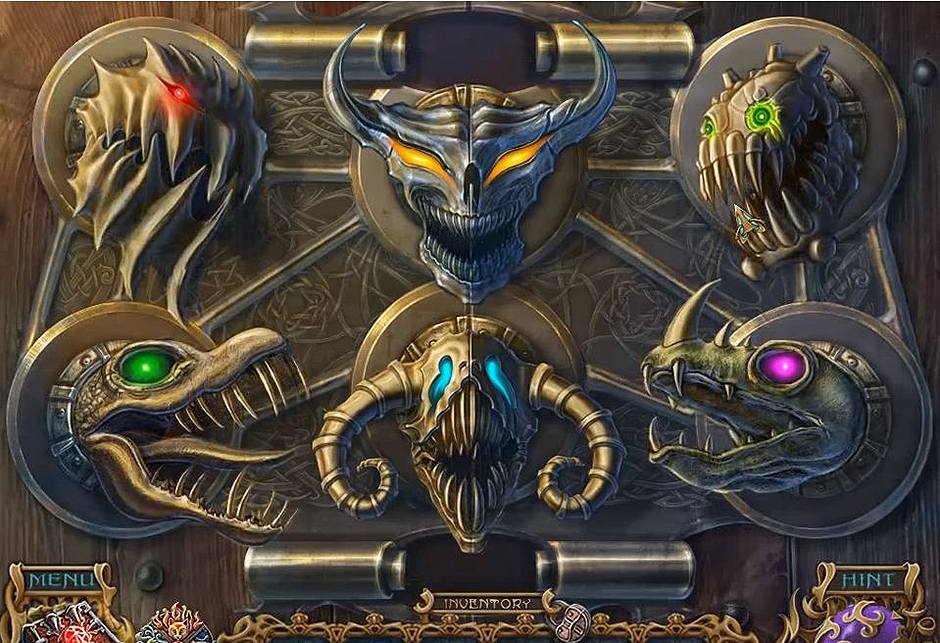
Spirits of Mystery – The Dark Minotaur – Monster Heads
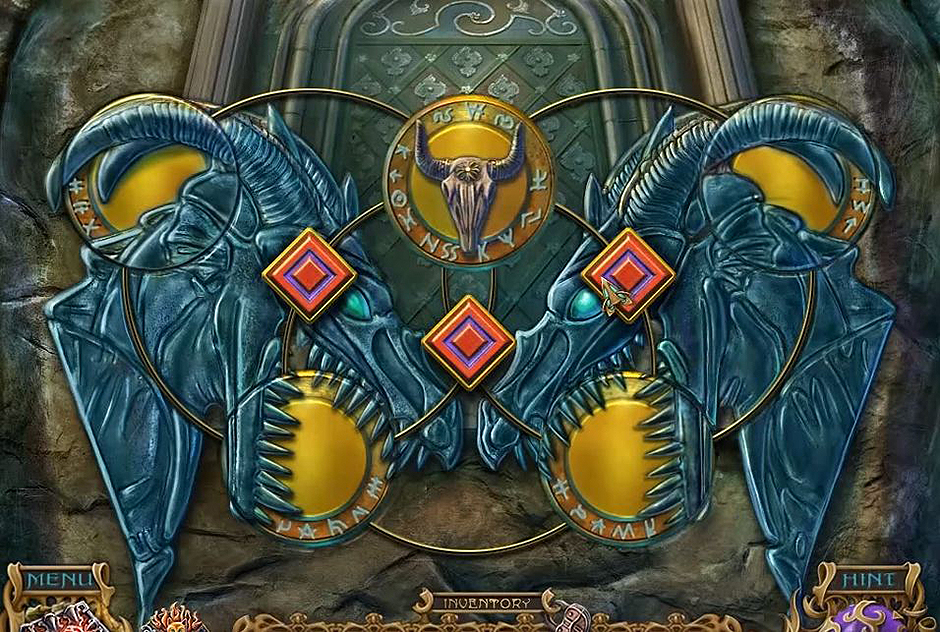
Mini-Puzzle 4: Rings must be rotated and placed in order to solve the puzzle and collect the Glove.
Solve the fifth HOP and collect the Pin.
Fill the with water to collect the Jug With Water. Rescue the Turtle by breaking the glass with the Hammer. Feed the Turtle with Seaweed and collect 2/2 Stone Feather. Collect the Magic Flower by using the Glove. Exit towards the right door.
SECTION 6: THE CASTLE
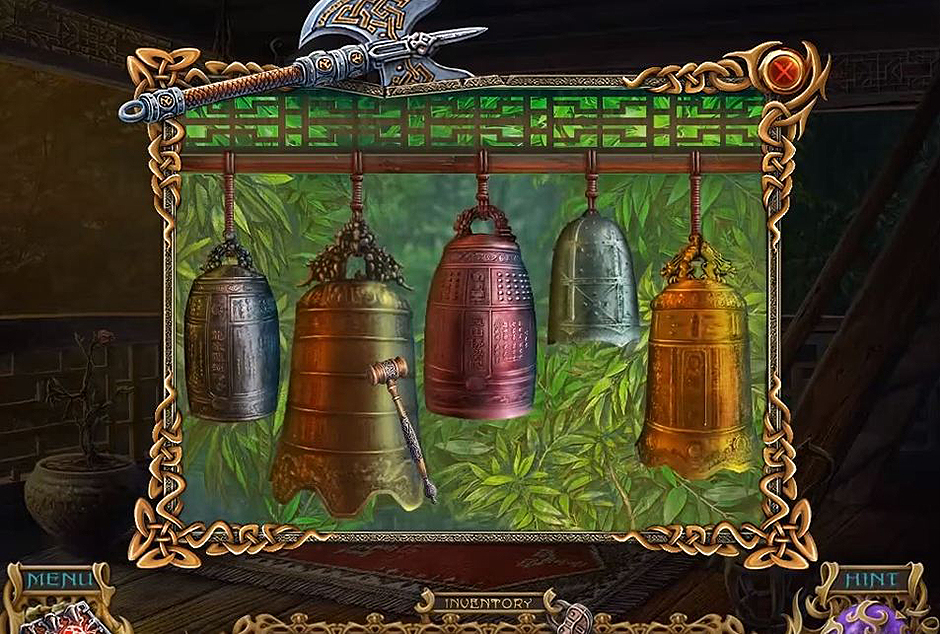
Hanna provides the second Invisibility Potion in exchange for the Magic Flower. Complete the first HOP and collect the Spear. Collect the Obsidian Claw by breaking the creature’s claw with the Hammer. Collect the Bell by placing Pin on it. Exit left.
Collect the Fruit Picker and Magic Growth Pear after opening book on table, flipping through the pages and taking a picture. Exit through the center door.
Collect the Domino and the Bottle by giving the goblin the Magic Growth Pear. Collect the Tweezers by placing 2 Stone Feathers on the door. Exit through the right door.
Collect the Horn by placing Bell on the panther’s tail and Cup of Milk by placing Pot of Milk in the bowl.
Mini-Puzzle 1: Placing Domino on the throne begins the first mini-game. Drag like items together to arrange by background color.
Obtain the Lens by using the Obsidian Claw on the stained-glass window. Go through the archway with the Invisibility Potion or gameplay will stop. Exit left.
The Obsidian Claw is also used to cut the cactus to receive Acid that should be collected in the Bottle. The second mini-game is activated by placing the Lens on the stones. With the Tweezers collect the Seeds. Exit right after walking down four times.
Make sure to take the Invisibility Potion and obtain the Book to enter the throne room in the castle or gameplay will be stopped.
Collect the Pliers and Ring and play the Hidden Object Game to receive the Tooth. Use the Acid on the frame and place the Horn, Ring, and Tooth on the face.
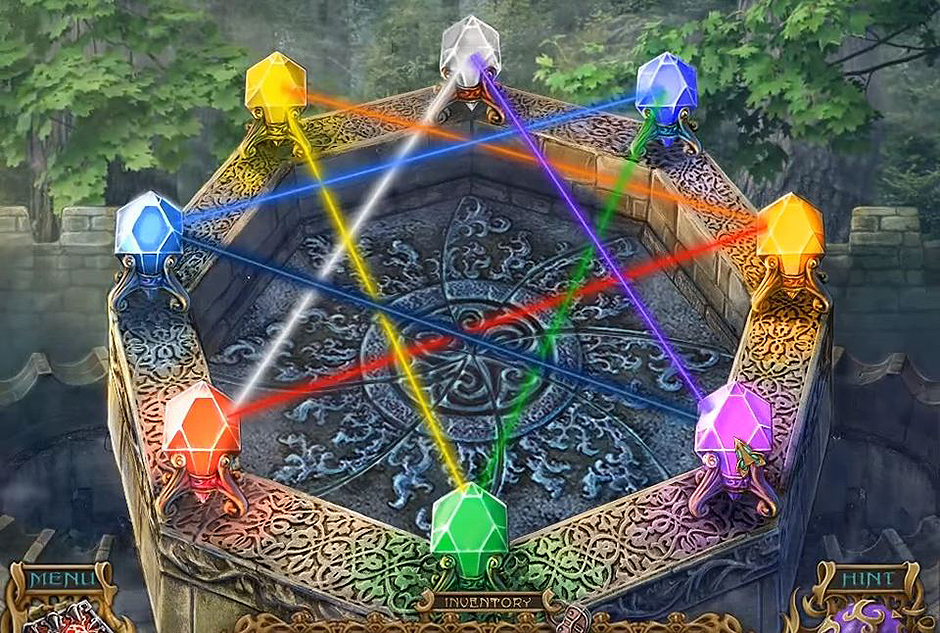
Mini-Puzzle 2: Begins when Isa’s Yarn Ball is placed on the maze. Get through the maze by taking the Clue. Hint: Keep in mind that the player will be taken back to the beginning of the maze if she makes a wrong move.
Use the Acid on the Chain to collect it and the Pliers on the glass tube by the monster. Give the cat the Cup of Milk to receive the Fire Medallion to place on the monster’s Chain. Exit through the door.
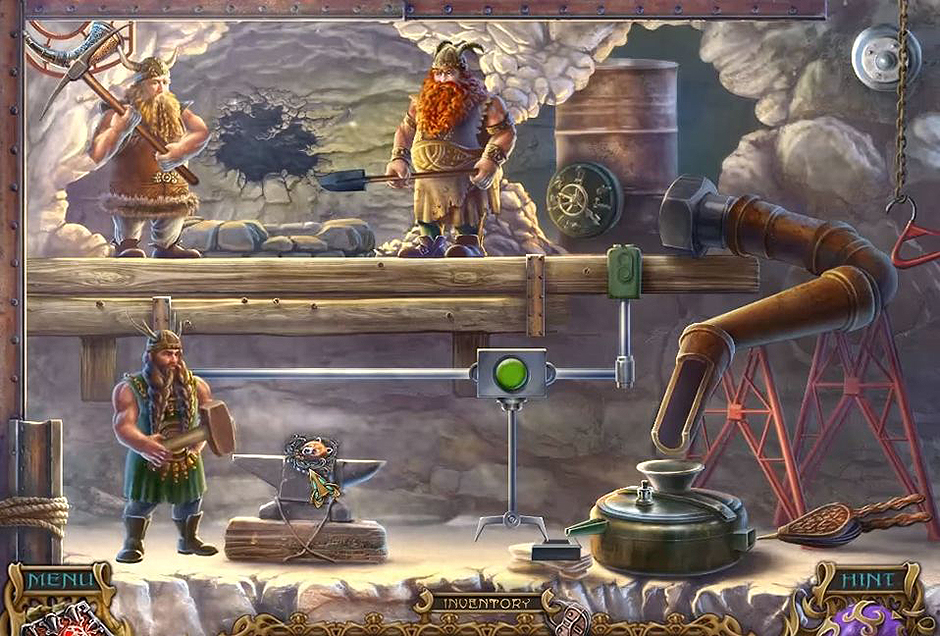
Collect the Pick, File, Clay Flask, Wheel, and Axe. Fill the Clay Flask with water to collect the Clay Flask With Water.
Collect the Luminous Moss and Silver Nugget (use the Pick) and repair the pipes by placing items in the correct places.
Inside the castle, clear the HOP to collect the Seal and Silver.
Follow the Recipe in the Book to make the Growth Potion. Clear the next two HOPs to collect the Shovel and Grain.
Spirits of Mystery – The Dark Minotaur -Recipe
At the flower bed collect the Lock Key and ½ Puzzle Part. Plant the Seed and add the Growth Potion. The Invisibility Potion is all used up.
Rescue the bird by using the Lock Key and feeding it grain to collect the 2 Puzzle Parts which activates the final mini-puzzle.
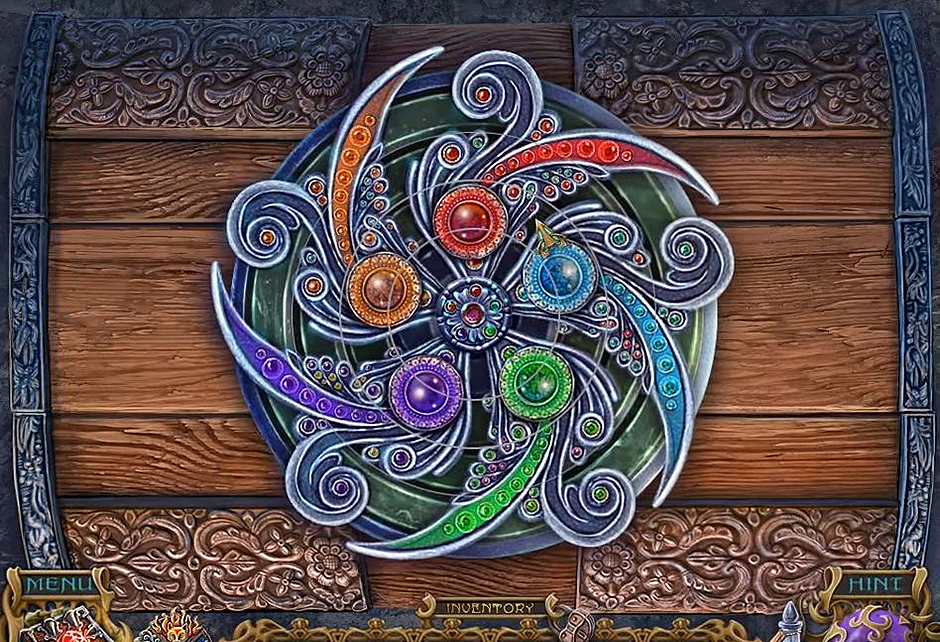
Mini-Puzzle 3: Rotate the parts until an image is created.
All four magical animals are rescued and the monster banished to the netherworld.
Congratulations! You’ve completed our Spirits of Mystery – The Dark Minotaur Walkthrough!
For more great tips and tricks, visit our blog!
The Spirits of Mystery: The Dark Minotaur Walkthrough Gameplay Guide is meant as a guide and does not contain cheats, hacks, or serials.