Welcome to our Walkthrough for Death at Fairing Point – A Dana Knightstone Novel. This guide is packed with tips and tricks to help you unlock the levels of the game and ultimately solve the final puzzle. Explore beautiful settings and immerse yourself in the delights of Europe as you investigate clues about a mysterious death from the past. Will you be able to right a wrong that was committed many years ago?
Contents
General Tips & Tricks
Navigation: An arrow will appear when you can move to another part of the location. When you’re zoomed in on an object, you can back out of it by clicking anywhere outside of the zoom window.
Cutscenes: If you want to move the dialogue along faster, right click your mouse. You can also choose to bypass the entire scene if you’re in a hurry.
Cursor Icons: The cursor will change depending on the action you can take. A speech bubble lets you talk to a character, the magnifying glass zooms, and the hand lets you pick up an object.
Inventory: You can view eight items on your screen at one time. To view more items, use the scroll arrows on the sides of the inventory tray.
Notebook and Goals: The game includes a guide in the notebook. The goals tab is especially helpful in letting you know what you need to do next to unlock the next part of the game.
Hints: There’s a very handy hint button on the bottom right of the screen. It’s a little in-game cheat to help you out when you get stuck. You can use it to find hidden objects or to figure out where you need to go next.
Skip Meter: If you really get stuck on a puzzle, you can skip it once the skip meter is full.
Tutorial: There’s an optional, built-in guide to gameplay at the start of your game.
Death at Fairing Point – A Dana Knightstone Novel Walkthrough
Chapter 1: Halward Manor
The game begins at the mysterious Halward Manor. In this chapter, you’ll investigate the bedroom, the second-floor hallway, the lobby, the parlor, the atrium, a magic booth and the conservatory balcony. There are 12 puzzles to solve in this level.
To get started, first speak to the concierge in your bedroom. Then, you’ll see a small table with a cup of tea on it. Go to the table and pick up the Passport. Note down the last four numbers of the phone number on the Business Card.
Head to the safe, punch in the last four digits of the phone number and press enter. The safe unlocks. Put your Passport inside. Pick up the Old Scroll and read the obituary. Close out of that frame.
The window flies open all by itself. Click on the window to close it. Zoom in and see that the latch is broken.
Go to the bed. What a mess! Take the objects out of your inventory and put them where they belong. The camera should go in the camera case, etc. The suitcase closes. Pick up the Umbrella.
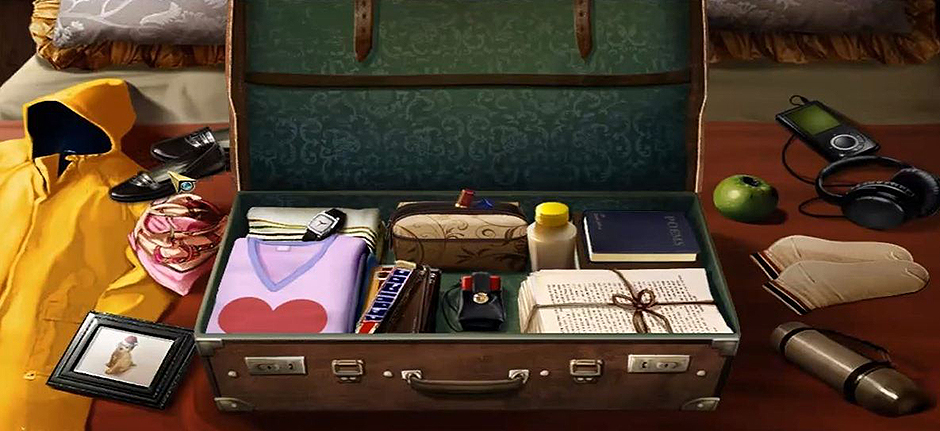
Death at Fairing Point – A Dana Knightstone Novel – Objects
Use the Umbrella to pick up the Latch that’s under the bed. Go to the Wardrobe; pick up the Dust Pan and the Screwdriver. Open the window and put the latch on it. Use the Screwdriver to attach the latch. Close the window.
Look below the mirror and use the Dust Pan to pick up the broken pieces. Put the Six Mirror Pieces onto the broken mirror. Rearrange the pieces to see your character’s reflection.
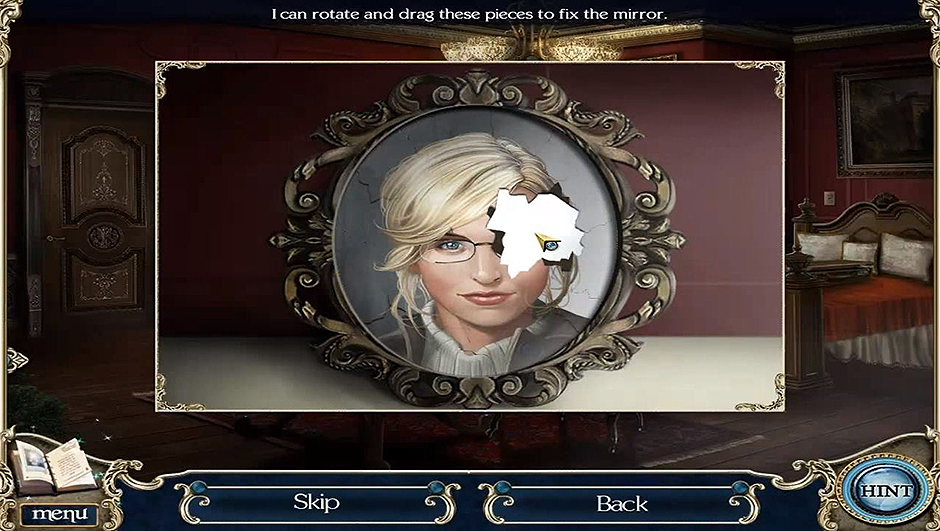
Death at Fairing Point – A Dana Knightstone Novel – Broken Pieces
Click on the picture of David. David’s ghost appears. Throughout the game, the ghost will lead you to the next step. Click on David’s Ghost to follow it out of the room.
To move on to the next level of gameplay, you’ll need to go to the back wall of the lobby and put the Torn Photo onto one of the paintings in the Photo Frames.

Death at Fairing Point – A Dana Knightstone Novel – Painting
Click on the photo scraps to change their arrangement and complete the picture. Then, move the Name Tags onto the photo to correctly label each person in the picture. Here’s a hint: The first letter of each name from right to left is D, C, W and M.
A Photograph will appear in your inventory after you successfully unlock this puzzle. Once again, David’s Ghost appears. Click on it to go to the next level.
Chapter 2: The Manor Grounds
In this chapter, you’ll explore the charming grounds of Halward Manor. The locations include Outside the Pub, Inside the Pub, the Road, the Outside Stables, Inside the Stables and David’s Workshop. There are twelve puzzles to solve in this level.
You start the level outside of the Pub where you’ll pick up the first two Shot glasses of the 10 that you’ll need to find throughout the level. Once you’ve found all 10 Shot glasses, go inside the pub and put them on the shot glass rack on the wall. Swap them around so that the design on each shot glass matches the background of the rack. When you’ve done it correctly, a Valve will fall out. Take it and leave the pub.

Death at Fairing Point – A Dana Knightstone Novel – Shot Glasses
Outside the pub, go to the barrel. Attach the Valve to the barrel’s faucet. Turn the faucet on to empty the barrel. Now you can look inside of the barrel to find a Box of Metal Letters. Pick it up and go to the stables.
Inside the stables, find the 10 Sketch Pieces that are strewn about the room. Examine the crates and pick up the Number 2 you find there. Put the Sketch Pieces atop the crate and fit them together to form a complete picture.
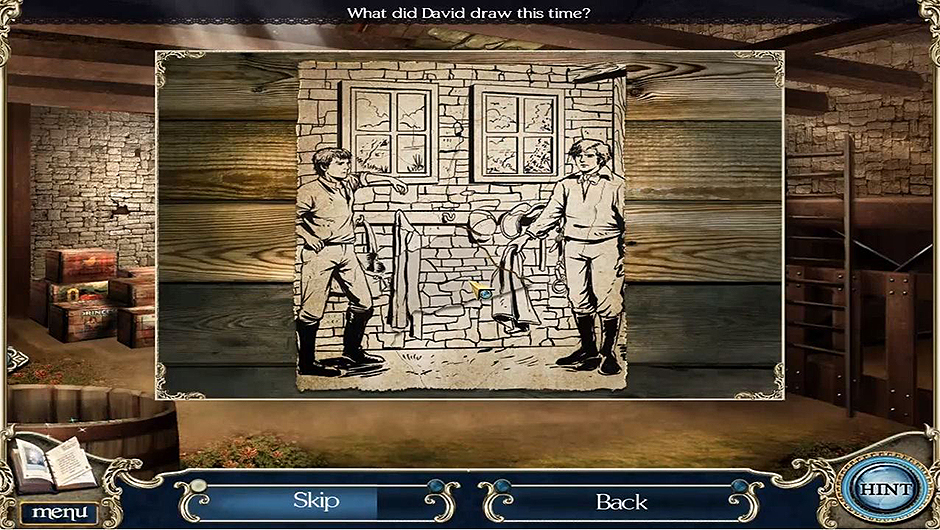
Death at Fairing Point – A Dana Knightstone Novel – Sketch Puzzle
You’ll find a hidden object scene in the horse stall on the right. Find all of the objects on the list, which will then place Stable Gear into your inventory.
Hang the Stable Gear from the hooks under the window. Click on the bag and grab the Hammer and Chisel. David’s ghost appears. He leads you to a stone wall. Break the wall using the Hammer and Chisel. You’ve found David’s hidden workshop! Inside, find the art supplies that you’ll use to complete a paint-by-number piece of art. David’s ghost will be so pleased with your artwork that he’ll show you where to find a hidden, secret note.
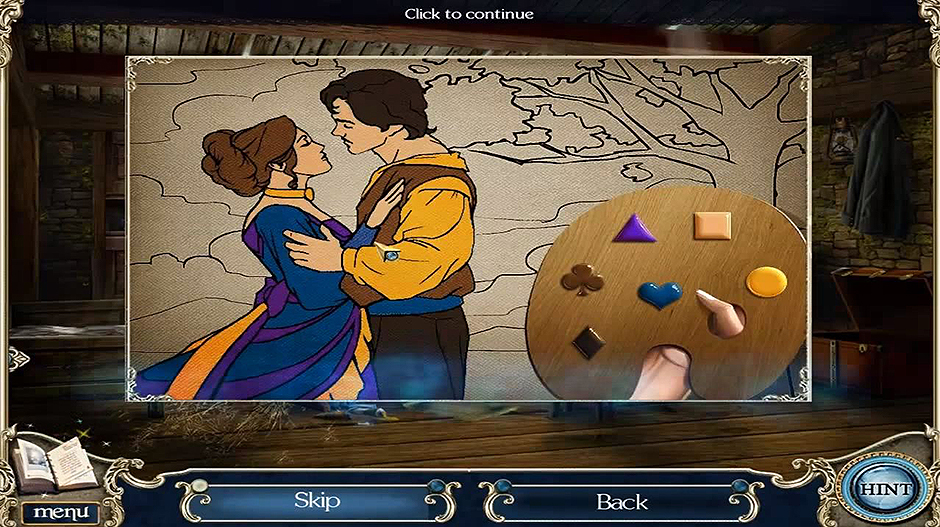
Death at Fairing Point – A Dana Knightstone Novel – Paint By Number
To move to the next level of the game, you’ll need to return to the Pub. Inside the Pub, zoom in on the Cuckoo Clock.
Go to your inventory and take the Hour Hand, the Minute Hand plus the number 10 that you found on the pub sign. Place it onto the clock face. Also, put the number 2 that you found in the workshop and the number 7 that was in the mailbox and place them onto the Cuckoo Clock. A red button and a blue button are on the clock. The red button is for hours, and the blue button is for minutes. Press them until the clock shows 5 o’clock. Take the Photograph.
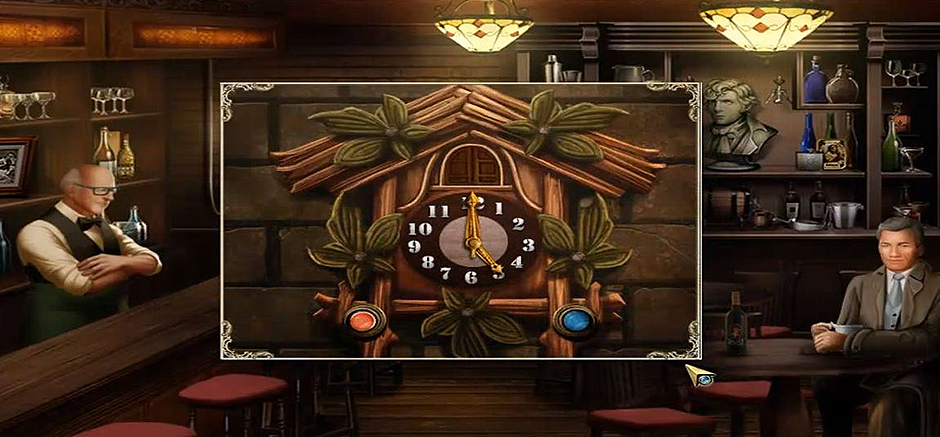
Death at Fairing Point – A Dana Knightstone Novel – Cuckoo Clock
Chapter 3: Baltoun Village
Next you’re headed to picturesque Baltoun Village. You’ll investigate the Town Hall, the Bridge, the Reception Area, the area Outside Town Hall, the Town Square, the Graveyard Gate, the Records Office, Outside Town Hall and the Graveyard. There are 11 puzzles to solve to move to the next level.
Begin at the Town Hall. Talk to the receptionist and gather up the four Sheets of Paper that are strewn throughout the room. Pick up the blue Feather Duster from the table.
Go to the Bridge where you’ll find a Torn Cat Poster on the grass. Return to the Town Hall and go to the Reception Area. Give the receptionist the Torn Cat Poster. This will activate a puzzle where you’ll drag and rotate the pieces to put the poster back together. Put the Cat Poster into your inventory.
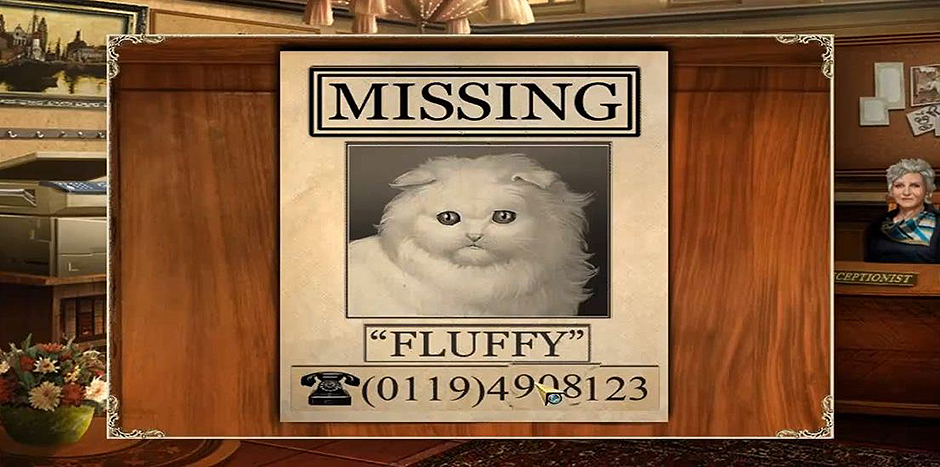
Death at Fairing Point – A Dana Knightstone Novel – Cat Poster
Your character wants to help find this missing kitty by making some copies of the poster. Go to the photocopier. It’s clearly in need of some attention. Move the plugs around to untangle the wires. You’ll know you’ve succeeded when all the plugs turn white.
Put four Sheets of Paper into the photocopier. Put the Cat Poster under the lid. Just like with a real photocopier, press the up arrow button to request 4 copies. Then push the large green button to start the copier.
You’ll now have 4 Cat Posters in your inventory. Put one up on the bulletin board that’s near the receptionist and get out of there. You’ll find Fluffy the cat eventually in the Graveyard, thanks to the help of some Catnip you’ll find growing near the Bridge.
To move to the next level of gameplay, you have to put a Badge onto the statue of Halward that’s located on the town square. To get the Badge, you’ll need to solve the puzzle with the Vintage Coins in the Graveyard. Successful achievement of that puzzle will get you a Special Screwdriver.
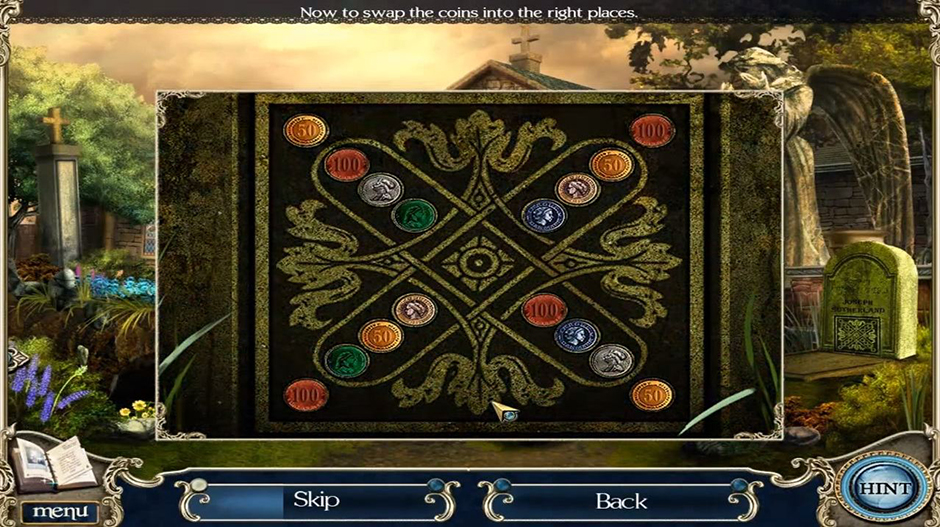
Death at Fairing Point – A Dana Knightstone Novel – Vintage Coins
Take the Special Screwdriver into the Reception Area and take off the nameplate that’s on the family portrait. You’ll find Ink Remover hidden there. Take it and go to the records office. Use the Ink Remover on the briefcase to remove the stain. Then unlock the briefcase by moving the dials to match the letters that were on the nameplate: MDCCCXCIV. Take the Medical Report and Badge from the briefcase and head to the Town Square.
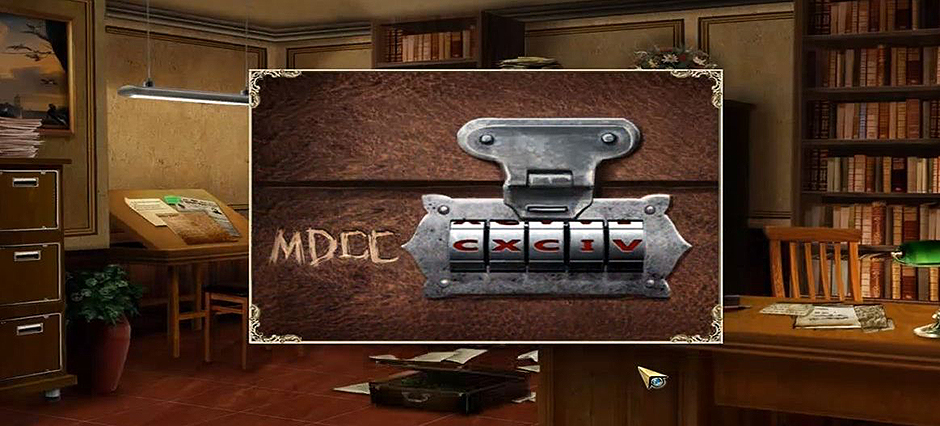
Death at Fairing Point – A Dana Knightstone Novel – Briefcase Lock
Put the Badge onto the statue’s chest. Take a look at the Photograph that slides out. Click on it to put it into your inventory. This level’s complete!
Chapter 4: England
The lush, flower-filled locations in this chapter include the Gate to Halward Estate, the Front Door, the Garden, Outside the Cottage and the Housekeeper’s Cottage. This level has a total of 10 puzzles.
You start at the Gate to Halward Estate. Peek around in the shrubbery to the left to find a Torn Note. You’ll find a Scissor Half on the tree on the right of the gate. Pick up the 4 Ringer Parts that are strewn around. Put them onto the old-fashioned ringer on the side of the entrance gate and pull it. Instead of the gate opening, the Ghost of Charlotte appears. Click twice on her ghost and the gate will open. Go into the Garden and through the door on the left.
Talk to the butler. Pick up 5 pieces of the Chore List. Look at the Broken Teapot on the outdoor table. Select and rotate the pieces to put the teapot back together again. The Teapot goes into your inventory. Look at the different kinds of tea, they will come in handy later.
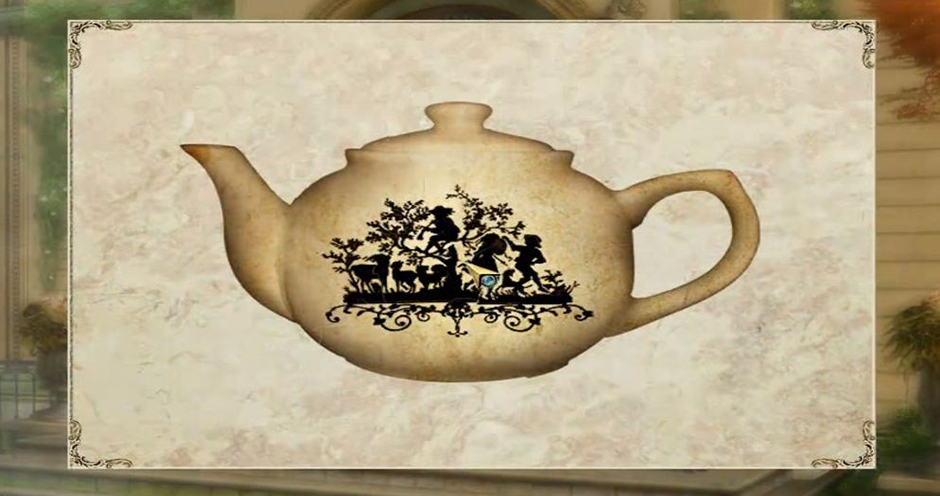
Death at Fairing Point – A Dana Knightstone Novel – Teapot
Head over to the Housekeeper’s Cottage. Take the pieces of the Chore List and put them on the clipboard that’s hanging near the table. Switch the strips around to put the list together. Then knock on the cottage door to talk to the housekeeper. Go inside, where you’ll find the other Scissor Half. You’ll now have a pair of Scissors in your inventory.
To complete the scene, you need to obtain a Compartment Key that opens the compartment at the foot of the Front Door to the estate. In order to get that key, you’ll need to do a whole host of chores, including making and serving tea. Once you’ve made the Hot Tea and placed it on the table near the Front Door, the butler will show up and give you a Green Crown.
Go to the garden and look at the lion statues that are flanking one of the gates and the one that is in the pool. Zoom in on each statue and complete the simple puzzles by rotating the squares. The lion with the sun symbol gets the Orange Crown, the lion with the waves gets the Blue Crown and the lion with the leaves gets the Green Crown.
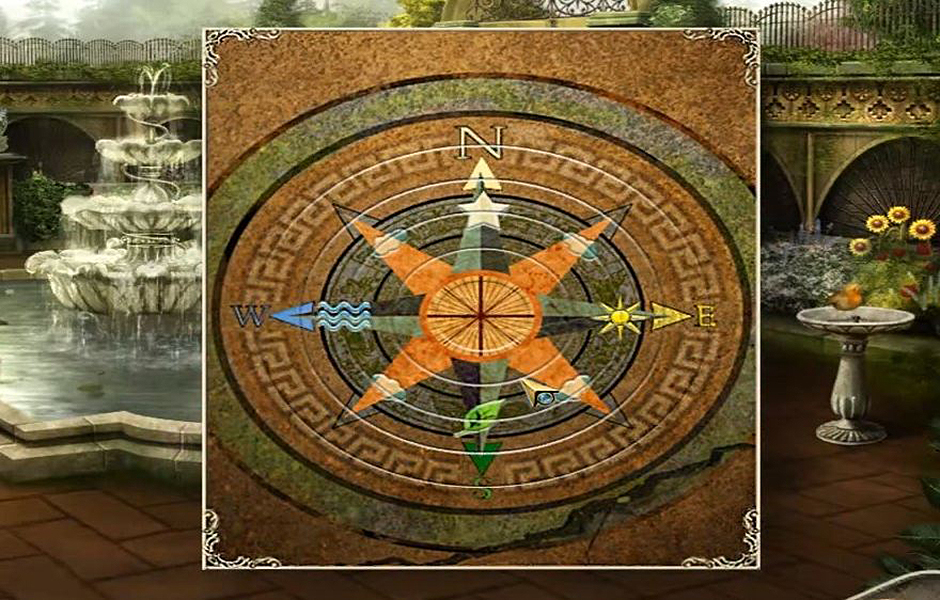
You’ll find a Compass on the ground. Click on the rings to complete it. That’s when the Compartment Key will appear. Take the key and go to the gate. Unlock the compartment and take the Photograph. Enter the estate to move on to the next level of the game.
Death at Fairing Point – A Dana Knightstone Novel – Teapot
Chapter 5: The Halward Estate
The elegant, rambling Halward Estate is the next place for you to explore. Locations include the Reception Hall, the Library, the Ballroom, the Patio and the Music Hall. This chapter has 17 puzzles in all.
You start in a beautiful library. Look at the plants and take an Angel. Then collect six Bookends that are strewn around the room. Put the Bookends onto the bookshelf to the right. Swap the books around to make pictures that match the bookends on each shelf. Once complete, take the Book.
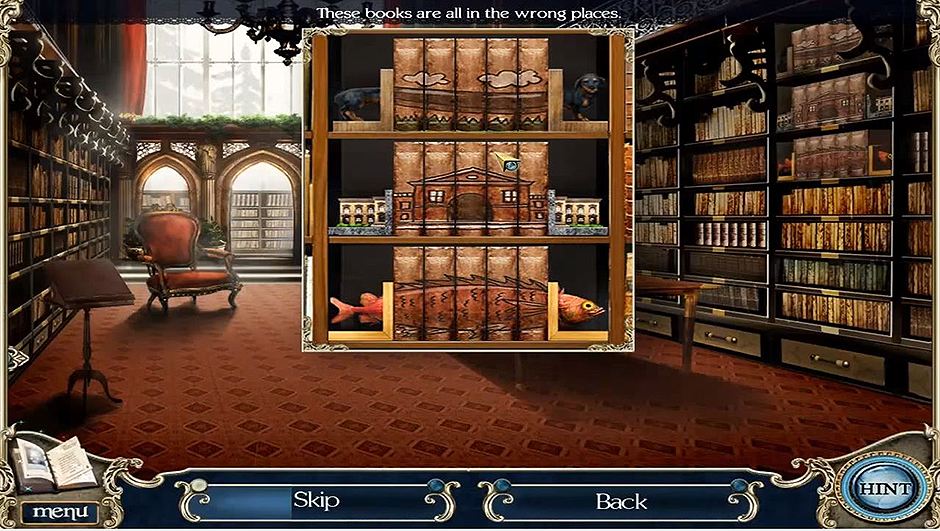
Death at Fairing Point – A Dana Knightstone Novel – Book Shelf
Go to the left and put the Book on the book stand. Put the pieces together into an oval shape. You’ll receive the Oval. Click on the book to turn the page. You can read half of a letter. From your inventory, place the other Half of Charlotte’s Letter onto the page. You can now turn the letter over to read a riddle. Leave the library.
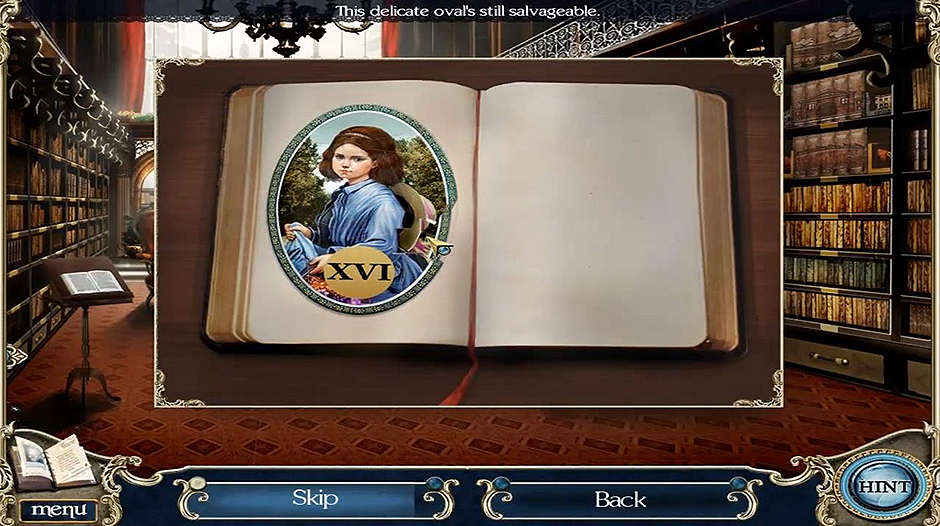
Death at Fairing Point – A Dana Knightstone Novel – Oval
Go to the Reception Hall and add another Angel to your inventory. Insert the Disc onto the round frame on the ballroom door. A sequence of colors will light up. Press the colored footprints in the same order. You’ll need to do this three times before you can enter the ballroom. The first round you press yellow, purple, aqua and brown. The other rounds are random and different for every player. Once you get it right for three rounds, enter the Ballroom.
To move to the next level, you’ll need to find another Photograph. Using the Dagger, tear down the curtain in the Ballroom. You’ll see a large mural that is actually a hidden object puzzle. Find the items and people who are on the list.
The Ghost of Charlotte appears; click on her Ghost. Look at the plant by the window. There is a Crank in the plant’s pot. Pick it up.
Go to the gramophone. Put the Crank into the hole and put the Record onto the turntable. Click on the Crank to turn it. The floor tiles in front of the steps is a puzzle. Rotate the tiles so that they make a complete pattern. A Photograph appears beneath the tile. Pick it up to move on to the next level of the game.
Chapter 6: France
In this chapter, you go to romantic France. The locations where you’ll be sleuthing include the Outside Alley, the Museum Lobby, the Exhibit Room, the Gallery, the Gift Shop, the Outside Alley and the Storage Room.
You find yourself on a lovely, cobblestoned street in France. First go to the red phone booth. You’ll find a Small Zipper and Salt Shaker. Take them both then head to the Museum Lobby. The Ghost of Charlotte appears. Click on the Ghost of Charlotte.. Pick up the Salt Shaker you find there. You should now have two of four Salt Shakers. Put the Small Zipper onto the pencil case that’s on the counter. Open the pencil case to find a Cutter. Take it.
Now go to the Exhibit Room. You’re not alone! Again, click on the Ghost of Charlotte. Grab the Blue Towel that’s hanging from the window ledge. Go to the plastic sheet that’s on the wall and use the Blue Towel on it. Then use the Cutter to cut through the plastic and take it down.
Go through the opening you’ve just created. You’re in an old Gallery. Take the Light Bulb and put it on the broken lamp, then select the light switch to turn on the light. Take the Salt Shaker. Use the Cutter on the newspaper that’s on the wall. Look at Charlotte’s painting. Leave the room.
You only need one more Photograph. You’ll receive it after you solve the music box puzzle in the Exhibit Room. Once you have that Photograph, go to the Gallery where you’ll find a grouping of empty picture frames on the wall.
Place all Six Photographs into the frames on the wall and arrange them chronologically. Then look at the scale and move the weights around to balance it. Once balanced, the safe door opens to reveal Charlotte’s Ring.
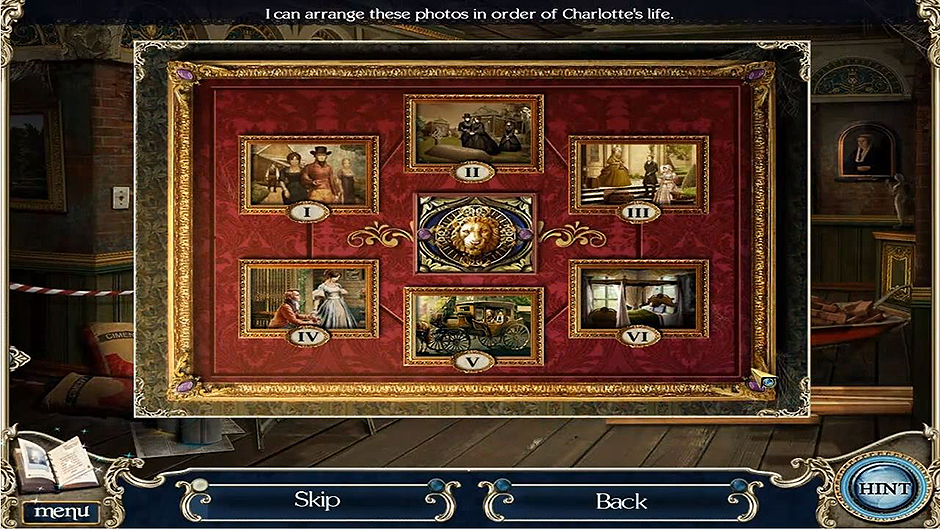
Death at Fairing Point – A Dana Knightstone Novel – Frames
Take the ring and the Blank Letter that’s underneath it. Go to the lobby and use the Matches to light the candle. Hold up the Blank Letter. The invisible ink will become visible. Take the Invisible Ink Letter. You’re now moving on to the final chapter!
Chapter 7: Fairing Point
This chapter brings us to the dramatic, wind-swept sea cliffs of Fairing Point. The beautiful locations for the game’s finale include the Lower Cliff and the Cliff Top. This level has three puzzles to solve to bring the story to an exciting conclusion.
Speak to the concierge at the Lower Cliff. Click on the purple Cloth to take it, then pick up the Half-Painted Canvas and the Easel. Open the box on the right and solve the paint jars puzzle. You need to create the colors that are shown on the swatches. Once complete, the Paint Jars will appear in your inventory.
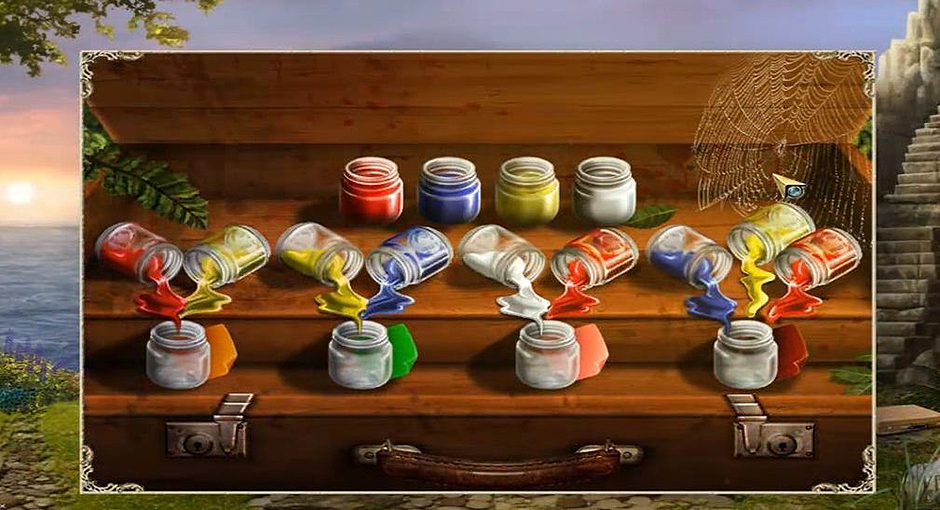
Death at Fairing Point – A Dana Knightstone Novel – Colors
Now go to the Cliff Top and place the Easel, the Half-Painted Canvas and the Paint Jars in the center clearing. Click on the painting and complete it by painting it as indicated by the symbols. It’s just like a paint-by-number picture but with symbols instead of numbers. Once complete, look at the tree.
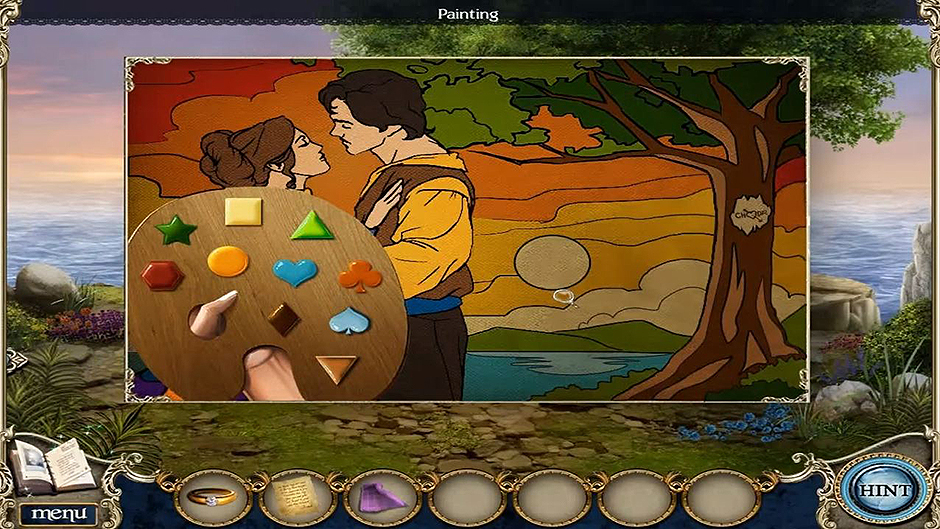
Death at Fairing Point – A Dana Knightstone Novel – Finished Painting
There’s a Carving Knife on the tree. Wrap the Cloth around the Carving Knife to take it. Then use the Carving Knife on the tree to remove some bark. A carving in the tree is revealed.
Look at the pile of leaves. Click on them to clear them out, revealing a box. Place your Invisible Ink Letter on the box and leave. David’s Ghost appears. Click on the Ghost. He unlocks and opens the box. You can now take the Lion Face Charm out of the box. Go down the steps to the Lower Cliff.
Click on the stone table and put the Lion Face Charm on the blank spot. Then move the lions around so that the lions are placed next to the flowers that match their colors. Once done correctly, a slot opens up on the stone table. Put Charlotte’s Ring into that slot. The Ghost of Charlotte appears. Click on her and follow her up to the Cliff Top.
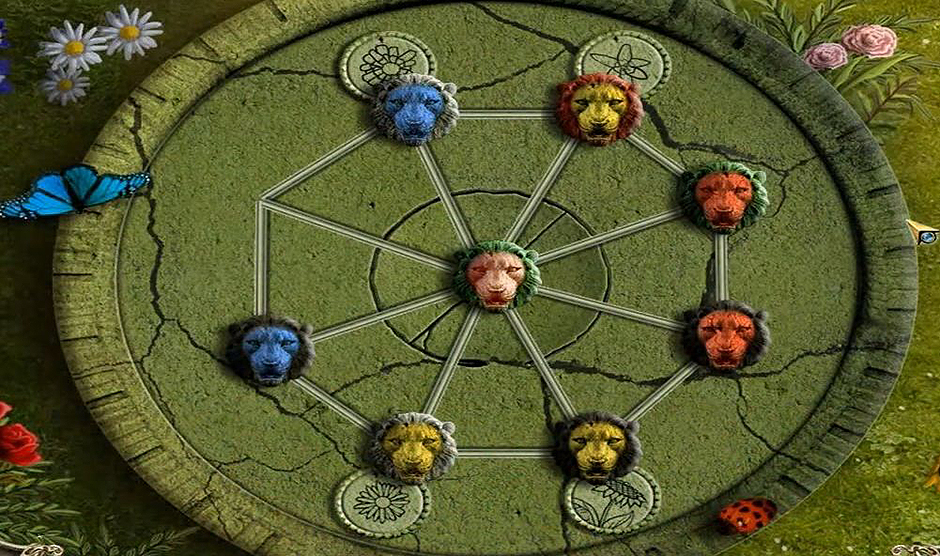
Death at Fairing Point – A Dana Knightstone Novel – Lions
Now click on Both Ghosts and watch their long-awaited reunion!
The final step is to congratulate yourself for a job well done! You’ve finished Death at Fairing Point – A Dana Knightstone Novel. Check out our blog for more great tips and tricks!
For your next adventure, consider finding hidden treasures in Shanghai in Big City Adventure: Shanghai.
This Walkthrough for Death at Fairing Point – A Dana Knightstone Novel is meant as a guide and does not contain cheats, hacks or serials.