When news reaches you that your dear friend Peter has gone missing, you set off at once to find him. Everyone told you not to go but you refused to heed their warnings. Peter had been traveling throughout Thailand and when you last heard from him, he was exploring a seemingly deserted Village, trying to figure out just what exactly had caused all the villagers to flee.
As you explore the environment of Peter’s Hut, you realize that Peter is not merely lost in the jungle. Rather, supernatural forces seem to be at work and the demonic werecreatures may very well have chosen Peter to serve has a human sacrifice. Now, you are his only hope of rescue.
To solve the thrilling mystery of this hidden object puzzle game, you will need to use your wits, logical reasoning, and all the bravery you can muster as you explore the abandoned village and ancient temples.
Below you will find the essential Secrets of the Dark – Eclipse Mountain walkthrough. Whether you follow this guide as a step-by-step roadmap or merely use it as a point of reference, this walkthrough will provide plenty of useful tips and tricks to help you unravel the mystery and save Peter.
The following walkthrough is based on the Platinum Edition of the game; some details may vary from the standard version. It is not necessary for you to complete all of the tasks listed below, however, do understand that certain actions must be completed before you can advance to the next level.
Contents
General Tips and Tricks
Secrets of the Dark – Eclipse Mountain is a hidden object game created by Orneon Limited. Gameplay will demand that you visit various different scenes to gather objects and solve puzzles in order to advance the story and ultimately solve the mystery. After completing certain puzzles, you may be obliged to return to locations you have previously visited– keep a sharp eye out! Things tend to change whenever you leave and return to a scene. In general, the gameplay is linear, however there is a certain degree of freedom with which you can decide how to go about exploring different areas.
The objects you collect will be stored in your inventory, which will be displayed at the bottom of your screen. In this walkthrough, we will indicate items that can be picked up by using all capital letters to discuss them. For example: “The first GEAR can be found in the Village mailbox.”
Level of Difficulty
When you begin the game, you will be asked to choose a level of difficulty – Regular, Advanced, or Hardcore. When playing in the Regular Mode, active zones will be highlighted with sparkles and the hint availability will recharge quickly. This mode also offers a full game tutorial. In the Advanced Mode, active zones are not lit up and the hint availability will take a longer time to recharge. In the Hardcore Mode, no active zones will be highlighted, all hints and skips will be disabled, and no tutorial will be available.
Once you begin playing on a certain level, you cannot alter your selection. If you wish to change the level of difficulty, you will have to quit the game and start again on another level.
Menu
The Menu button is located in the bottom left hand corner of your screen. This will allow you to save, pause, resume, or quit your current game. The Menu includes an Options tab where you will be able to adjust the volume of music and sound effects. You can also adjust the screen size to full screen. Additionally, the Menu has a Help section that explains general information about playing the game (note that the Help section does not provide Hints).
Hints
In the bottom right hand corner of your screen there is a lotus flower. This is the Hint button. The game offers an unlimited number of hints but after you receive one hint, a certain amount of time has to pass before you can receive another. While working to solve various puzzles, the Hint button will serve as a Restart button, and a Skip button will appear just below it.
Journal
On the lower left hand side of the screen, above the Menu button, is your Journal. This is where all of the tidbits of information and clues you uncover will be recorded. Some clues will come in the form of letters, codes, or instructions that will be necessary later on to unlock certain puzzles. This will all be automatically written down in your Journal for your reference.
Hidden Object Scenes
Periodically throughout the game, you will be given the opportunity to solve a Hidden Object Scene, of which there are two types. The first variation is similar to an I Spy game- there will be a list of items you must find in the scene. Some of the items will be written in yellow, meaning that an additional action is required in order to find the object- for instance, opening a cupboard door.
The second type of Hidden Object Scene is like an I Spy game in reverse. You will be asked to place the various items that appear in your inventory tray into the correct position within the scene; for instance, a spider should be placed on its web. During these rounds, if you hover your cursor over an inventory item, a description of the object will appear.
While working to solve puzzles, an Instructions tab will appear on the top of the toolbar that can give you directions.
Lighting/ Time Travel
Several of the rooms you will enter allow you to alter their appearance by turning on a lamp, turning different valves, or flipping switches. This will show you the room as it looked in a previous era. For example, when you first enter Peter’s Hut, you will see a dark, gloomy room with items scattered everywhere. But if you pull the light switch, it will not only brighten the scene, it will make the room appear neat and tidy, just as it did when Peter was still living there.
Penalties
If you click excessively about an area, you will be penalized and your cursor will temporarily be unable to click on anything in the scene (you will still be able to click on the Menu button).
Secrets of the Dark – Eclipse Mountain Walkthrough
Chapter 1: The Abduction
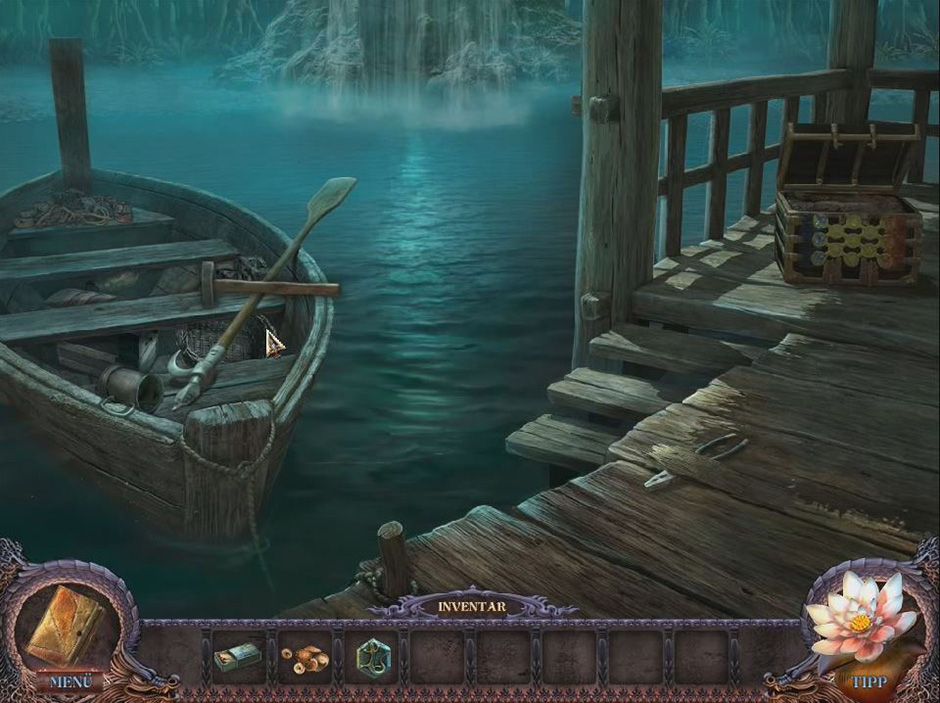
Having just learned that your good friend Peter has been kidnapped, you begin the game by exploring the hut that he lived in and its surrounding environment. Part of the bridge that will take you to the Village has been washed away and you must repair it in order to move forward to other scenes.
In this Chapter, you will explore the Crossroads, the Pool, Outside of the Hut, Inside of the Hut, and the Dock. The level has three different Hidden Object Scenes and three puzzles. The Hidden Object Scenes can be found by closely inspecting the suitcase, the area near the Hut’s window, and beneath the bushes by the Pool. The puzzles will be found near the Hut’s window, in the cupboard against the Hut’s back wall, and in the chest by the Dock.
In order to advance to the next Chapter, you need to use a GAFF to retrieve the detached section of the bridge and put it back in place. You will have to build the GAFF yourself. The first thing you will need is the OAR that is lying on the floor of the Hut. As a prize for completing the Hidden Object Scene beneath the bushes, you will receive a NAIL.
Secrets of the Dark – Eclipse Mountain Creating the Gaff
Once you have freed the stone statue, he will give you a HAMMER. When you have all three pieces, use the HAMMER to affix the NAIL to the OAR, thus creating a GAFF. Once you have repaired the bridge, you can follow the road to the Village.
Chapter 2: The Village
In this Chapter, you will explore the Village, the Fountain, the Hotel Lobby, a Hotel Room, the Kitchen, and the Garden. In addition, you may find yourself returning to areas from the previous Chapter, such as the Hut, the Crossroads, etc.
The level has five Hidden Object Scenes and three puzzles. The Hidden Object Scenes can be found to the right of the path that leads to the Pool, in the Kitchen’s refrigerator, by the window of the Hotel Room, in a suitcase found at the Crossroads, and again by the Hotel Room window (you will return to the Hotel Room several times). The puzzles are located in the grate in the ground by the Fountain, in the Hotel Lobby’s desk drawer that you must unlock (the puzzle will only appear when you turn off the Hotel Lobby’s lights), and on the bamboo extension of the bridge by the Fountain (you will need to collect all three GEARs first to access this puzzle).
In order to proceed to the next Chapter, you need to complete the final puzzle by the Fountain. To unlock this puzzle, you must gather three GEARs. The first GEAR can be found in the Village mailbox. You can pick up the second GEAR when you look closely at the plants at the end of the Garden path. Finally, the third GEAR will be presented to you once you free the stone statue that is stuck within some tree roots in the Garden.
Once you have all three GEARs, inspect the base of the bamboo extension bridge by the Fountain, and use the GEARs to trigger the puzzle. To solve this puzzle, you must arrange the GEARs in such a way so that the gear in the upper-right corner begins to rotate. This will make the bridge passable, allowing you to move on towards the Temple Plaza.
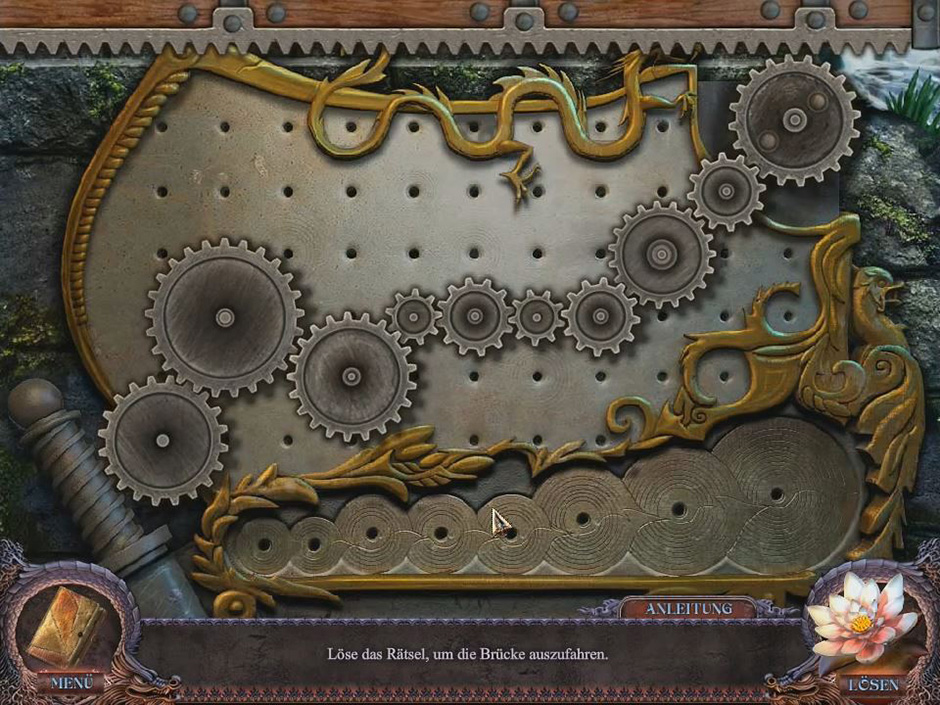
Secrets of the Dark – Eclipse Mountain Gear Puzzle Solution
Chapter 3: Peter Imprisoned
In this Chapter, you will explore the Plaza, the Souvenir Shop, the Museum Entrance, the Cave, the Basement, and the Back Room. You will also have to periodically revisit sites from the previous levels.
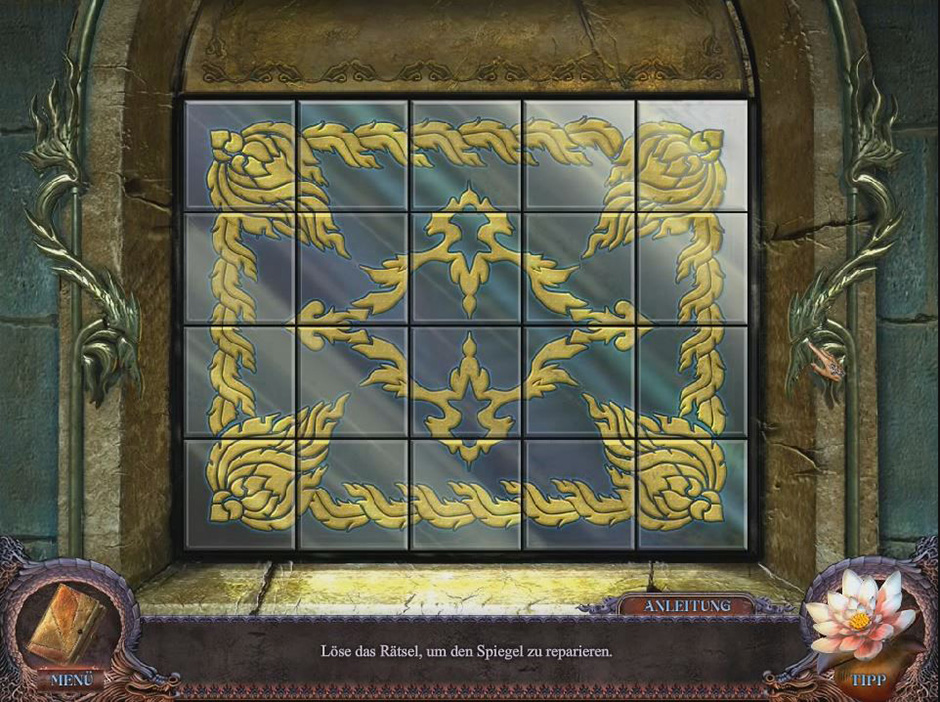
This level has five Hidden Object Scenes and two puzzles. The Hidden Object Scenes can be found in the ticket booth of the Museum Entrance, on the windowsill of the Hut, in the corner shelves of the Souvenir Shop, in the cabinet of the Back Room, and on the ground by the Pool. The puzzles are located in the door of the Souvenir Shop and on the middle white crystal stand in the Basement.
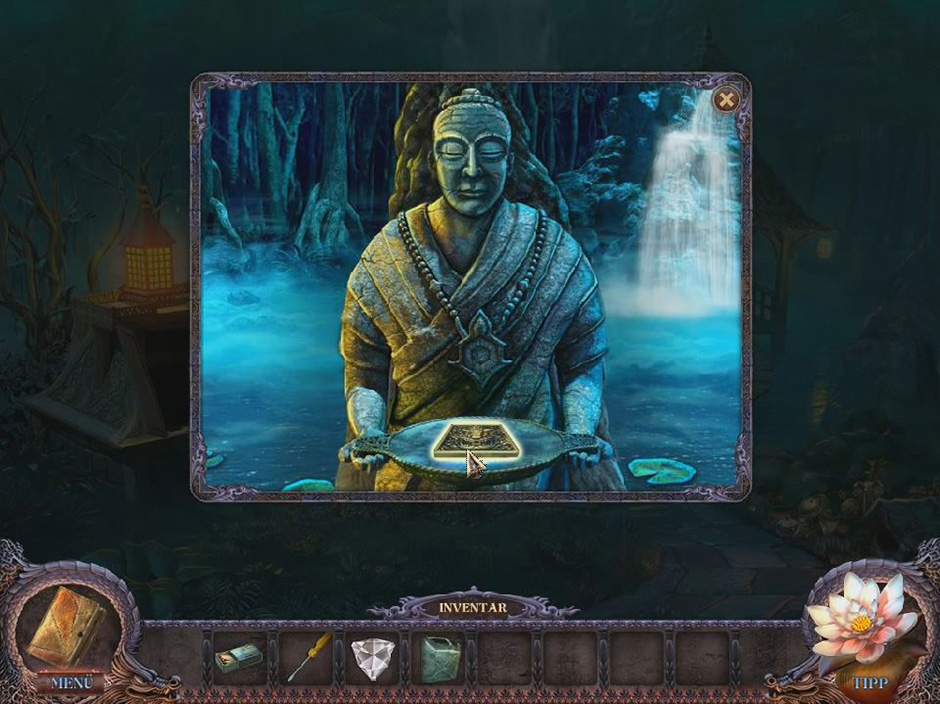
There is no clear differentiation between Chapter 3 and Chapter 4. You will spend much of this level going from location to location to gather items and clues. Technically, Level 4 begins after you have completed the Hidden Object Scene by the Pool, for which you will receive an OILCAN. Then, examine the stone statue and use the SPECIAL ITEM on the plate in its hands. The statue will present to you a MIRROR PART to add to your inventory. From there, you should walk over to the Hut.
Secrets of the Dark – Eclipse Mountain The Mirror Part
Chapter 4: Collecting the Temple Lock Plates
In this Chapter, you will explore the Mine Cart, the Attic, the Office of the Souvenir Shop, the Upstairs (a room above the Souvenir Shop), and the Closet of the room above the Souvenir Shop. The majority of the action in this Chapter will take place in scenes you have already visited, in particular, the various rooms of the Hotel.
There are four Hidden Object Scenes and four puzzles in this Chapter. The Hidden Object Scenes can be found in the ticket booth at the Museum Entrance, in the refrigerator of the Kitchen, in the corner shelves of the Souvenir Shop, and in the cupboard of the Back Room. The puzzles can be activated in the red arcade machine in the Hotel Lobby, the green arcade machine in the Hotel Lobby, the claw game machine in the Souvenir Shop, and in the toolbox in the Attic.
The purpose of this level is to collect all of the necessary Temple plates, which you will need to enter each of the three Temples and save Peter. The Lizard, Bull, and Tiger Temples require you to have two plates to enter. You will receive these at different times: the first plate for each Temple will come when you release its corresponding stone statue; the second plate will come when you present the stone statue with a SPECIAL ITEM.
You should have received the first piece of the Lizard plate in Chapter 1 when you used the SAW to remove the chains that imprisoned the stone statue by the pool. The second Lizard plate will also come from this particular statue. In the Attic of the Souvenir Shop you will find a SPECIAL ITEM on the floor. Present it to the stone statue by the Pool and it will transform into the second Lizard Plate.
Similarly, you should have gotten the first Bull plate in Chapter 2 when you used the MACHETE to free the stone statue from the tree roots in the Garden. To get the second Bull plate, you must uncover the SPECIAL ITEM that is hidden in the vent of the Closet (you can open the vent by using the SCREWDRIVER you found on the ground next to the Village mailbox). When you use this SPECIAL ITEM on the stone statue in the Garden, it will transform into a Bull plate.

Secrets of the Dark – Eclipse Mountain The 2nd Bull Plate
The opportunity to acquire the first Tiger plate comes at the beginning of this level. Using the PICKAXE you found by the Mine Cart, free the stone statue in the Museum Entrance from the crystal that surrounds it. In gratitude, the statue will offer you the first Tiger plate. This stone statue will also give the second Tiger plate to you when you use a SPECIAL ITEM on it. However, the time for this will not come about until the sixth chapter. Then, you will have to use the CARVING CHISEL awarded to you for completing a Hidden Object Scene in Chapter 6 and the MALLET you receive for completing a Hidden Object Scene in Chapter 5 to chip away at the rock and skull that can be found on the table of the Museum’s Work Room. This will reveal the SPECIAL ITEM that you can use on the stone statue in the Museum Entrance to transform it into the last Tiger Plate.
Chapter 5: The Lizard Temple
In this Chapter, you will explore the Lizard Temple, the Bull Temple and the Museum Office. In this level there are two Hidden Object Scenes and four puzzles. The Hidden Object Scenes can be found in the cabinet in the office of the Souvenir Shop and in the Kitchen’s refrigerator. The puzzles will present themselves to you at the door of the Lizard Temple, on the altar of the Lizard Temple, at the door of the Bull Temple and in the upper left cupboard of the Kitchen.
To advance the next level, you are going to need a working COMPASS. The body of the COMPASS can be obtained in the Hut Interior after illuminating the room. It is stuck to the clock on the back wall. The COMPASS NEEDLE is hidden between the cymbals of the clapping monkey hanging in the Attic. He will not open the cymbals until you replace his BATTERIES. Once you have repaired the COMPASS, go back to the Museum Office.
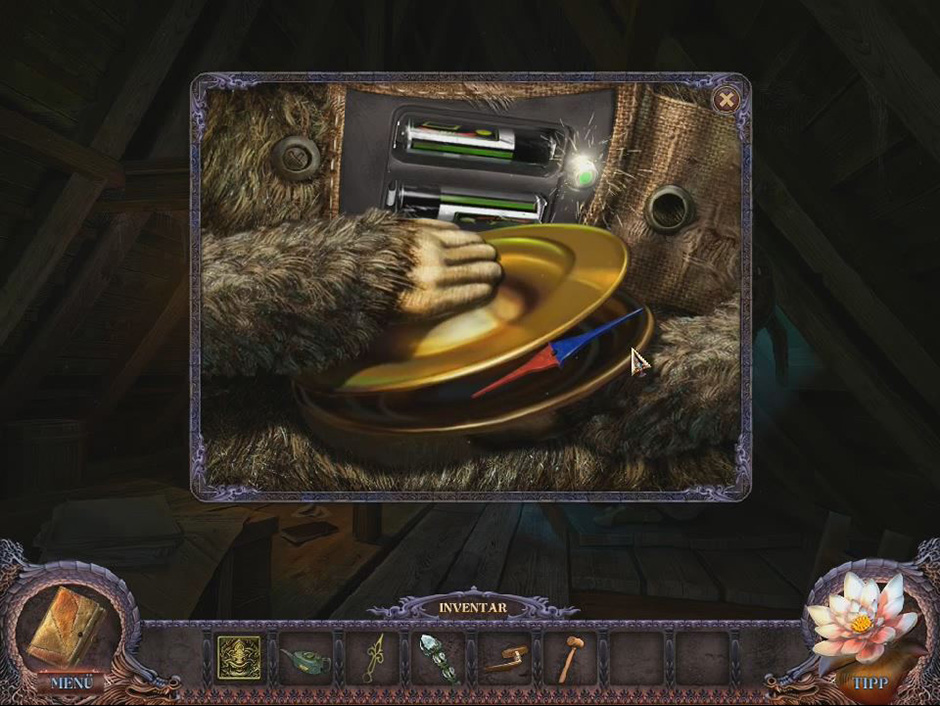
Secrets of the Dark – Eclipse Mountain Compass Needle Location
Chapter 6: The Bull Temple
In Chapter 6, the new places you will visit include the Dock, the Hallway of the Museum, the Work Room of the Museum and the Demon Statue. This level includes four Hidden Object Scenes and five puzzles. The Hidden Object Scenes can be uncovered in the suitcase by the Crossroads, in the ticket booth of the Museum, and twice in the left cubby of the Hallway. Puzzles can be found when trying to open the Souvenir Shop safe, in the red pedestal at the lower left side of the Basement scene, in the dome at the top of the steps in the Bull Temple, when trying to open the door on the right side of the Hallway, and at the Demon Statue where the light strikes a mirror.
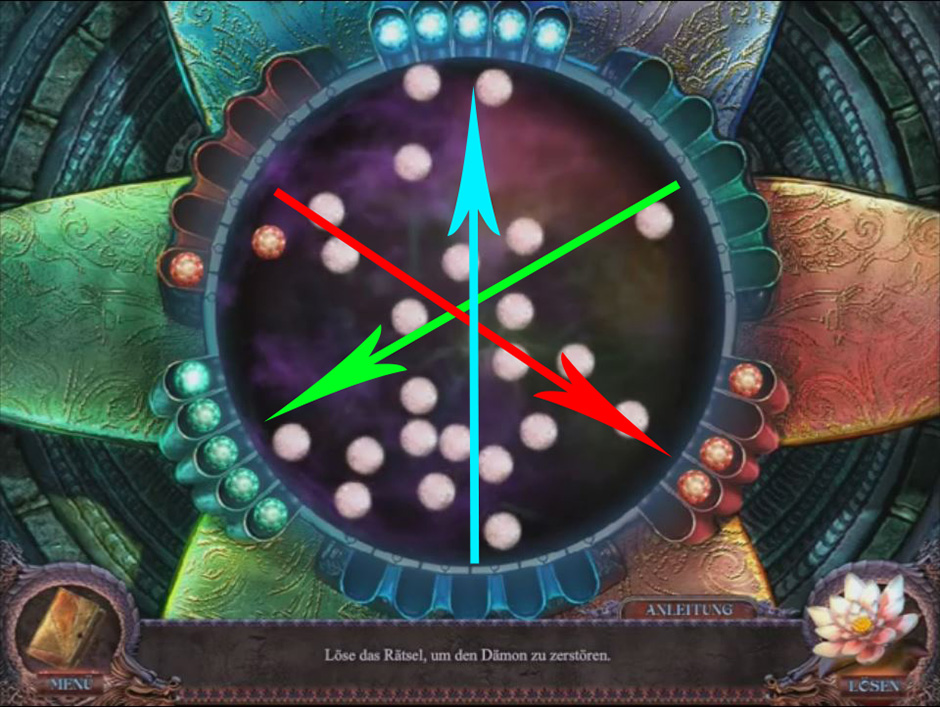
During this level, you discover where Peter is being held captive. In order to go on to the next level and free your friend, you must solve the puzzle at the Demon Statue. Successful completion of the puzzle will earn you a KNIFE. The puzzle can be triggered by placing the MIRROR PART you received at the end of Chapter three into the missing space.
Secrets of the Dark – Eclipse Mountain Demon Statue Puzzle Solution
Chapter 7: The Tiger Temple
In the final Chapter, the only new location you will explore is the Tiger Temple. Other than that, you will be required to go to previous locales. There is no Hidden Object Scene in this Chapter but there are six puzzles. The puzzles can be triggered at the door of the Tiger Temple, while examining the blue pedestal at the lower right side of the Basement scene, twice in the unlit mirror frame by the Demon Statue, by examining the dome at the top of the steps in the Tiger Temple, and at the bottom of the Demon Statue.
To win the game and release Peter, you must place a DEMONIC HEART into the groove of the pedestal where Peter is imprisoned. You will win the DEMONIC HEART after you destroy the Demon Statue by solving the three puzzles located at the Demon Statue.
Secrets of the Dark – Eclipse Mountain Demonic Heart Final Puzzle Solution
Congratulations! You have successfully saved your friend Peter and completed Secrets of the Dark – Eclipse Mountain Platinum Edition.
Go to GameHouse to play this game!
If you found the Secrets of the Dark – Eclipse Mountain walkthrough helpful, check out some of the other guides available on the GameHouse Blog including: