In your town, a young woman has been found alongside the road. She is in a coma and all that is known about her is that there was a bloody knife with her. What happened to her? That is exactly what you are going to find out in Surface – The Noise She Couldn’t Make. This hidden object adventure game will take you through the stages of her illness, as you try to figure out what happened to her. In this Surface – The Noise She Couldn’t Make walkthrough, you will find tips and hints for navigating your way through the mystery of ‘The Young Woman’.
Contents
General Tips & Tricks
Surface – The Noise She Couldn’t Make has rules similar to other hidden object games; however, the hidden object scenes and mini-games are not standard. The games and scenes change every time you play them. To help you with your quest, you will have a journal to guide you. This journal contains a map that will help you always find your way, so becoming lost should not be a problem you have to worry about.
You have the choice of three difficulty levels: casual, advanced, and hardcore.
- Casual works best for beginners. The places you need to go will be highlighted for you.
- For something more challenging, try the advanced mode. It will still highlight areas you need to go to, but your hint bar will load slowly.
- If you are truly adventurous, try the hardcore mode. In this mode you will have to complete all the puzzles and there will be no hints.
Surface: The Noise She Couldn’t Make Walkthrough
Chapter One: Fever
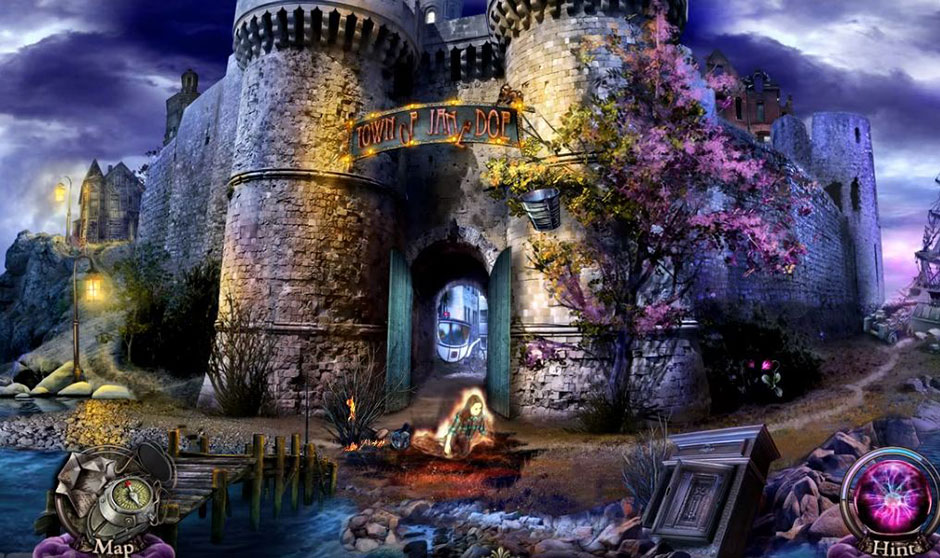
Surface – The Noise She Couldn’t Make – Chapter One Fever
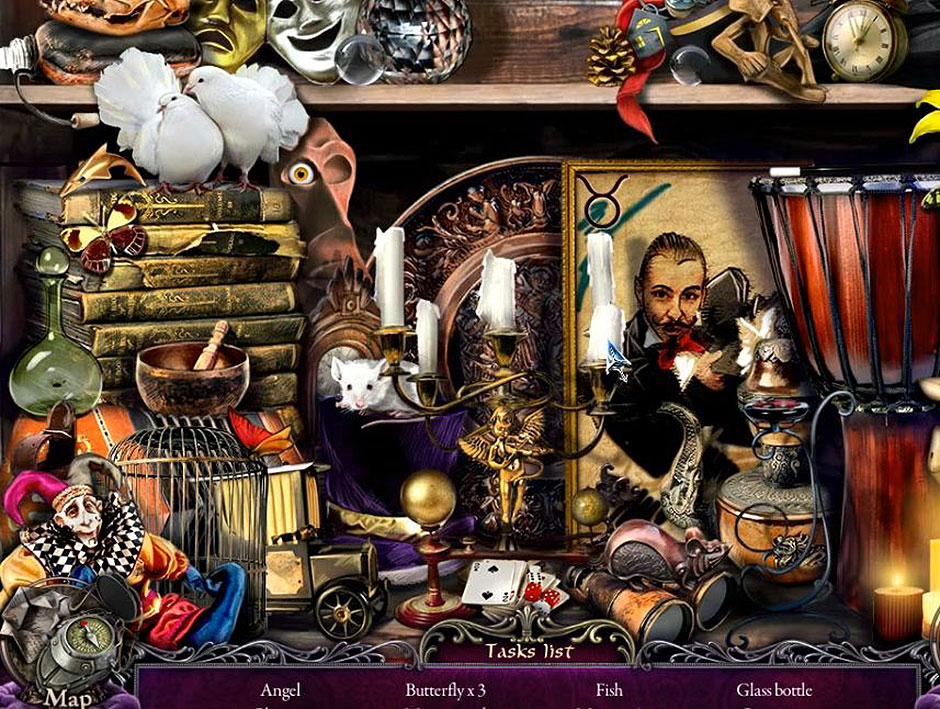
If you are new to the game, watching the tutorial is the best way to learn how to find the objects. You find ‘The Young Woman’ (Jane’s) first symptom by clicking on her. Go to the dock, grab the Net and obtain the Paper Boat. Head towards the flowers to pick up the Key. Locate the wardrobe and use the Key to open the first hidden object game. Once you find all of the items, you will receive the Magician’s Wand.
Surface – The Noise She Couldn’t Make – Magical Wand
Go to the wrecked ship and take the Sharp Knife from the cannon. Locate the Carrot near the boat. Cut the red cloth with the Sharp Knife, and put the Piece of Cloth into your inventory. Go to the rabbit hole and get the Rabbit by using the Carrot you just found. Go to The Decrepit House.
In The Decrepit House first find the top hat, then put the Rabbit in it, and put the Piece of Cloth over it. Wave the Magician’s Wand over the top hat and pull out the Magician’s Scarves, Head towards the stump, grab the Torch and return to the ship.
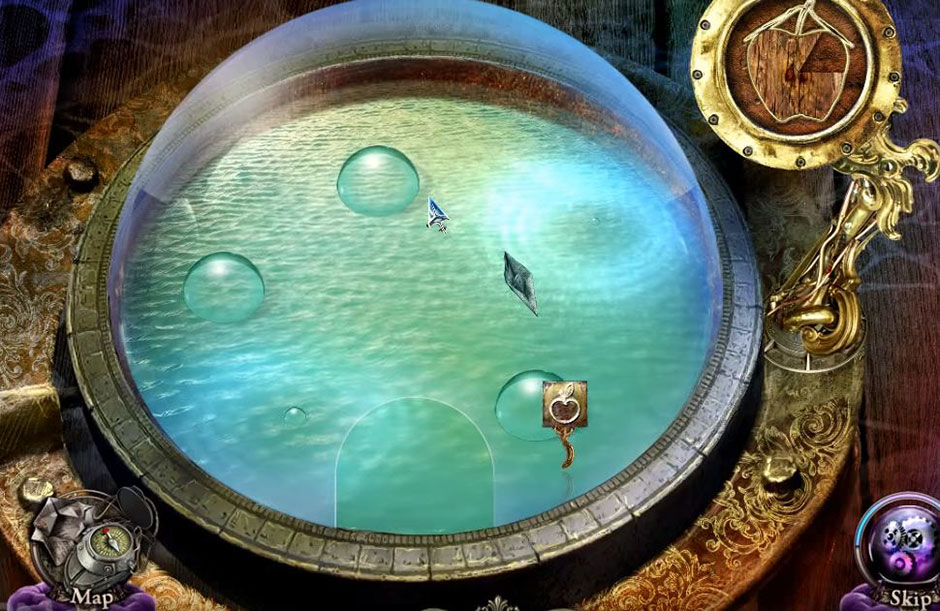
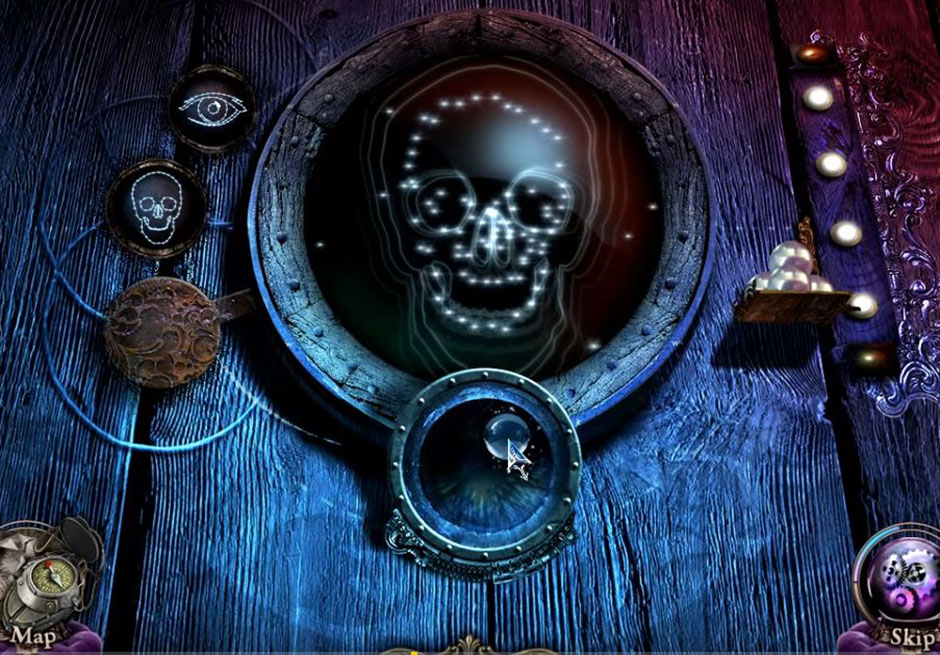
Make a Grappling Hook by using the Magician’s Scarves. Grab the Gunpowder from the gargoyle and head to the town gate. Locate the tree and place the Grappling Hook on it. Grab the Bucket of Water, and dump the Bucket of Water on Jane to help reduce her fever. Turn your Torch into a Burning Torch by placing it near where Jane was located. Grab the Hammer, Lever, and Glass Globe before heading back to the ship. Place the Lever on the ladder’s control, pull the lever, and go up the ladder. You will find a Ship’s Wheel. Put it into your inventory. Locate the winch and use the Hammer on it to obtain the Net. Play the hidden object game to earn a Skull, then grab the Compass from the map table, open a shell to grab a Pearl, and head to the globe. Place the Compass on top to find a mini-game. Use bubbles to maneuver your Paper Boat to the apple flags and obtain the Wooden Flag.
Surface – The Noise She Couldn’t Make – Mini Game Chapter One
Head to the cannon, move the barrel, and grab the Gunpowder. Use the Gunpowder and the Skull to open the barrel. Use your Burning Torch on the end of the cannon to fire it. Give the gargoyle your Wooden Apple to get the Doorbell. Go towards The Decrepit House, put the Doorbell on and ring it. Inside of the house, go to the dollhouse, grab the Mirror Shard from the broken mirror, and grab the Ironing Board Head back to the wrecked ship. Cover the hole in the ship with the Ironing Board and proceed into the ship’s hold. Before looking at the table, tip over the bottle, then grab both the Gear and the Butterfly in a Jar from the table.
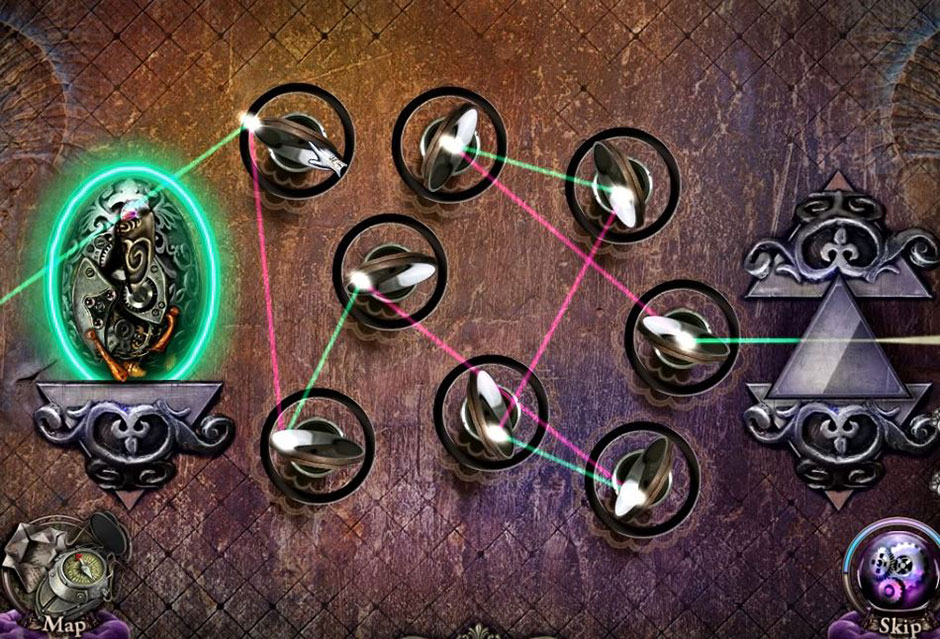
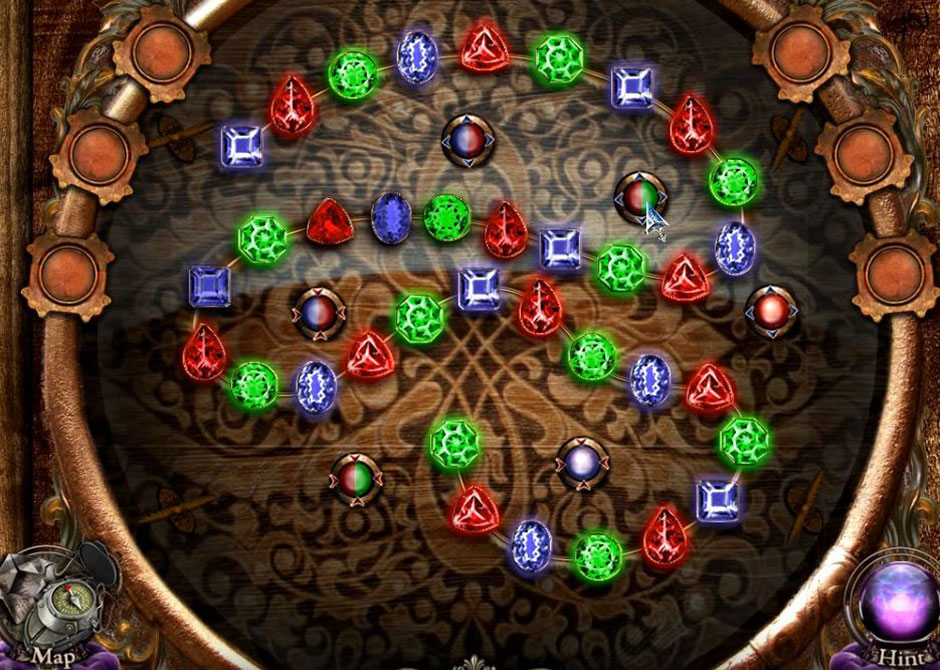
Go back to the town gate, place the Butterfly in a Jar near the flowers to get the Medallion Head back to the ship, and place the Medallion on the indentation. Move around the gems until they are in the right positions, then open the chest to release a page of Jane’s memory. Take the second Pearl Go to the dollhouse and locate the cabinet. Put the Gear into the mechanism and take the Spring, then go to the chair, put the Spring in, and lower the chair. Remove the Pin from the doll, take the Mirror Shard, and cut the necklace to receive another Pearl Go back to the town gate. Find Jane’s real name, then go to the door. Put the 3 Pearls on the shelf to enter a mini-game. Use controls to move stars to win the game.
Surface – The Noise She Couldn’t Make – Mini Game Skull
Head towards Main Street, locate the carriage wheel and take both the Bride Figurine and the Mailbox Door Walk to the tower gate and take the Star and Statue’s Hat from the lion. Grab the Belt from the gate and get the Scalpel from the stable gate. Go back to the ship, find the toy soldier, and place the Pin to obtain the Windup Key. Place the Windup Key in your inventory. Go back to the dollhouse, find the music box, put the Windup Key into the lock, and grab the Mouse Place the Bride Figurine next to the groom on the wedding cake, and move the couple to the left. Grab the Mechanical Hand, and go back to Main Street.
Locate the carriage wheel and free the Mailbox Flag with the Mechanical Hand Head back to The Decrepit House, and place the Mailbox Flag and Mailbox Door on the mailbox to obtain the package. Open the package, retrieve the Black Paint, and go back to Main Street. Use the Black Paint on the carriage door, enter the carriage, and give the Mouse to the snake. Obtain the Heart before clicking on the couch to play the hidden object game. Once you beat the game, you will receive a Rook.
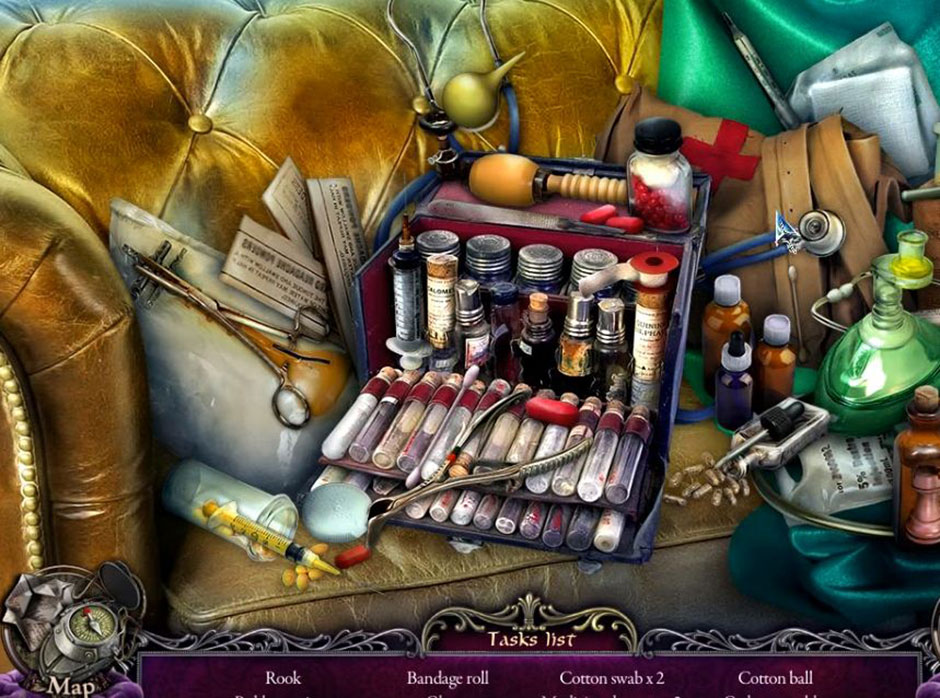
Surface – The Noise She Couldn’t Make – Cage
Open the burlap cover with your Scalpel and take the Monocle. Place the stomach sign in the right spot before placing the Heart into the now empty spot. Go back to the ship and look for the cage. Take the Knight and replace it with the Rook Go to the tower gate and go to the stable. Put the Knight into the lock to open the stable. Go inside and look toward the ladder. Grab the Boot and Ladder before opening the stall. Replace the rope with the Belt Take the Ship’s Wheel to open the stall, play the hidden object game, and receive a Horseshoe
Return to Main Street, locate the horse’s head, and put the Horseshoe into the indentation you find there. Obtain the Stone Pipe, and put the ladder on the lamppost to retrieve the Good Luck Medallion. Remove the Lamp by pulling the chain and head back to the carriage. Put the Lamp on the counter and retrieve the Camera Head back to the stables, locate the dog house and retrieve the Collar. Put the Camera near the dog house, take a photo of the bone, then put the Picture of a Bone into your inventory.
Head back to the ship and locate the statue. Place the Stone Pipe, Statue’s Hat, and Monocle on it to obtain the Brain. Return to the carriage, find the metal man, put the Brain in the head. Also, place the Picture of a Bone on the sign before zooming in on the mid-section. Start the mini-game, and put together a jigsaw puzzle to take the Defibrillator
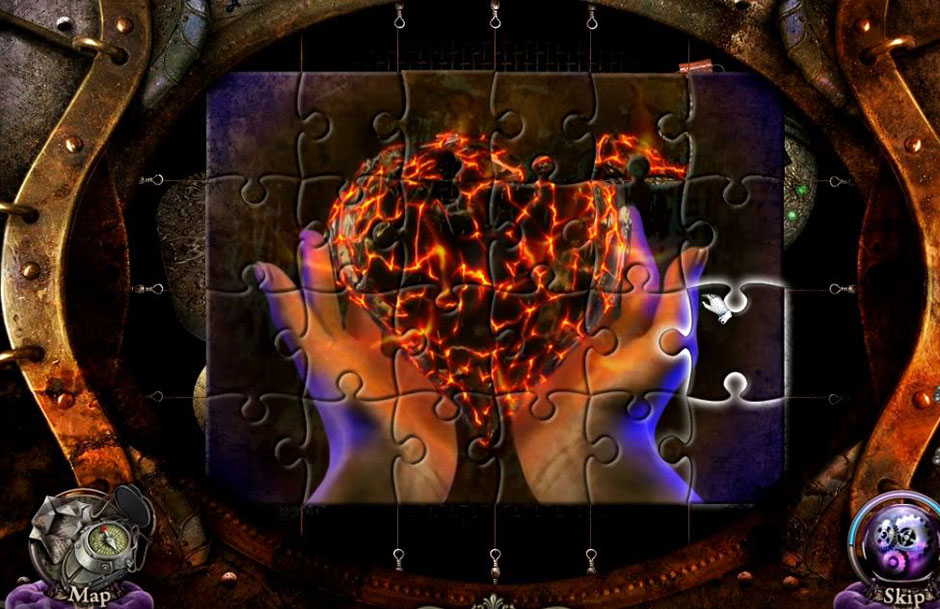
Surface – The Noise She Couldn’t Make – Jigsaw Puzzle
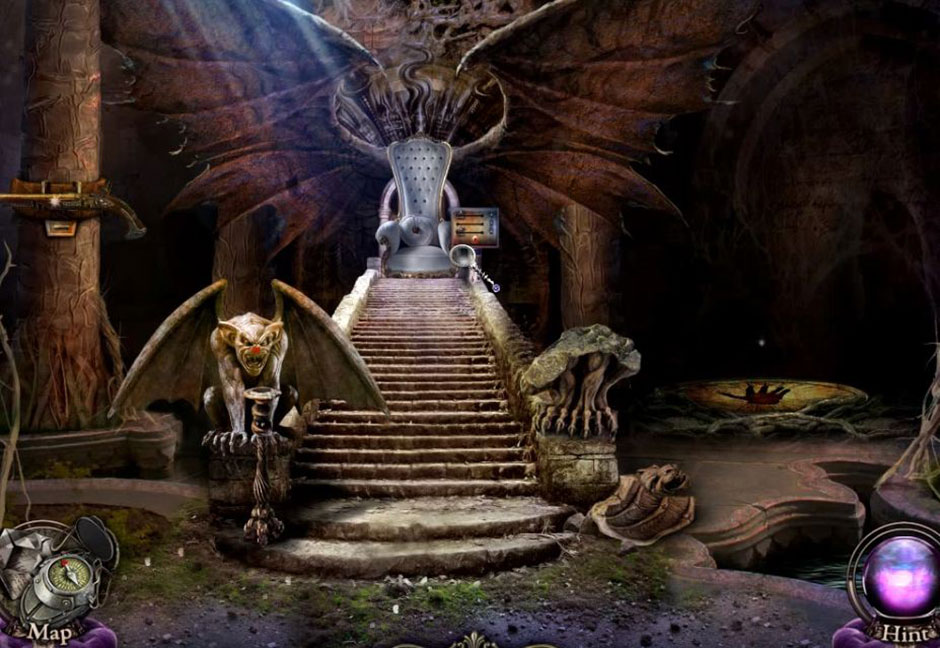
Head back to the tower gate and place the Defibrillator on the lock to open it. Head towards the throne room, grab the memory page, and remove the pillow to take the Gas Head back to the carriage, replace the broken hydraulics tank with the Gas, and grab the Plunger Go back to the throne room and replace the Plunger near the metal door. Go into the reservoir.
Chapter Two: Respiratory
Surface – The Noise She Couldn’t Make – The Reservoir
Grab the Fishing Rod from the boat. Take the seaweed off the whale and go to the windmill. Grab the Ruby and the Arrow Fletching Walk to the shed, unlatch the door with the Fishing Rod, and take the Oar Retrieve the Bucket with Tar from under the spider near the door. Go to the lake coast, find the statue, and put the Ruby on its belt. Obtain the Weight and proceed to the windmill. Find the gate and put the Weight on the hook. Go into the cave, retrieve the Spray Can from the backpack and continue on. Grab the pool toy, blow it up with the Spray Can, and take the Board Head back to the lake coast.
Place the Board in the boat and pour the Bucket of Tar over it. Put the Oar in the boat and go towards the island. Find the figures to take the rings. Click the trash heap, activate the hidden object game, and earn a Ribbon
Go back to the windmill, tie the twigs together with Ribbon, and take the Broom. Go back to the island. Remove the cobwebs on the figures with the Broom, place the Good Luck Medallion on a figure and go into the Tree of Wishes. Find the frog, take the Crown and the Opener Put the Arrow Fletching on a stick before looking at a painting. Continue on and locate the convertible top. Open it with the Opener and grab the lever.
Go into the car, open the zipper on the bag, and grab the Throwing Star, Screw, and The Clapper Return to the windmill. Retrieve the Key near the window by using the Throwing Star Head back to the lake coast, look for the train, and take the Bell after putting The Clapper on it. Return to the Tree of Wishes. Find the toy train, place the Bell on the ear trumpet and grab the ticket. Take the Lock from the table by using the Key.
Find the train at the lake coast and put the Ticket on the stamper. Pull the lever and go into the train. Locate the case and retrieve the Code Paper. Grab the Wheels from the open bag before starting a hidden object game to obtain Scissors.
Return to the lake coast, find the whale, and put the Wheels on the cart. Go back to the cave and open the backpack with the Scissors. Grab the Button before returning to the train. Put the Button on the case. To open the case, press the left then center button and grab the Ship in a Bottle. Separate the pair to make them into simply a Ship and a Bottle separately. Go back to the car, open the glove box, enter the code from the Code Paper and find the Key. Put the Key on the bracelet near the car’s steering wheel to make a Bracelet Piece. Head back to the train, place the Bracelet Piece on the lid to start a mini-game. Put all the gems into the right outlines to win the game.
Surface – The Noise She Couldn’t Make – Gems Mini Game
Grab the memory page from the chest and retrieve the Fork before heading back to the island. Go to the back of the car and use the Lock to remove the chain. Also, take the Key by using the Fork before returning to the windmill. Use the Key on the spider to obtain the Car Key and return to the car. Turn on the car with the Car Key and it will return you to the lake coast. Retrieve the Key from the whale before heading to the windmill. Put the Key into the body of the spider before entering the windmill. Grab the Handle and Matches from the table, read the page near the tank, and take the Drill Bit to activate a hidden object game. After completing the game, you will receive an Old Rag.
Return to the island, find the case and grab the Plaster Head. Create the Drill by combining the Drill and the Drill Bit. Go around to the back of the car, put the Bottle under the dripping fuel, and use the Drill to create a bigger hole. Put the Bottle with Fuel into your inventory before heading back to the cave. Go to the pedestal, put the Plaster Head on it and grab the Tiara. Proceed to the Tree of Wishes. At the Tree of Wishes, place the Tiara on the frog’s head. Wrap the Old Rag around the tip of the arrow, pour the Bottle of Fuel on the arrow, and light it with the Matches. Place the Burning Arrow into your inventory before clicking on the round chest to start the mini-game. Put the Handle near another piece to start the game. Combine items on the board until the board is full and receive the Lantern.
Surface – The Noise She Couldn’t Make – Round Chest Mini Game
Go to the windmill, combine the bow with the Burning Arrow to make the Longbow. Head to the cave and light the scarecrow on fired with the Longbow. Go to the tent inside the cave, open it, and put the Lantern in the tent. Take the Handkerchief and Gloves. Repair the ax with the Screw and create the Ice Ax. Keep walking until you find the flames. Grab the Wrench with your Gloves, head towards the cave wall and use the Ice Ax. Grab the Chalk. Clean the lens of the telescope with the Handkerchief. Place the Star on the string and use the Chalk to make an outline. This triggers another mini-game where you need to move the caveman to gather his belongings in the fields. You will receive a Stopwatch when you complete the game.
Surface – The Noise She Couldn’t Make – Caveman Game
Head back to the windmill, find the reservoir, then cover and remove the bolts with the Wrench. Go to the control panel and put the Stopwatch on it to activate a mini-game. You will need to place the timers correctly to open the gates for the glass ball to travel. Once the timers are in the correct positions, press the red button
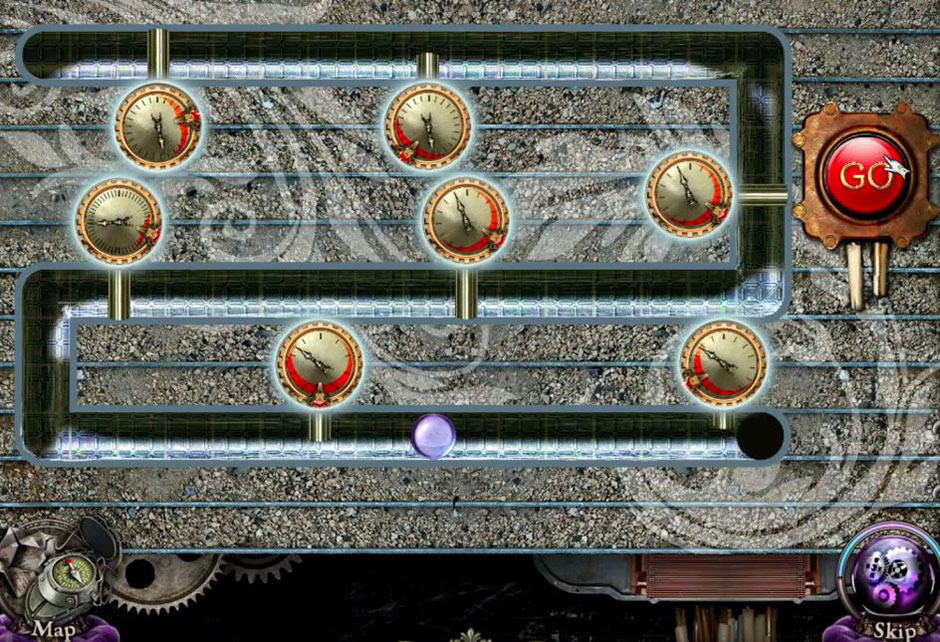
Surface – The Noise She Couldn’t Make – Solution Timers Mini Game
Chapter Three: Paralysis
Go to the path leading to Sand River, find the compasses and grab the Magnet. Click on the debris to start the hidden object game where you will receive a Guitar Pick. Go to Sand River, use your Lever to raise the gate, and grab the Magnet from the cactus. Grab the Dropper. and go near the statue to find Jane’s next symptom. Kill the scorpion with your Boot. Collect a Tear using the Dropper, then use it on a plant. Find the drummer and retrieve the Medallion with the Dog. Also, locate the piper and grab the Brush.
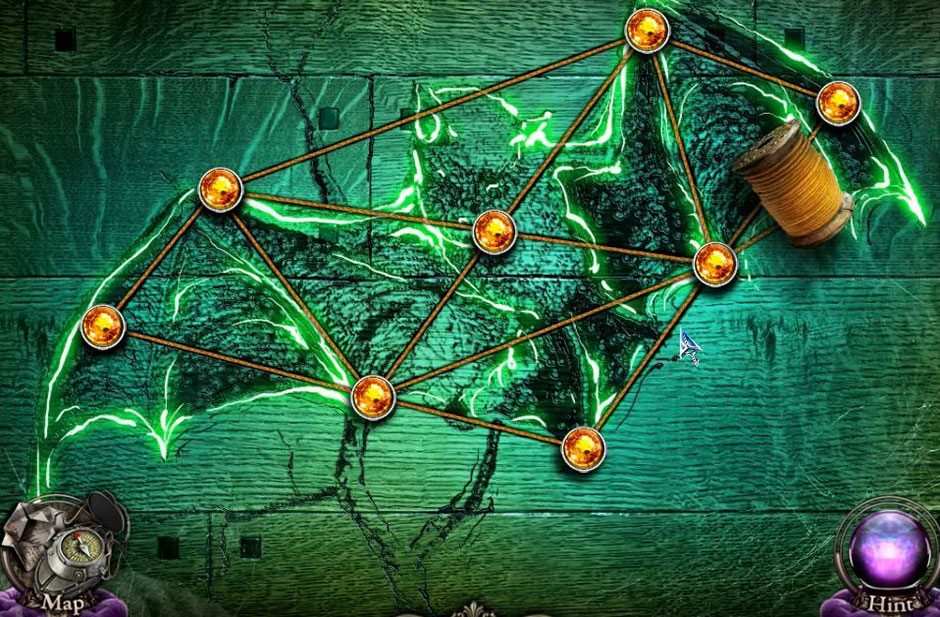
Head towards The Oasis, find the soldier, and retrieve the Smoke Bomb. Take the dead flower from the vase and go down the left side of the fork in the road. Scare away the bees by throwing the Smoke Bomb on the flowers and retrieve one Flower. Retrieve the Valve from the well, then head towards the fallen column. Head towards the Hall of Ropes. Find the winch and put the Lever on top before playing a mini-game. You need to use the spool of rope to trace all the lines, but remember, you cannot retrace your path.
Grab the Guitar and the Blunt Blade before traveling to the desert. Go to the large rock, sharpen your Blunt Blade into a Sharp Blade and return to the Hall of Ropes. Take the Rope from the box as well as the Rake. Return to The Oasis, put the Flower into the vase near the soldier, and grab the Non-Loaded Musket. Look in the bag to retrieve the Pipe Brush before heading back to the fork in the roads.
Go to the well to clean the pipe with the Pipe Brush. Grab the Form and return to The Oasis. Use the Rake on the beach and put the Form on the sand to make a Sand Fish. Return to Sand River, find the cat, and place the Sand Fish in the bowl to retrieve the Sand Cat. Use your map to return to the Hall of Ropes to scare the birds with the Sand Cat.
Head into the Hall of Birds to get the Screwdriver. Place your Rope on the gears you find in the column’s hole and retrieve both the Iron Ball and the Hypno-Medallion. Locate the box, then clear off the damp with the Screwdriver and retrieve the Three-Eyed Muzzle. Move back to the Hall of Birds, locate the cage and use the Brush. Put the Three-Eyed Muzzle in the last spot. Arrange the line of faces based on the number of eyes they have, receive the Climbing Equipment and the Lighter. Head back to The Oasis and find the back wall. Place the Climbing Equipment on the gear. Head up the rocky slope to the flying machine to grab the Lever. Take the Bellows from the fan, start the hidden object game at the base of the flying machine, and take the Clock Hands.
Go back to The Hall of Birds, locate the tools, use your Lever to open the vice, and retrieve the Tongs. Locate the post base and inflate the air bag with the Bellows. Return to Sand River, place the Clock Hands on the clock and lift the gate. Push the Iron Ball through the opening and grab the Vitruvian Man. Use the Hypno-Medallion to charm the Snake, and use the Snake to retrieve the Prism under the rock before heading back to The Oasis. Remove the nails from the tree with the Tongs and retrieve the Mechanical Egg. Go towards the rocky slope and locate the case on the flying machine. Put the Vitruvian Man on the case and take the Bomb. Push on the bird to activate the mini-game. Use the Mechanical Egg and the Prism in the game. Move the mirrors to get the light to hit the egg to get the Mechanical Bird.
Surface – The Noise She Couldn’t Make – Mechanical Bird Game
Go back to The Hall of Birds and put the Mechanical Bird on the metal tree. Grab the Flute from the pedestal, return to the statue, and give the Flute to the piper. Give the guitarist the Guitar and Pick before heading to the fork in the road. Locate the fallen column, put the Bomb on it, and light it with the Lighter. Go to The Hall of Rain, locate the drain and grab the Hand by using the Ship. Put the Cart into your inventory before looking at the pipes and retrieving both the Adhesive Tape and the Spade. Go to the rocky slope. Place the Cart with the fan blade and take the Drumsticks and Fan. Locate the dog’s grave, use the Spade to dig a hole and put the Medallion with the Dog on top. Retrieve the Plaster Head from the box and head to The Hall of Wind. Fix the fan with the Fan Blade and fix the glass with the Adhesive Tape to activate the mini-game. Create a pattern with the triangles to compete the puzzle.
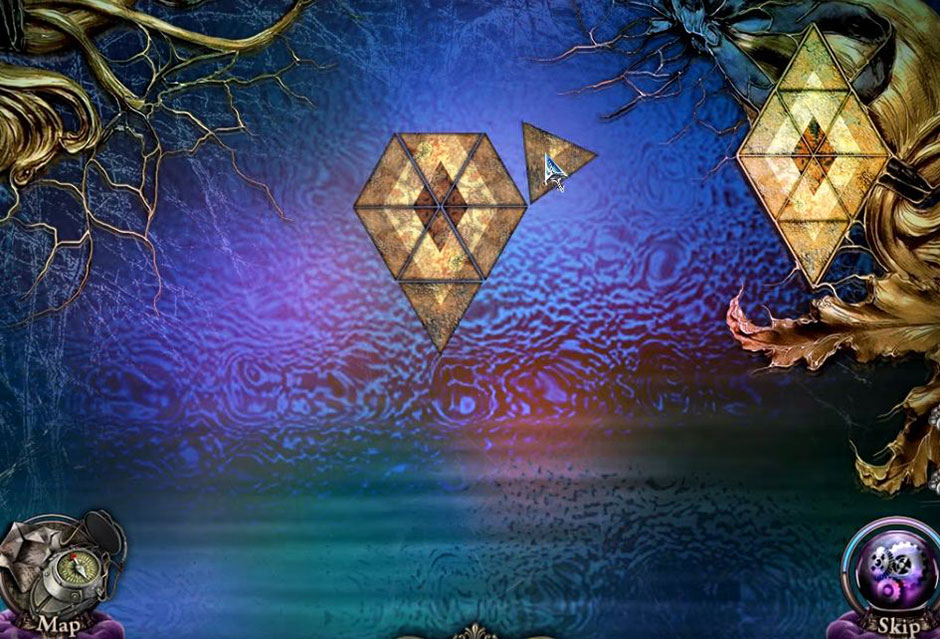
Surface – The Noise She Couldn’t Make – Triangles Puzzle
Collect the Bagpipe from the door before returning to Hall of Rain. Fix the column with the Ceramic Head and locate the pipes. To fix the pipes, place the Valve on the stem and turn. Retrieve the Drum from the platform and head back to the statue. Put the Hand on the bagpiper before giving him the Bagpipes and giving the drummer the Drum. Do not forget to give him the Drumsticks as well. Take the Signal Key from the platform and go back to the rocky slope.
Chapter Four: Nightmares
Surface – The Noise She Couldn’t Make – Chapter Four Nightmares
Click on the crashed flying machine to activate the hidden object game to earn Sand. Toss the Sand on the fire before going to the tower entrance. Grab the Detergent from the bushes before heading into the throne room and retrieving the Sponge from the ground. Examine the handprint, then take the Valve and head to the tree. Place the Musket on the tree to receive the Bullet. Load the Musket and place the Loaded Musket into your inventory. Clean the horse with the Detergent and the Sponge to receive the Horse-Rider. Go back to the throne room, place the Horse-Rider on the device, and play the mini-game. Move the controls so that all the horses move at the same speed.
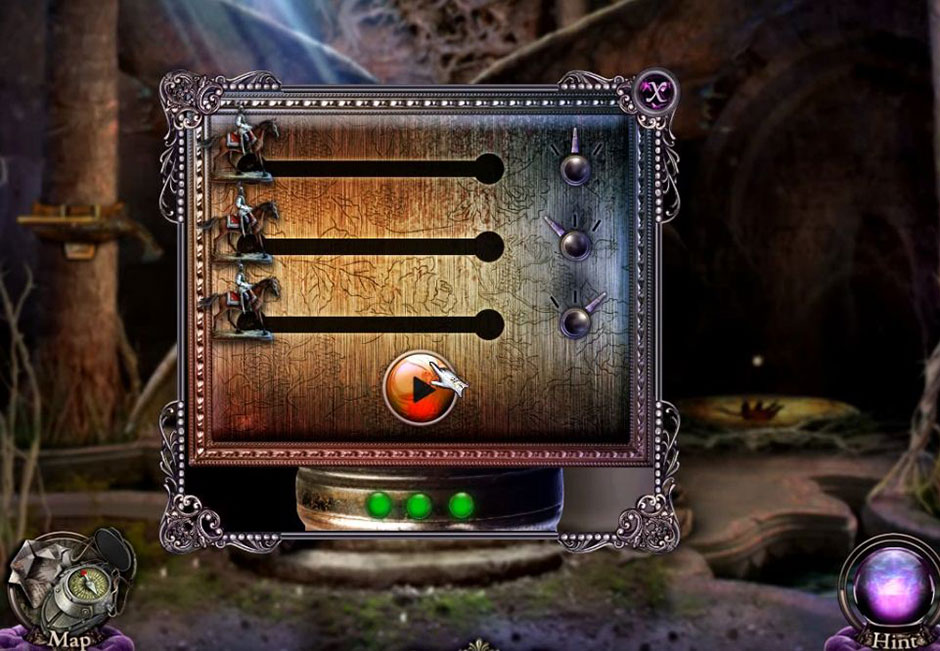
Surface – The Noise She Couldn’t Make – Horse – Rider Game
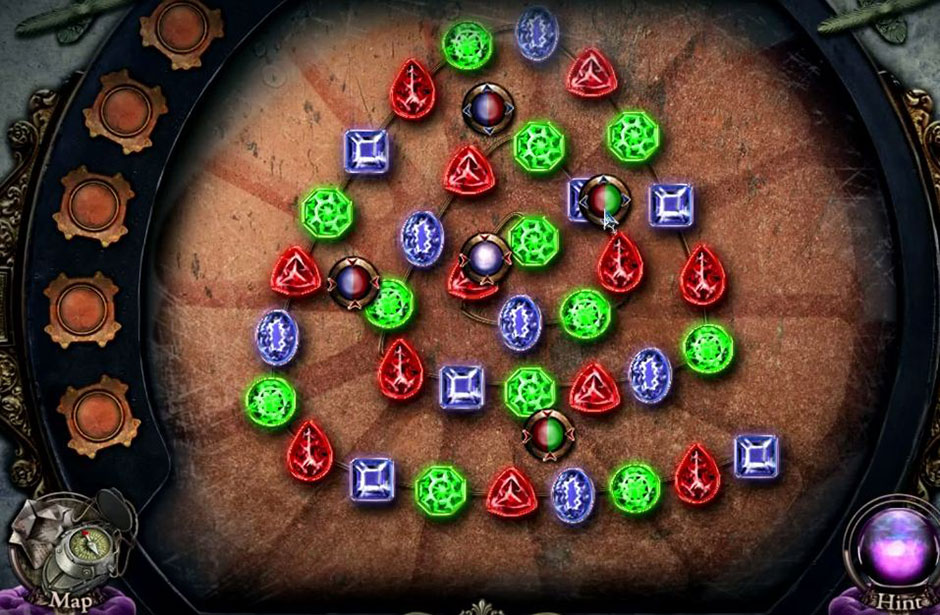
Go into the secret room, retrieve the Plastic Hand from the vanity, and take the dress. Head back into the throne room, place the Plastic Hand on the handprint to collect the Pin. Go to the chest, put the pin on the top, and activate the mini-game. To win the mini-game, move the gems around with the magnets until they are in the correct positions.
Surface – The Noise She Couldn’t Make – Magnets Game Solution
Look in the chest and retrieve the Hook and the Green Gem. Go back to Main Street, locate the window above the ladder, and shoot the lock with the Loaded Musket. Grab the Blue Gem, head to the manhole cover, and place the Valve on it. Move the lid five times to take the Gardening Scissors. Return to the tower entrance, and use the Gardening Scissors to cut the ivy, and obtain both the Peg and Door Knocker.
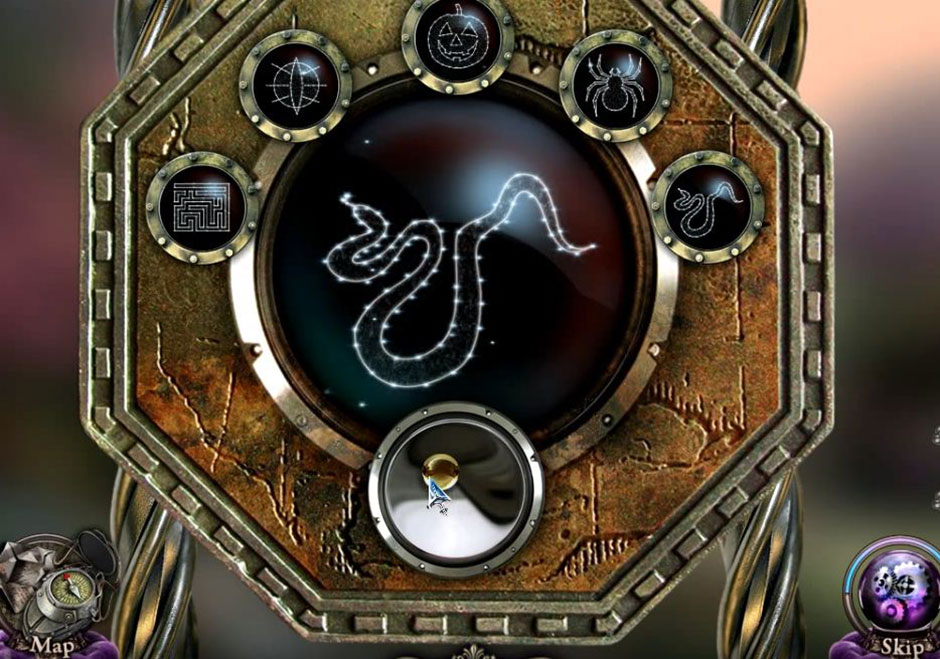
Head down the dark alley, place the Green Gem and Blue Gem in the eye sockets on the door. To go into the memorial, place the Door Knocker on it and knock on the door. Inside the memorial, go to the gong and retrieve the Elephant Figurine. Return to the secret room, put the Elephant Figurine on the mirror to get the Gong Mallet. Go to the memorial, place the gong on the Hook, and hit it with the Gong Mallet. Find the fountain, grab the Nameplate and proceed down the dark alley. Place the Nameplate on the back gate to activate a mini-game. Unveil the constellation by moving the green glass ball around.
Surface – The Noise She Couldn’t Make – Constellation Sollution
Head to the old chapel, grab the Scythe from the mound, and head to the door. Grab the Candle, head to the backyard, and cut the reeds with the Scythe. Remove the Rag and the Dragon Tooth before going to the throne room. Place the Candle on the left statue and put the Dragon Tooth in the mouth. Light the candle, put the Lit Candle in your inventory, and go into the backyard. Place the Lit Candle into the lantern, retrieve the Wheel from the cart, then go back to the old chapel. Find the battering ram, add the Wheel and place the Peg on the wheel.
Find and talk to Liza, take the Stick from the pew, and locate the broken Pitchfork. Replace the Stick and place the Pitchfork in your inventory. Head back to the backyard, go to the cart, move the hay with the Pitchfork, and grab the Forceps. Head into the dark alley, find the birdhouse, and retrieve the Heart-Shaped Badge with the Forceps. Head to the secret room, locate the dress form and place the Heart-Shaped Badge on the slot to retrieve the Needle and Thread. Repair the blanket with the Needle and Thread before placing the Blanket in your inventory. Go back to the chapel and cover the eye with the Blanket. Grab the Lantern and go to the school.
At the school, place the Lantern on the noise, clean the chalkboard with the Rag, and go to the hospital. Take the note from the nurse, go to the hut, and grab both the Mat and the Knob from the door. Drape the Mat over the fence, climb over the fence, and play the hidden object game to receive a Saw.
Locate the well, use your Saw to cut the beam, and retrieve the Well Lid and the Empty Tranquilizer Dart. Head to the front door and use the Well Lid on it. Go into the living room, retrieve the Switch Button from the door, and take the Screwdriver from the stairs. Return to the backyard, remove the screws from the door with the Screwdriver, and grab the Fridge Handle. Go into the living room, put the Fridge Handle on the fridge and open it to receive the Pumpkin. Fill the dart and place the Full Tranquilizer Dart in your inventory. Find the dart gun, load it, and place the Loaded Tranquilizer Dart Gun into your inventory. Place the Pumpkin on the trap and continue up the stairs. Locate the dog and use the Loaded Tranquilizer Dart Gun on it. Grab the Nippers from the trophy bear, activate the hidden object game to win the Shovel.
Go back to the backyard, dig up the mound with the Shovel, and grab the Wire. Head up to Liza’s room and replace the Wire and Switch Button. Replace the Knob on the drawer to retrieve the Hunting Horn. Find the bear downstairs and give it the Hunting Horn. Press the buttons to get one Pearl Go to the key cabinet, use the Nippers to open it and receive both the Snake Head and the Key for Byron’s Letters. Go to the mantle, place the Snake Head on the cane and receive another Pearl. Head back to the well, find the keyhole and use the Key for Byron’s Letters to rescue the dog. Find the last Pearl.
Surface – The Noise She Couldn’t Make – Lockpit Solution
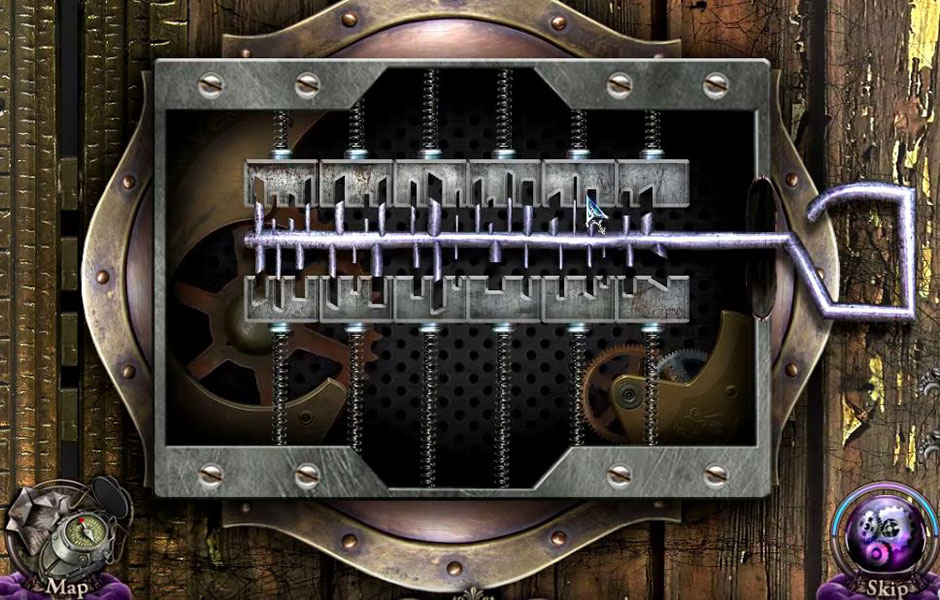
Return to Liza’s room, locate the doll, put the Pearls on the necklace, and receive the Lockpick. Go into the living room, find the door, and use the Lockpick to open the last mini-game. Move the forms around to open the lock. Once you solve the puzzle, you have finished the game.
There you have it! You have solved the mystery and helped Jane! Through the use of the tips and tricks within this The Surface – The Noise She Couldn’t Make walkthrough, you have saved Jane and unlocked the mystery of what happened to her.
Be sure to visit our blog for more great tips and tricks!
The Surface – The Noise She Couldn’t Make Walkthrough is meant as a guide and does not contain cheats, hacks, or serials.